Desserts · Part 2 of 3: Instructions
Thick Mosaic Rounds: No-Bake Date Nut Slices Step-by-step instructions
- Prep
- Cook
- Total
- Serves
- 12
Before you start
Before starting, measure out all ingredients. Pit the dates if needed. Chop the walnuts and slice the almonds if not already prepared.
Have a sheet of parchment paper ready for shaping the log. Clear space in the refrigerator for chilling. The entire process is quick, so having everything ready ensures smooth assembly.
Ingredients at a glance (8)
- 500 g pitted Medjool dates
- 2 tbsp unsalted butter
- 1/2 cup chopped walnuts
- 1/2 cup sliced almonds
- 1/2 cup whole roasted pistachios
- 1 tsp ground cinnamon
- 1/4 cup toasted sesame seeds
- 1/2 cup unsweetened shredded coconut flakes
Instructions
Softening the Dates
- Soften the DatesIn a wide skillet over low heat, melt the butter. Add the pitted Medjool dates and cook, pressing with a spatula, for 5 minutes until they become soft and paste-like.Look for Dates are glossy, soft, and easily mashed.Tip Stir frequently to prevent sticking.
- Incorporate the Nuts and SpicesAdd the chopped walnuts, sliced almonds, whole roasted pistachios, ground cinnamon, and toasted sesame seeds to the date paste. Stir with a spatula until everything is evenly distributed and forms a cohesive dough.Look for The mixture holds together when pressed.Tip Let the mixture cool slightly if too sticky to handle.
At the end of this phase, the dates are glossy, soft, and easily mashed with a spatula. The butter is fully melted and incorporated, giving the dates a rich sheen.
The aroma is sweet and buttery. Press a spoon into the dates—they should give way easily without resistance. If they are still firm, continue cooking for another minute or two.
Shaping and Chilling
- Shape the LogTransfer the warm nut-date mixture onto a sheet of parchment paper. Using the parchment to help, roll it into a tight, uniform cylinder log, about 2 inches in diameter.Look for The log is compact and holds its shape.Tip Use the parchment to press and roll firmly.
- Coat with CoconutSpread the shredded coconut flakes on a plate. Roll the log in the coconut, pressing gently to adhere, until all sides are generously coated.Look for The log is fully covered in coconut.Tip Use your hands to pat the coconut onto any bare spots.
- Chill the LogWrap the coated log in plastic wrap or parchment and refrigerate for at least 30 minutes, until firm and sliceable.Look for The log is firm to the touch.Tip Chilling longer makes slicing easier.
The nut-date mixture forms a cohesive, slightly sticky dough that holds together when pressed. After rolling, the log is uniform and compact. The coconut coating adheres evenly. After chilling, the log is firm to the touch and holds its shape when picked up. It should feel solid and cold, ready for slicing.
Slicing and Serving
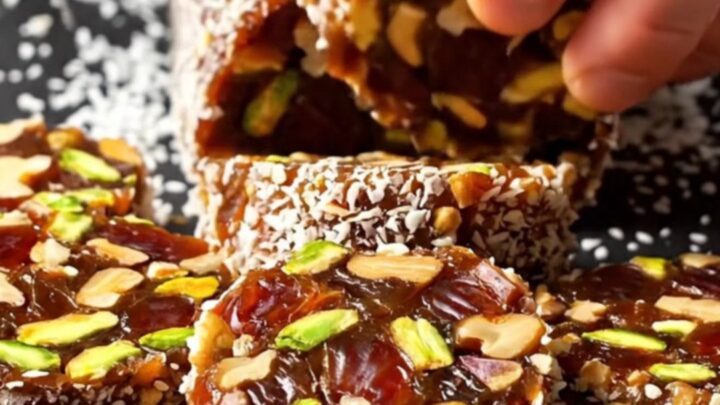
- Slice and ServeUsing a sharp chef's knife, slice the chilled log into 1-inch thick rounds. Arrange on a platter and serve.Look for Each round shows a mosaic of nuts and dates.Tip Wipe the knife between cuts for clean slices.
Each slice is a thick round with a beautiful mosaic of green pistachios, brown walnuts, and golden dates. The edges are clean, and the coconut coating remains intact. The slices are firm yet chewy. The aroma is sweet, nutty, and warm from the cinnamon. Serve immediately or store in the fridge.
Common mistakes
If the date mixture is too sticky to shape, let it cool for a few minutes or wet your hands slightly. If it's too dry, add a teaspoon of water or melted butter.
Ensure the log is tightly rolled to prevent air pockets. Chilling thoroughly is key—if the log is not firm enough, slices will fall apart. Use a sharp knife for clean cuts.
How to tell it’s done
The dates are done when they are soft and easily mashed with a spatula, forming a thick paste. The mixture is ready to shape when it holds together when pressed.
The log is ready to slice after chilling for at least 30 minutes, or longer if you prefer a firmer texture. Slices should be cleanly cut with no crumbling.
Up next · Part 3 of 3
4 variations · storage & make-ahead · 5 answers · printable card
Tips, FAQ & printable recipe (Part 3)← Back to the ingredients (Part 1)