Dinner · Part 2 of 3: Instructions
Slow-Cooker Texas Frito Pie Casserole with Beef and Beans Step-by-step instructions
- Prep
- Cook
- Total
- Serves
- 8
Before you start
Before starting, gather all ingredients and equipment. Brown the ground beef in a large skillet, then drain off the excess fat. Dice the onion, shred the cheddar cheese if not already shredded, and measure out the corn chips and chili gravy.
Have the slow cooker ready and plugged in. This recipe comes together quickly once the beef is browned, so having everything prepped will make the layering process smooth.
Ingredients at a glance (11)
- 2 lb ground chuck
- 2 cans (15 oz each) ranch-style pinto beans, undrained
- 2 cups red chili gravy
- 1 medium white onion, diced
- 4 cups corn chips (such as Fritos)
- 3 cups sharp cheddar cheese, shredded
- 1 medium avocado, diced
- 1/2 cup sour cream
- 1/2 cup sliced jalapeños
- 1/4 cup fresh cilantro leaves
- 1 medium lime, cut into wedges
Instructions
Browning and Layering
- Brown the BeefHeat a large skillet over medium-high heat. Add the ground chuck and cook, breaking it up with a wooden spoon, until browned and no longer pink, about 8 to 10 minutes. Drain off any excess fat. Season with salt and pepper if desired, though the chili gravy and beans add plenty of flavor.Look for The beef is browned and crumbly, with no pink remaining.Safe temperature 160°F (71°C) internal temperature (ground meat)Tip For deeper flavor, let the beef develop a nice crust before stirring.
- Layer the CasseroleIn the slow cooker, spread half of the browned beef evenly over the bottom. Top with half of the ranch-style beans, half of the diced onion, and half of the corn chips. Repeat the layers with the remaining beef, beans, onion, and corn chips. Pour the red chili gravy over the top, spreading it to cover as much as possible.Look for The layers are evenly distributed, with chili gravy covering the top.Tip Do not stir after adding the gravy—layering keeps the chips from getting too soggy.
The ground beef is browned and crumbly, with no pink remaining. The slow cooker is filled with alternating layers of beef, beans, onion, and corn chips, topped with chili gravy. The gravy should cover most of the surface. The kitchen smells of chili and spices. The casserole is ready for the cheese and slow cooking.
Slow Cooking and Melting
- Add the CheddarSprinkle the shredded sharp cheddar cheese evenly over the top of the casserole. Cover the slow cooker with the lid and set it to LOW heat. Cook for 3 hours, or until the chili is bubbling through the layers and the cheese is melted and golden around the edges.Look for The cheese is fully melted and starting to brown at the edges; the chili bubbles up through the chips.Tip Resist the urge to lift the lid during cooking—each peek releases heat and slows the melting.
- Check for DonenessAfter 3 hours, check that the casserole is hot and bubbling throughout. The beef should be fully cooked and tender, the beans soft, and the cheese completely melted into a gooey blanket. If the top needs more browning, cook for an additional 15 to 30 minutes on HIGH, watching closely.Look for The casserole is bubbling at the edges and the cheese is fully melted.Safe temperature 160°F (71°C) internal temperature (ground meat)Tip If the top isn't browned enough, switch to HIGH for the last 15 minutes.
After 3 hours on LOW, the casserole is bubbling at the edges and the cheese has melted into a smooth, golden blanket. The chili gravy is simmering through the layers, and the aroma is rich and savory. The casserole looks inviting, with the cheese slightly browned in spots. It's ready to serve.
Serving with Fresh Toppings
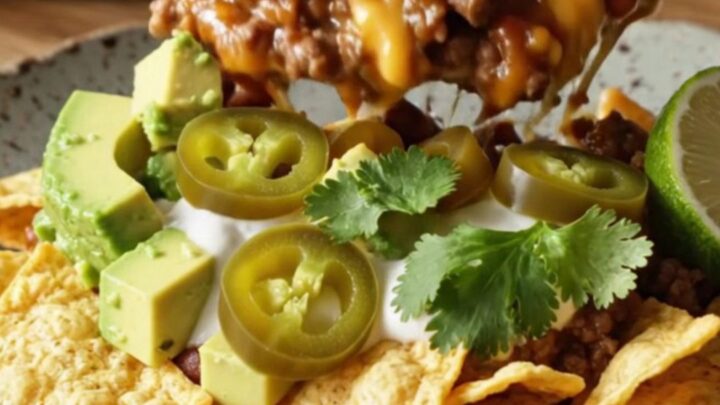
- Serve with ToppingsSpoon generous portions of the Frito Pie into bowls. Top each serving with diced avocado, a dollop of sour cream, sliced jalapeños, fresh cilantro leaves, and a squeeze of lime juice. Serve hot, with extra corn chips on the side for crunch.Look for The casserole is creamy and cheesy, with fresh toppings adding color and brightness.Tip Set out the toppings in small bowls so everyone can customize their serving.
The Frito Pie is spooned into bowls, each portion topped with creamy avocado, cool sour cream, spicy jalapeños, and bright cilantro. A squeeze of lime adds a fresh, citrusy note.
The dish is colorful and appetizing, with the melted cheese stretching as it's served. The casserole is hot and comforting, ready to enjoy.
Common mistakes
A common mistake is lifting the lid during cooking, which lets out heat and increases the cooking time. Trust the 3-hour window. Another is over-stirring the casserole, which can break up the chips and make the dish mushy.
Stir gently if needed, or avoid stirring altogether. Also, be sure to drain the beef well after browning to prevent a greasy casserole. Finally, don't skip the toppings—they add freshness and balance the richness.
How to tell it’s done
The Frito Pie is done when the casserole is bubbling throughout and the cheese is fully melted and lightly golden on top. The beef should be cooked to at least 160°F (71°C), which it will easily reach after 3 hours on LOW.
To check, insert an instant-read thermometer into the center of the casserole—it should read at least 160°F (71°C). The mixture will be thick and creamy, with the chips softened and the flavors fully melded.
- Ground meat: 160°F (71°C) in the thickest part
Up next · Part 3 of 3
4 variations · storage & make-ahead · 5 answers · printable card
Tips, FAQ & printable recipe (Part 3)← Back to the ingredients (Part 1)