Dinner · Part 2 of 3: Instructions
Tender Slow Cooker Country-Style Boneless Pork Ribs Step-by-step instructions
- Prep
- Cook
- Total
- Serves
- 4
Before you start
Before beginning the cooking process, gather your ingredients and ensure the slow cooker insert is clean and dry.
Trim any excessively thick pieces of exterior fat from the country-style boneless pork ribs, leaving enough marbling to keep the meat juicy. Measure out the BBQ sauce so it is ready for quick assembly.
Ingredients at a glance (2)
- 3 lb country-style boneless pork ribs, fat trimmed
- 2 cups BBQ sauce, divided
Instructions
Preparation and Arranging
- Arrange the RibsPlace the country-style boneless pork ribs in a single layer at the bottom of the slow cooker insert. Ensure the meat is kept refrigerated until immediately before cooking to maintain food safety standards.Look for The ribs should fit snugly but remain in a single layer for even cooking.Tip Pat the ribs dry with paper towels before placing them in the cooker to help the sauce adhere better.
At the end of this initial phase, the country-style boneless pork ribs are arranged snugly in the slow cooker. The meat is positioned evenly at the bottom of the pot, ready to be covered with the rich sauce in the next step.
Slow Cooking
- Add the BBQ SaucePour one and a half cups of the BBQ sauce over the pork ribs in the slow cooker, reserving the remaining half cup of sauce for later. Ensure the ribs are well coated.Look for The sauce should cover the tops of the ribs completely before cooking begins.Tip Keep the lid closed during the cooking process to prevent heat and moisture loss.
- Slow Cook the RibsCover the slow cooker with the lid and cook on low for six hours or on high for three to four hours until the pork is tender.Look for The ribs will shrink slightly and release their natural juices into the sauce.Tip Cooking on low is highly recommended for the most tender, melt-in-your-mouth texture.
As this phase concludes, the slow cooker will be filled with a rich, bubbling aroma of sweet barbecue and warm pork. The ribs will have shrunk slightly, releasing their natural juices into the BBQ sauce to create a thin, highly flavorful cooking liquid that surrounds the meat.
Final Glazing and Resting
- Glaze and Verify DonenessRemove the lid and brush the remaining half cup of BBQ sauce over the tender ribs. Insert a meat thermometer to ensure the pork has reached an internal temperature of at least 145°F (63°C), though cooking to 195°F (91°C) provides the ultimate tender shredding texture. Let the meat rest for 10 minutes before serving.Look for The ribs will be extremely tender and yield easily when pressed with a fork.Safe temperature 145°F (63°C) internal temperature (steaks, chops and roasts)Tip Letting the meat rest allows the juices to redistribute, keeping the ribs exceptionally moist.
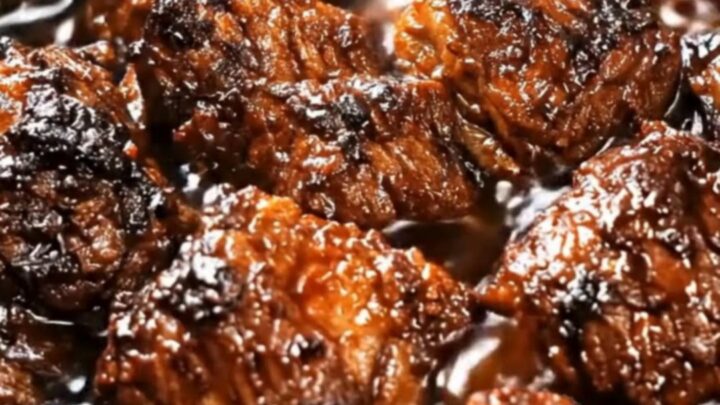
By the end of the final phase, the ribs are coated in a thick, sticky, caramelized glaze that shines under the light.
The meat is so tender that it easily yields to a fork, and the internal temperature has safely passed the required threshold, promising a succulent dining experience.
Common mistakes
One of the most common mistakes when making slow cooker ribs is opening the lid repeatedly to check on the progress.
Each time the lid is lifted, a significant amount of heat and moisture escapes, which can add up to twenty minutes to the total cooking time and dry out the pork. Trust the process and keep the lid sealed until the final glazing step.
How to tell it’s done
To determine if the pork ribs are perfectly cooked, insert a digital meat thermometer into the thickest part of the meat.
The pork must reach a minimum safe internal temperature of 145°F (63°C) followed by a three-minute rest, though cooking it to 195°F (91°C) or higher is recommended for a truly tender, shreddable texture. The meat should pull apart effortlessly with a fork.
- Steaks, chops and roasts: 145°F (63°C) in the thickest part, then a 3-minute rest
Up next · Part 3 of 3
2 variations · storage & make-ahead · 4 answers · printable card
Tips, FAQ & printable recipe (Part 3)← Back to the ingredients (Part 1)