Dinner · Part 2 of 3: Instructions
Brown Sugar Glazed Pork Roast with Cinnamon Apples Step-by-step instructions
- Prep
- Cook
- Total
- Serves
- 6
Before you start
Before you begin, heat the oven to 350°F (175°C) and line a roasting pan with aluminum foil for easy cleanup. Pat the pork roast dry with paper towels to help the glaze adhere. Core the apples and cut them into wedges—leave the skin on for texture and color.
Measure out the glaze ingredients and set everything within reach. Let the pork sit at room temperature for up to 30 minutes before roasting, but no longer, to promote even cooking.
Ingredients at a glance (10)
- 3 lb boneless pork loin roast
- 1/2 cup packed brown sugar
- 2 tbsp Dijon mustard
- 1 tbsp apple cider vinegar
- 1 tsp garlic powder
- 1 tsp salt
- 1/2 tsp black pepper
- 3 firm apples (such as Honeycrisp or Fuji), cored and cut into wedges
- 1 tsp ground cinnamon
- 2 tbsp unsalted butter, cut into small pieces
Instructions
Preparing the Glaze and Apples
- Prepare the Glaze and ApplesHeat the oven to 350°F (175°C). In a small bowl, stir together the brown sugar, Dijon mustard, apple cider vinegar, garlic powder, salt, and black pepper until a thick paste forms. Set aside. Core the apples and cut them into wedges; toss with the ground cinnamon.Look for The glaze is thick and aromatic; the apples are evenly coated with cinnamon.Tip Use a sharp knife to cut the apples into uniform wedges for even cooking.
- Season the Pork RoastPat the pork loin roast dry with paper towels. Rub the brown sugar glaze all over the surface of the roast, pressing it onto the meat so it adheres well. Place the roast in a foil-lined roasting pan.Look for The roast is evenly coated with the glaze.Tip Let the roast sit at room temperature for up to 30 minutes before roasting for more even cooking.
- Arrange the ApplesScatter the cinnamon-coated apple wedges around the pork roast in the pan. Dot the apples with the small pieces of butter.Look for The apples are nestled around the roast, ready to roast.Tip Tuck the apples close to the roast so they absorb the drippings.
The glaze should be a thick, spreadable paste with a balanced sweet-tangy aroma. The apples are tossed with cinnamon, and the butter is ready to dot on top.
The oven is preheated, and the pork is seasoned and waiting. Everything is in place for a smooth roasting process.
Roasting and Resting
- Roast the Pork and ApplesRoast the pork and apples for about 1 hour, or until the internal temperature of the pork reaches 145°F (63°C) when measured with an instant-read thermometer inserted into the thickest part of the roast. The apples should be tender and caramelized. Let it rest for 3 minutes before slicing.Look for The glaze is bubbling and darkening; the apples are soft and golden.Safe temperature 145°F (63°C) internal temperature (steaks, chops and roasts)Tip If the apples are browning too quickly, cover them loosely with foil.
- Rest the RoastRemove the roasting pan from the oven. Transfer the pork roast to a cutting board and let it rest for at least 10 minutes before slicing. The temperature will continue to rise during resting.Look for The roast is resting; the juices are redistributing.Safe temperature 145°F (63°C) internal temperature (steaks, chops and roasts)Tip Resting the meat ensures a juicy, tender slice.
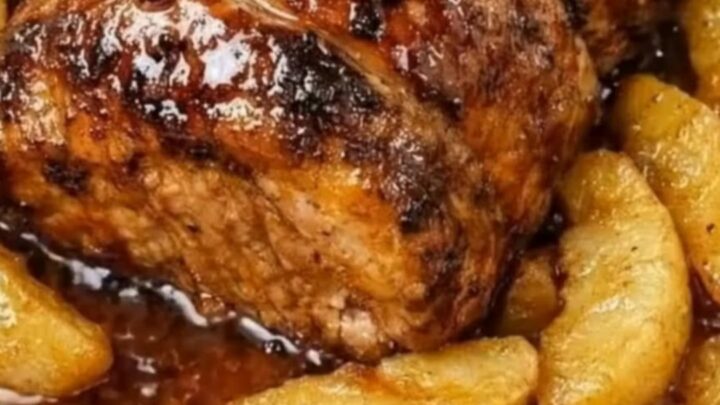
The kitchen fills with the scent of caramelizing sugar and cinnamon. The pork is deeply browned and glistening, the apples are soft and golden, and the pan juices are bubbling. The thermometer reads 145°F (63°C). After resting, the roast is ready to slice.
Slicing and Serving
- Slice and ServeUsing a sharp carving knife, slice the pork roast into 1/2-inch-thick slices. Arrange the slices on a serving platter with the glazed apples. Spoon any pan juices over the top. Let it rest for 3 minutes before slicing.Look for The pork is juicy and the apples are glazed and tender.Safe temperature 145°F (63°C) internal temperature (steaks, chops and roasts)Tip Slice against the grain for the most tender pieces.
The sliced pork shows a juicy, tender interior with a caramelized crust. The apples are soft and coated with glaze. Arrange everything on a platter, spoon the pan juices over, and serve immediately while warm.
Common mistakes
One common mistake is overcooking the pork, which dries it out. Use a reliable meat thermometer and start checking early. Another pitfall is not letting the roast rest; slicing immediately causes the juices to run out, leaving the meat dry.
Avoid overcrowding the pan—give the apples room to caramelize rather than steam. Finally, resist the urge to add extra liquid to the pan; the glaze and meat juices are enough to create a flavorful sauce.
How to tell it’s done
The pork roast is done when an instant-read thermometer inserted into the thickest part registers 145°F (63°C). After resting, the temperature will rise slightly, and the meat will be juicy and tender with a hint of pink at the center.
The apples should be fork-tender and caramelized, with a deep golden color. If the roast reaches temperature before the apples are soft, continue roasting the apples while the pork rests.
- Steaks, chops and roasts: 145°F (63°C) in the thickest part, then a 3-minute rest
Up next · Part 3 of 3
4 variations · storage & make-ahead · 5 answers · printable card
Tips, FAQ & printable recipe (Part 3)← Back to the ingredients (Part 1)