Dinner · Part 2 of 3: Instructions
Sweet Vidalia Molasses Beef Short Ribs Step-by-step instructions
- Prep
- Cook
- Total
- Serves
- 6
Before you start
Before you start, make sure your slow cooker is clean and dry. Pat the short ribs dry with paper towels—this helps the seasonings and sauce adhere better. Slice the onions thinly and even, so they cook down uniformly.
Measure out the brown sugar and BBQ sauce so everything is ready to go. There's no need to sear the meat first; the slow cooker does all the work. If you have time, let the ribs sit at room temperature for 30 minutes before cooking to take the chill off, but this is optional.
Ingredients at a glance (4)
- 5 lb bone-in English-cut beef short ribs
- 3 medium Vidalia onions, thinly sliced
- 1/2 cup packed light brown sugar
- 1 1/2 cups molasses garlic BBQ sauce
Instructions
Layer and Dump
- Layer the Short RibsPlace the beef short ribs in the bottom of a 6-quart slow cooker, arranging them in a single layer as much as possible. They can overlap slightly if needed, but try to keep them even so they cook uniformly.Look for The ribs should cover the bottom of the slow cooker in a snug layer.Tip If the ribs are very long, trim them to fit, but keep the bone in for flavor.
- Top with Onions and SugarScatter the sliced Vidalia onions evenly over the ribs, then sprinkle the brown sugar over the onions. Use your hands to spread the sugar so it covers the onions and some falls between the ribs.Look for The onions should form a thick, sweet blanket over the meat.Tip Don't stir—the sugar will melt and help create the glaze as it cooks.
- Pour Over the BBQ SaucePour the molasses garlic BBQ sauce over the onions and ribs, using a spatula to scrape every last bit from the measuring cup. Tilt the slow cooker slightly to ensure the sauce spreads evenly, but do not stir.Look for The sauce should coat the onions and ribs in a thick, glossy layer.Tip If the sauce is very thick, add 1/4 cup water to help it spread, but the onions will release moisture as they cook.
- Cover and Cook LowCover the slow cooker with the lid and set it to LOW. Cook for 8 to 10 hours, until the meat is fork-tender and nearly falling off the bone. Do not lift the lid during the first 6 hours to keep the heat steady. Let it rest for 3 minutes before slicing.Look for The sauce will be bubbling gently around the edges after a few hours.Safe temperature 145°F (63°C) internal temperature (steaks, chops and roasts)Tip Cooking on LOW is essential for tender short ribs; HIGH will make them tough.
At the end of this phase, the slow cooker contains a neat layer of raw short ribs, topped with sliced onions and a sprinkle of brown sugar, all covered with a thick ribbon of BBQ sauce. The colors are deep and appetizing—dark meat, pale onions, and a rich mahogany sauce. The raw ingredients are ready to start their long, slow transformation. Make sure the sauce covers the onions and ribs evenly, and that the lid fits snugly.
Slow Cook and Tenderize
- Check for DonenessAfter 8 hours, test the ribs with a fork. The meat should be so tender that it twists easily and begins to separate from the bone. If not, continue cooking for another hour and check again. Let it rest for 3 minutes before slicing.Look for The meat should shred with gentle pressure from a fork.Safe temperature 145°F (63°C) internal temperature (steaks, chops and roasts)Tip For safety, the internal temperature should reach 145°F (63°C), but slow-cooked ribs will be far above that.
- Rest the RibsTurn off the slow cooker and let the ribs rest in the sauce for at least 10 minutes. This allows the juices to redistribute and makes the meat even more tender.Look for The sauce will settle and thicken slightly as it rests.Tip Skim off any excess fat from the surface with a spoon if desired.
After 8 to 10 hours on LOW, the kitchen smells sweet and savory. The sauce is bubbling gently around the edges, and the meat has turned a deep, glossy brown. When you poke it with a fork, it feels incredibly tender and starts to shred. The onions have melted into a jammy, caramelized mass. The sauce has thickened and coats the ribs like a glaze. This is the moment to turn off the heat and let the ribs rest.
Serve and Savor
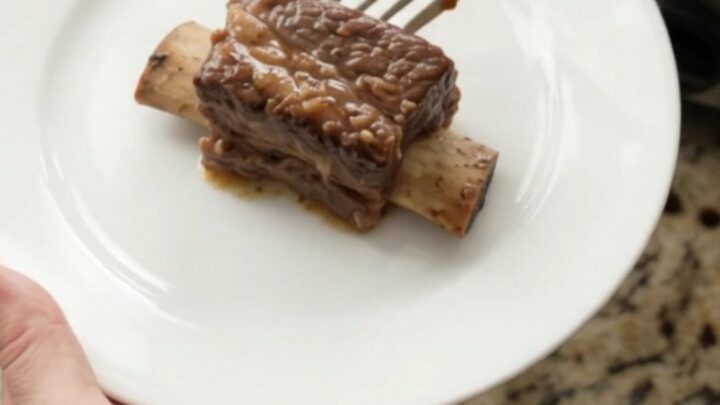
- Serve on a PlateUsing tongs, carefully lift each short rib out of the slow cooker and place it on a serving plate. Spoon some of the caramelized onions and sauce over the top. Serve hot.Look for The meat should be glistening and the onions jammy.Tip For a neat presentation, remove the bones before serving, or leave them for a rustic look.
The ribs are lifted out of the slow cooker with tongs, their surfaces glistening with the dark, sticky sauce. The meat is so tender that it threatens to fall off the bone.
Piled onto a white plate, they look rustic and inviting, with caramelized onions clinging to every surface. A final spoonful of sauce over the top ensures every bite is packed with flavor. The dish is ready to be served immediately, with plenty of sauce on the side.
Common mistakes
One common mistake is lifting the lid too often to check on the ribs. Every time you open the slow cooker, heat escapes, which can extend the cooking time and make the meat tough. Trust the recipe and resist the urge to peek for at least the first 6 hours.
Another mistake is using a high heat setting to speed things up—this will make the meat chewy instead of tender. Stick to LOW for the best results. Finally, don't skip the resting time after cooking; it allows the juices to redistribute and keeps the meat moist.
How to tell it’s done
The short ribs are done when the meat is fork-tender and easily pulls away from the bone. Use a fork to twist a piece of meat—it should turn easily and start to shred. The internal temperature should read at least 145°F (63°C) on an instant-read thermometer, but because of the long cook time, it will likely be much higher, which is fine.
The sauce should be thickened and glossy, and the onions should be soft and caramelized. If the meat still resists, continue cooking for another 30 minutes and check again.
- Steaks, chops and roasts: 145°F (63°C) in the thickest part, then a 3-minute rest
Up next · Part 3 of 3
4 variations · storage & make-ahead · 5 answers · printable card
Tips, FAQ & printable recipe (Part 3)← Back to the ingredients (Part 1)