Desserts · Part 2 of 3: Instructions
Strawberry Pistachio Cream Napoleon Pastry: Crisp, Creamy, Quick Step-by-step instructions
- Prep
- Cook
- Total
- Serves
- 8
Before you start
Before starting, ensure the puff pastry is thawed but still cold. Preheat the oven to 400°F (200°C) and line a baking sheet with parchment.
Have all ingredients measured and ready: strawberries hulled and sliced, pistachios chopped, white chocolate grated. Prepare the two piping bags with star tips and have the vanilla pastry cream ready (store-bought or homemade).
Ingredients at a glance (10)
- 1 sheet frozen puff pastry, thawed
- 2 cups fresh strawberries, hulled and sliced
- 1/2 cup shelled pistachios, finely chopped
- 4 oz white chocolate, grated into curls
- 1 cup mascarpone cheese
- 1/2 cup heavy cream
- 2 tbsp pistachio paste
- 1/4 cup confectioners' sugar
- 1 cup vanilla pastry cream (store-bought or homemade)
- Powdered sugar, for dusting, to taste
Instructions
Phase 1: Bake the Pastry and Prep Fillings
- Prepare the ComponentsPreheat the oven to 400°F (200°C). Line a baking sheet with parchment paper. Roll out the puff pastry sheet on a lightly floured surface to an even thickness, then cut it into two equal rectangles. Place the rectangles on the prepared baking sheet and prick them all over with a fork. Bake for 15-20 minutes, until golden and puffed. Transfer to a wire rack to cool completely.Look for The pastry should be deeply golden and crisp, with no raw dough in the center.Tip Pricking the pastry prevents it from puffing too unevenly; keep the rectangles flat while baking.
- Make the Pistachio Mascarpone CreamIn a large bowl, combine the mascarpone, heavy cream, pistachio paste, and confectioners' sugar. Beat with an electric mixer on medium speed until soft peaks form, about 2-3 minutes. Do not overbeat; the cream should be smooth and spreadable.Look for The cream holds a soft peak when the beaters are lifted.Tip Chill the bowl and beaters for 10 minutes before starting for a quicker, sturdier whip.
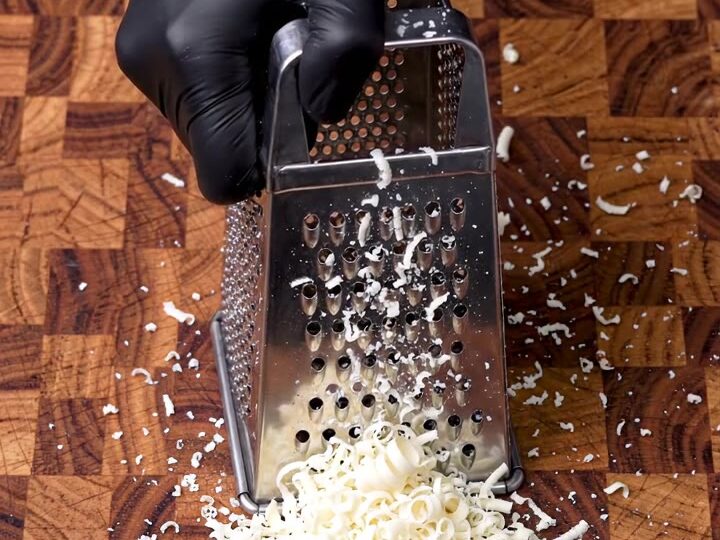
- Prepare the Fruit and ChocolateHull and slice the strawberries into even rounds. Finely chop the pistachios. Grate the white chocolate on a box grater into fine curls. Set all aside.Look for Strawberries are bright red and juicy; chocolate curls are fine and airy.Tip Use a cold chocolate bar for cleaner curls; handle gently to avoid melting.
The puff pastry should be golden, puffed, and crisp. The pistachio mascarpone cream should be light and airy, holding a soft peak. The strawberries are sliced, pistachios chopped, and white chocolate grated. Everything is ready for assembly.
Phase 2: Pipe Creams and Layer Strawberries
- Pipe the CreamsFit two piping bags with star tips. Fill one with the pistachio mascarpone cream and the other with the vanilla pastry cream. Pipe alternating rosette rows of each cream onto one baked puff pastry rectangle, covering the surface completely.Look for The two creams form neat, distinct rosettes in rows.Tip Pipe close together to avoid gaps; the rosettes will hold the strawberries.
- Layer the StrawberriesArrange the sliced strawberries over the cream in a single, overlapping layer, covering the surface evenly.Look for The strawberries create a bright red, juicy layer.Tip Pat the strawberries dry with paper towels if they are very juicy to prevent sogginess.
- Assemble the NapoleonCarefully place the second baked puff pastry rectangle on top of the strawberry layer, pressing gently to adhere.Look for The top pastry sits evenly over the filling.Safe temperature 160°F (71°C) internal temperature (egg dishes)Tip If the top pastry is domed, gently press it down to level it.
The rosettes of pistachio and vanilla cream cover the pastry evenly, and the strawberries form a bright, juicy layer.
The top pastry is placed gently, creating a neat sandwich. Take a moment to check the color, texture and aroma before you move on to the next step.
Phase 3: Finish and Serve
- Finish and ServeDust the top with powdered sugar. Drizzle with the reserved white chocolate curls (or melted white chocolate, if using). Sprinkle with the chopped pistachios. Cut into portions with a sharp knife and lift a warm, flaky piece to serve.Look for The top is snowy with sugar, drizzled with white chocolate, and scattered with green pistachios.Tip Use a serrated knife to cut cleanly through the crisp pastry without crushing it.
The top is dusted with powdered sugar, drizzled with white chocolate, and scattered with pistachios. Cutting reveals clean layers of crisp pastry, creamy filling, and fruit. Take a moment to check the color, texture and aroma before you move on to the next step.
Common mistakes
Common pitfalls include overworking the puff pastry, which makes it tough; handle it gently. Overbeating the mascarpone cream can cause it to curdle; stop as soon as soft peaks form.
Soggy layers happen if the strawberries are too wet or the pastry isn’t fully baked; pat berries dry and bake until deeply golden. Cutting with a dull knife can crush the layers; use a serrated knife.
How to tell it’s done
The pastry is done when it is deep golden brown and feels crisp and dry to the touch, with no soft spots. The pistachio mascarpone cream should hold soft peaks and be smooth, not runny.
The assembled napoleon should be served within an hour of assembly to maintain crispness. If making ahead, keep components separate and assemble just before serving.
- Egg dishes: 160°F (71°C) in the thickest part
Up next · Part 3 of 3
4 variations · storage & make-ahead · 5 answers · printable card
Tips, FAQ & printable recipe (Part 3)← Back to the ingredients (Part 1)