Desserts · Part 1 of 3: Ingredients
Strawberry Pistachio Cream Napoleon Pastry: Crisp, Creamy, Quick
- Prep
- Cook
- Total
- Serves
- 8
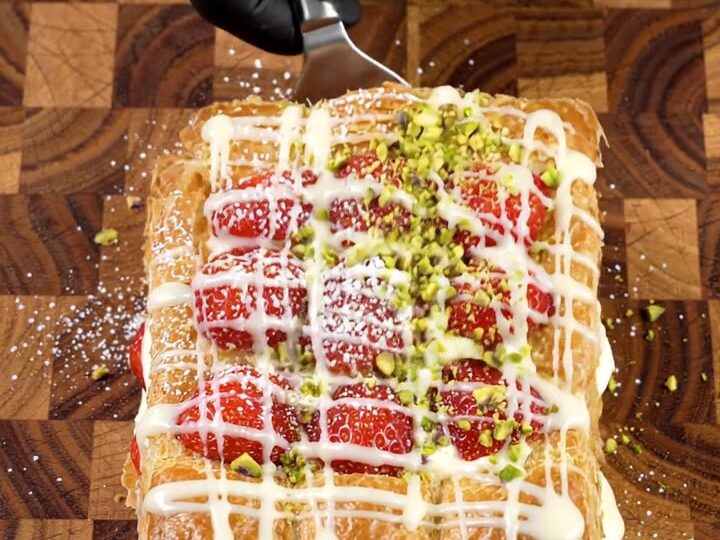
This Strawberry Pistachio Cream Napoleon Pastry layers crisp golden puff pastry with a cloudlike pistachio mascarpone cream, silky vanilla pastry cream, juicy ruby strawberries, and a shower of white chocolate curls and crushed pistachios.
It’s a showstopping dessert that comes together in under an hour, yet tastes like it came from a French patisserie. The combination of textures—crunchy, creamy, and juicy—makes every bite unforgettable.
Napoleon pastries are often thought of as fussy, but this version uses store-bought puff pastry to keep it approachable. The filling is a duo of creams: a luscious pistachio mascarpone whipped to soft peaks, and a classic vanilla pastry cream.
Fresh strawberries add brightness, while white chocolate and pistachios bring richness and crunch. The result is a dessert that looks impressive but is simple enough for a weeknight treat or a special celebration.
Ingredients
- 1 sheet frozen puff pastry, thawed
- 2 cups fresh strawberries, hulled and sliced
- 1/2 cup shelled pistachios, finely chopped
- 4 oz white chocolate, grated into curls
Pistachio Mascarpone Cream
- 1 cup mascarpone cheese
- 1/2 cup heavy cream
- 2 tbsp pistachio paste
- 1/4 cup confectioners' sugar
Vanilla Pastry Cream
- 1 cup vanilla pastry cream (store-bought or homemade)
For dusting
- Powdered sugar, for dusting, to taste
Why this recipe works
The method here relies on contrast: crisp, flaky puff pastry against a velvety, airy cream. Baking the pastry until deeply golden ensures it stays sturdy enough to hold the layers without becoming soggy.
Piping the creams in rosettes not only looks beautiful but also creates even distribution, so every bite has both flavors.
Using store-bought puff pastry is a time-saver that doesn’t compromise quality. The box grater for white chocolate creates fine curls that melt on the tongue, and the pistachios add a pleasant crunch. Assembling just before serving keeps the pastry crisp—this is a dessert best enjoyed fresh.
Notes and substitutions
For the puff pastry, look for all-butter puff pastry in the freezer section; it yields the flakiest, most flavorful layers. Thaw it in the refrigerator overnight or on the counter for 30 minutes until pliable but still cold. If the pastry tears, patch it with a little water and press gently.
Pistachio paste can be found in specialty baking stores or online; if unavailable, make a quick paste by blending shelled pistachios with a bit of honey.
Mascarpone is essential for the cream’s richness—substituting cream cheese will alter the flavor. White chocolate should be high-quality, as cheaper versions may not grate well.
- pistachio paste: Use 1/4 cup finely ground pistachios blended with 1 tablespoon honey or maple syrup.
- vanilla pastry cream: Use a thick vanilla pudding or a mixture of whipped cream and vanilla instant pudding.
- white chocolate: Use high-quality white chocolate chips or a white chocolate bar, grated.
- mascarpone: Use an equal amount of cream cheese softened, or a mixture of cream cheese and heavy cream.
Equipment
- Box grater
- Piping bags with star tips
- Baking sheet
- Parchment paper
- Sharp knife
- Cutting board
- Electric mixer
- Cooling rack
Up next · Part 2 of 3
7 steps · 20 min of cooking · what to look for at each stage
Step-by-step instructions (Part 2)