Dinner · Part 2 of 3: Instructions
Sticky Honey Glazed Chicken Drumsticks Step-by-step instructions
- Prep
- Cook
- Total
- Serves
- 4
Before you start
Before starting, ensure the oven racks are positioned in the center to allow for balanced airflow. Take the chicken out of the refrigerator about 20 minutes before cooking to allow it to come closer to room temperature, which helps with even cooking.
Have the aluminum foil ready to line the pan and ensure all necessary equipment is clean and accessible to streamline the entire process. Preparing your workspace in advance prevents unnecessary stress and ensures that you can focus entirely on the glazing and roasting stages, which are critical for the final result.
Ingredients at a glance (2)
- 8 pieces chicken drumsticks
- 1/2 cup honey
Instructions
Preparation and initial bake
- Prepare the chickenPreheat the oven to 400°F (200°C). Line a baking sheet with aluminum foil for easy cleanup. Place the chicken drumsticks in a single layer on the prepared baking sheet, ensuring they are not touching for even cooking.Look for The oven should be fully preheated before adding the chicken.Tip Pat the chicken dry with paper towels to ensure the skin crisps up nicely during the baking process.
The chicken should be arranged neatly on the foil-lined tray, looking clean and ready for the oven. By the end of this phase, the skin will begin to tighten and turn slightly opaque, signaling that the initial fat rendering has begun and the meat is ready to accept the glaze. The kitchen should start to smell of roasted chicken, and the drumsticks should look firm and evenly spaced, ensuring that heat can reach all sides of each piece for uniform cooking.
Glazing the drumsticks
- Glaze the drumsticksBake the drumsticks for 30 minutes. Meanwhile, in a small bowl, prepare the honey glaze. Remove the baking sheet from the oven and use a pastry brush to coat each drumstick generously with the honey mixture.Look for The chicken should be partially cooked and firm to the touch.Tip Apply the glaze evenly to all sides of the drumsticks for a consistent coating.
The chicken is now partially cooked and has a firm, slightly golden exterior. The kitchen should smell of savory roasted protein. After applying the glaze, the drumsticks should look evenly coated, with the sticky mixture clinging to the surface, ready for the final caramelization stage in the hot oven.
Check that the glaze is applied in a thin, even layer to prevent pooling at the bottom of the pan, which could lead to uneven burning during the final minutes of the cooking process.
Final caramelization
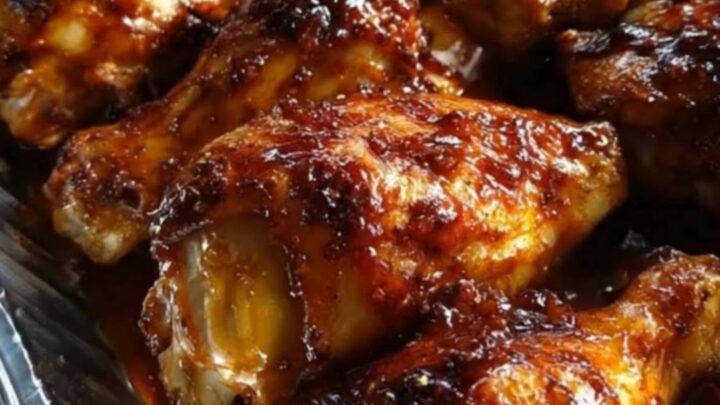
- Final bake and serveReturn the glazed drumsticks to the oven and bake for an additional 10 minutes until the glaze is sticky and caramelized. Ensure the internal temperature of the chicken reaches 165°F (74°C) at the thickest part. Remove from the oven and let rest for 5 minutes before serving.Look for The glaze should look glossy, dark, and slightly bubbling.Safe temperature 165°F (74°C) internal temperature (poultry)Tip Letting the chicken rest allows the juices to redistribute, ensuring every bite is tender and moist.
The drumsticks will emerge with a deep, glossy, and dark mahogany color. The glaze should be bubbling and thick, with some slightly charred, caramelized spots on the edges. The aroma is rich and sweet, and the meat should appear exceptionally tender and ready to be served immediately after resting. Ensure the chicken is not left in the oven too long at this stage, as the high sugar content in the honey can transition from perfectly caramelized to burnt very quickly.
Common mistakes
A common mistake is overcrowding the baking sheet, which prevents the heat from circulating and can result in steamed rather than roasted skin. Another error is applying the glaze too early, which can cause the sugars to burn before the chicken is cooked through.
Always wait until the final stage to apply the honey mixture. Additionally, failing to use a meat thermometer can lead to overcooked or undercooked meat, so always check the internal temperature to guarantee safety and the best possible texture for your meal.
How to tell it’s done
The chicken is done when the internal temperature reaches 165°F (74°C) at the thickest part near the bone. You can verify this using a digital meat thermometer. Visually, the juices should run clear when the meat is pierced with a fork, and the meat should naturally pull away from the bone, indicating it is tender and fully cooked.
The glaze should be deep amber, sticky to the touch, and bubbling on the surface of the chicken, confirming that the sugars have properly caramelized during the final bake.
- Poultry: 165°F (74°C) in the thickest part
Up next · Part 3 of 3
2 variations · storage & make-ahead · 3 answers · printable card
Tips, FAQ & printable recipe (Part 3)← Back to the ingredients (Part 1)