Dinner · Part 2 of 3: Instructions
Sticky Brown Sugar Mustard Glazed Ham Step-by-step instructions
- Prep
- Cook
- Total
- Serves
- 12
Before you start
Before you begin, ensure your ham is brought out of the refrigerator about 30 minutes before cooking. Preheat your oven to 325°F and prepare your roasting pan by lining it with a sheet of heavy-duty aluminum foil for easier cleanup.
Gather your whisk, a small mixing bowl, and your basting brush so that the glazing process can be completed efficiently once the oven is ready.
Ingredients at a glance (3)
- 1 whole spiral-cut ham (about 10 lbs)
- 1 cup brown sugar, packed
- 1/3 cup dijon mustard
Instructions
Mixing the Glaze
- Prepare the GlazeIn a small mixing bowl, whisk together the brown sugar and dijon mustard until the mixture is smooth and completely combined. Ensure the sugar is fully incorporated into the mustard to create a uniform, thick glaze consistency before applying it to the meat.Look for The glaze should be thick, glossy, and free of any large sugar clumps.Tip Mixing the glaze a few minutes before use allows the sugar to dissolve slightly in the mustard acidity.
The glaze should be uniform in color and texture, with no visible sugar granules remaining. It should be thick enough to coat the back of a spoon without running off immediately, ensuring it stays on the ham during the roasting process.
Roasting the Meat
- Glaze and Roast the HamPlace the spiral-cut ham in a roasting pan. Brush the prepared glaze liberally over the entire surface of the ham, ensuring it drips into the spaces between the slices. Cover the pan tightly with heavy-duty aluminum foil to trap moisture. Roast in a preheated oven at 325°F until the ham reaches an internal temperature of 145°F (63°C). Once reached, remove from the oven and let the meat rest for at least 3 minutes.Look for The ham is ready when the center reaches the safe temperature and the glaze looks bubbly.Safe temperature 145°F (63°C) internal temperature (steaks, chops and roasts)Tip Use a meat thermometer inserted into the thickest part of the ham to ensure accuracy.
The ham should be tightly covered to ensure moisture retention. After roasting, check that the internal temperature has reached 145°F. The aroma should be sweet and savory, filling the kitchen as the sugars begin to caramelize.
Resting and Serving
- Rest and ServeRemove the ham from the oven and let it rest, still tented with foil, for at least 15 minutes before carving. This resting period allows the juices to redistribute throughout the meat, ensuring that every slice remains tender and moist when served on the platter.Look for The ham should look glistening and smell deeply caramelized.Safe temperature 145°F (63°C) internal temperature (steaks, chops and roasts)Tip Do not skip the resting time, as it is essential for the texture of the meat.
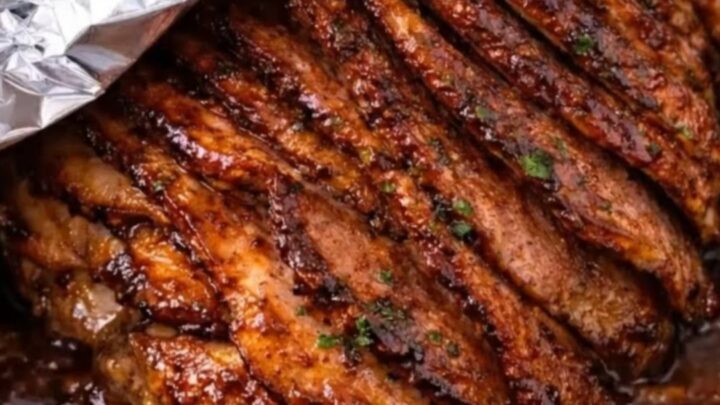
After resting, the ham should be easy to slice. The glaze should have thickened into a syrupy consistency that coats each slice beautifully. The meat should be tender and moist, with a distinct, balanced flavor profile.
Common mistakes
A common mistake is failing to tent the ham properly with foil, which can lead to dry, tough meat.
Another error is adding the glaze too early or too late; applying it at the start allows the flavors to seep into the layers, but keeping the heat moderate prevents the sugar from burning.
Always ensure the ham rests for the full 15 minutes to allow the juices to settle.
How to tell it’s done
The ham is perfectly done when it reaches an internal temperature of 145°F (63°C). Use a meat thermometer to check the thickest part of the meat, avoiding the bone if possible.
The exterior should be deeply glazed and glossy, with the sugar having melted into a rich, dark syrup that clings to the slices. If the glaze appears too dark, you can tent it loosely with additional foil.
- Steaks, chops and roasts: 145°F (63°C) in the thickest part, then a 3-minute rest
Up next · Part 3 of 3
2 variations · storage & make-ahead · 3 answers · printable card
Tips, FAQ & printable recipe (Part 3)← Back to the ingredients (Part 1)