Dinner · Part 1 of 3: Ingredients
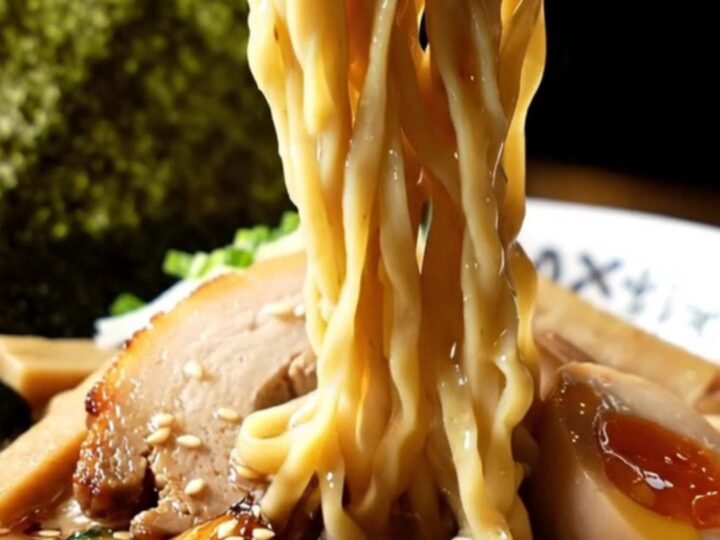
Smoky Black Garlic Tonkotsu Ramen with Torched Chashu
- Prep
- Cook
- Total
- Serves
- 2
Elevate your home dining experience with the intense, smoky depths of a professional Tokyo-style ramen. This recipe captures the essence of street-side ramen bars by focusing on the transformative power of black garlic oil and the luxury of perfectly torched chashu pork belly.
Bringing these bold, complex flavors into your own kitchen is surprisingly achievable with the right technique and attention to detail. Prepare to impress your guests with a bowl that rivals the best shops in Tokyo, delivering deep, savory satisfaction in every single slurp.
Tonkotsu ramen is revered for its creamy, collagen-rich broth and deep umami profile. By incorporating a homemade black garlic mayu, you create a complex layer of smoky sweetness that cuts through the richness of the pork. The final torching of the chashu pork belly adds a caramelized texture that is simply unmatched.
This guide provides a straightforward method to achieve restaurant-quality results in your own kitchen, focusing on the interplay of heat, texture, and timing. Every step is designed to maximize the depth of flavor, ensuring that your final bowl is not just a meal, but a complete sensory journey through the heart of Japanese noodle culture.
Ingredients
Black Garlic Mayu
- 12 cloves garlic cloves, deeply charred
- 60 ml sesame and canola oil blend
Ramen Components
- 200 g soy-braised pork belly chashu, pre-cooked
- 600 ml rich pork bone broth
- 2 servings fresh thin alkaline noodles
Garnish
- Bamboo shoots, nori, and ajitama egg for serving
Why this recipe works
The black garlic mayu works because the carbonized garlic infuses the oil with a bitter-sweet, smoky quality that balances the fatty, savory notes of the pork broth. This creates a multi-dimensional flavor experience where every sip feels different and exciting. By emulsifying the charred garlic into the oil, you ensure that the smoky essence is distributed evenly throughout the bowl, allowing the intense aroma to hit your senses before you even take your first bite of the noodles.
Torching the chashu pork belly works because direct high-heat application renders the fat instantly, creating a crispy exterior while keeping the center succulent and tender. This technique not only improves the texture but also releases aromatic compounds that enhance the overall sensory appeal of the bowl.
The contrast between the soft, braised meat and the slightly charred, caramelized surface provides a sophisticated mouthfeel that transforms a simple topping into the highlight of the dish, elevating the entire ramen experience to new heights.
Notes and substitutions
For the best results, use fresh alkaline noodles if available, as they provide the characteristic snap and chewiness necessary for ramen. If you cannot find them, high-quality dried ramen noodles are an excellent alternative that maintains the proper structure in hot broth. Always ensure your noodles are cooked to the correct degree of firmness, as they will continue to soften slightly in the hot broth once served. This attention to texture is what distinguishes a truly great bowl of ramen from a standard soup.
When choosing your equipment, a high-speed blender is essential for achieving the perfectly smooth consistency of the black garlic mayu. If using a standard blender, you may need to scrape the sides several times to ensure all charred garlic bits are fully emulsified into the oil.
Additionally, having a reliable kitchen blowtorch is key to achieving that authentic, smoky char on the pork belly. Ensure your torch is properly fueled and that you have a safe, clear workspace before you begin the final searing process.
- pork bone broth: high-quality store-bought tonkotsu broth or rich chicken stock
- fresh thin alkaline noodles: dried ramen noodles or spaghetti cooked with baking soda
Equipment
- High-speed blender
- Small saucepan
- Large soup pot
- Kitchen blowtorch
- Fine-mesh strainer
- Tongs
Up next · Part 2 of 3
3 steps · 10 min of cooking · what to look for at each stage
Step-by-step instructions (Part 2)