Dinner · Part 2 of 3: Instructions
Smoky BBQ Beef Brisket with Mashed Potatoes and Baked Beans Step-by-step instructions
- Prep
- Cook
- Total
- Serves
- 8
Before you start
Set up the night before if possible: trim the brisket and apply the rub, then refrigerate it uncovered, which seasons the meat deeply and dries the surface for a better bark.
On smoking day, fill the water pan, load the wood, and preheat the smoker or set up the charcoal grill for indirect cooking at 250°F (121°C) at least 45 minutes ahead so the temperature is stable before the meat goes on.
Ingredients at a glance (22)
- 5 lb beef brisket, fat cap trimmed to 1/4 inch
- 1/4 cup kosher salt
- 1/4 cup coarsely ground black pepper
- 2 tbsp smoked paprika
- 1 tbsp garlic powder
- 1 tbsp onion powder
- 2 tbsp brown sugar
- 1 cup water, for spritzing
- 1 cup barbecue sauce, plus more for serving
- 3 lb russet potatoes, peeled and cut into chunks
- 6 tbsp unsalted butter, softened
- 3/4 cup whole milk, warmed
- 1/2 cup sour cream
- Kosher salt, to taste
- 4 bacon slices, chopped
- 1 yellow onion, finely chopped
- 2 (15-oz) cans pinto beans, drained and rinsed
- 1/2 cup ketchup
- 1/3 cup brown sugar
- 2 tbsp molasses
- 1 tbsp yellow mustard
- 1 tbsp apple cider vinegar
Instructions
Smoke and bark
- Trim and dry the brisketPat the brisket dry with paper towels. Trim the fat cap to about 1/4 inch and remove any hard, waxy fat so smoke can reach the meat. Score the surface lightly in a crosshatch, then blot the whole roast once more so the rub sticks evenly. Work with the meat cold, straight from the refrigerator, for the cleanest trim.Look for The surface feels dry to the touch and the fat cap is an even, thin layer.Tip Cold brisket trims far more cleanly than warm meat, so take it directly from the refrigerator.
- Season with the pepper rubStir the kosher salt, black pepper, smoked paprika, garlic powder, onion powder and brown sugar together in a small bowl. Coat every surface of the brisket generously, pressing the rub into the meat. Return the seasoned brisket to the refrigerator while the smoker heats, and take it out no more than 30 minutes before it goes on the grate.Look for The brisket looks evenly coated, like it is wearing a dark, coarse crust.Tip Coarse pepper builds the bark shown in the video; fine pepper burns before it crusts.
- Smoke low and slowSet the smoker or indirect grill to 250°F (121°C) and add your wood. Lay the brisket fat-side down on the grate, close the lid and smoke for about 6 hours, spritzing with water every hour once the surface starts to look dry. Keep the lid closed between spritzes.Look for A deep mahogany color and thin wisps of smoke; the edges feel firm when pressed with tongs.Tip Oak gives a classic beefy smoke; a little hickory deepens it without taking over.
- Wrap and finish to temperatureWhen the bark is set, wrap the brisket in butcher paper and continue cooking to an internal temperature of 200°F (93°C), 2 to 3 hours more. Check through the thickest point of the flat. At 200°F (93°C) the meat is fully cooked; let it rest at least 3 minutes before any further handling.Look for The thermometer slides into the flat with almost no resistance, like butter.Safe temperature 200°F (93°C) internal temperature (steaks, chops and roasts)Tip Judge by tenderness, not the clock; briskets finish anywhere from 195°F to 205°F (90°C to 96°C).
By the end of phase one the brisket is wrapped and pushing toward its final temperature. The bark should be deep mahogany, set enough that it does not smear when pressed, and the surface should smell of smoke and toasted pepper.
An instant-read thermometer through the flat reads close to 200°F (93°C), and a skewer slides in with only slight resistance.
Sides on the stove
- Boil the potatoesWhile the brisket smokes, put the peeled, chunked russets in a large pot, cover with cold water by an inch and salt it well. Bring to a boil, then simmer 15 to 20 minutes until a fork slides through a chunk with no resistance. Drain thoroughly and let the steam escape for a minute.Look for The chunks split at the edges and fall apart when nudged with a fork.Tip Starting in cold water cooks the interior evenly, so no chalky centers survive the mash.
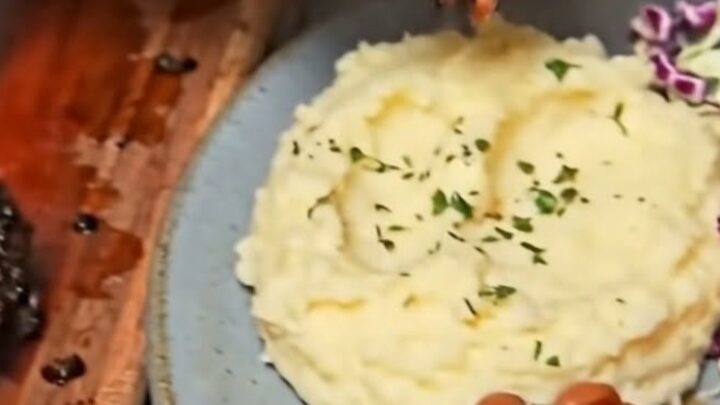
- Mash until creamyReturn the drained potatoes to the pot over low heat. Mash them, then fold in the softened butter, warm whole milk and sour cream until glossy and smooth. Season with kosher salt to taste, taste again, and hold the pot covered off the heat until serving time.Look for The mash pulls away from the sides in soft, shiny peaks with no dry spots.Tip Warm milk keeps the potatoes creamy; cold milk makes them gluey.
- Build the baked beansCook the chopped bacon in a cast-iron skillet over medium heat until crisp, about 8 minutes. Add the onion and cook until soft. Stir in the pinto beans, ketchup, brown sugar, molasses, mustard and apple cider vinegar, then simmer gently for 20 minutes until thick and glossy.Look for The sauce coats a spoon and leaves a slow-clearing trail across the bottom of the pan.Tip Set the skillet near the smoker for the last 20 minutes to pick up a little smoke flavor.
Phase two fills the kitchen with the smell of bacon and butter while the smoker works. The mash should sit glossy and smooth in the pot, holding soft peaks, seasoned boldly enough to stand up to the peppery brisket. The beans should be thick and glossy, the sauce coating a spoon, with a balance of sweet molasses, sharp mustard and a lift of vinegar.
Rest, slice, plate
- Rest the brisket properlyMove the wrapped brisket to a cutting board or a cooler and let it rest a full hour, or hold it in a 150°F (66°C) oven. Resting lets the juices settle back into the meat instead of running onto the board the moment the knife touches it.Look for The wrap is warm, not steaming, and the meat feels relaxed and pliable under a light press.Tip An hour of rest is the difference between juicy slices and a wet cutting board.
- Slice against the grainUnwrap the brisket, saving the juices. Find the direction the muscle fibers run and slice the flat crosswise into 1/4-inch slices with a long, thin knife. Work the point separately, since its grain runs a different way. Spoon the collected juices over the slices.Look for Each slice shows a defined pink smoke ring under a dark, peppery bark.Tip Sawing tears the bark; use long, single strokes and wipe the blade between cuts.
- Plate and serveSpoon mashed potatoes and baked beans onto warm plates, lay the brisket slices over the mash and drizzle with barbecue sauce and any resting juices. Bring the plates straight to the table while the meat is still steaming, with extra sauce on the side.Look for Steam rises off the slices and the fork pulls the meat apart with no knife needed.Tip Warm plates keep the first bite as good as the last, so stack them near the smoker.
The final phase is all about patience and a sharp knife. After the hour of rest, the wrapped brisket feels pliable and warm, not steaming hot, and the juices have settled.
Each 1/4-inch slice cut across the grain shows a defined pink smoke ring under the dark bark, and the meat glistens without flooding the board. The fork test settles it: a bite should pull away tender and juicy with no knife.
Common mistakes
The most common failure is cooking brisket by the clock. Weight, thickness and smoker behavior vary so much that a schedule is only a rough guide; the probe test is the truth.
The second mistake is opening the lid constantly — every peek costs heat and stretches the cook. Spritz only when the surface looks dry, and work quickly. Wrapping too early, before the bark is set, steams the crust soft; wrapping too late dries the exterior.
How to tell it’s done
The brisket is done by feel and temperature together: an instant-read thermometer through the thickest part of the flat reads at least 200°F (93°C), and a probe or skewer slides in with almost no resistance, like into room-temperature butter. The bark should be dark mahogany and firm, and the slices should show a pink smoke ring beneath it.
- Steaks, chops and roasts: 145°F (63°C) in the thickest part, then a 3-minute rest
Up next · Part 3 of 3
4 variations · storage & make-ahead · 5 answers · printable card
Tips, FAQ & printable recipe (Part 3)← Back to the ingredients (Part 1)