Dinner · Part 2 of 3: Instructions
Slow-Simmered Beef Ragu with Tagliatelle Step-by-step instructions
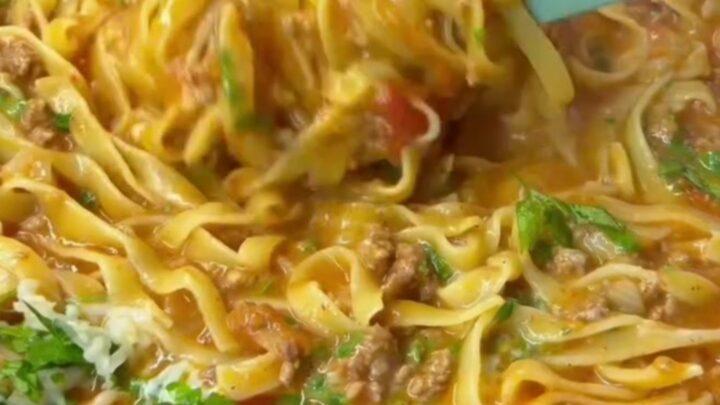
- Prep
- Cook
- Total
- Serves
- 6
Before you start
Before you start, set out all your ingredients and have your equipment ready. Finely dice the carrot, celery, and onion, and mince the garlic. Measure the olive oil, beef broth, and grated parmesan. Cube the fresh mozzarella and tear the basil leaves.
Bring a large pot of salted water to a boil for the pasta, but don't add the tagliatelle until the sauce is almost ready. Have a cup of pasta water reserved before draining. This recipe moves at a steady pace, so having everything prepped makes the process smoother.
Ingredients at a glance (14)
- 3 tbsp extra-virgin olive oil
- 1 lb ground beef (80/20)
- 1 medium carrot, finely diced
- 1 stalk celery, finely diced
- 1 medium yellow onion, finely diced
- 4 cloves garlic, minced
- 1 can (28 oz) whole peeled tomatoes, preferably roasted
- 1 cup beef broth
- 12 oz fresh tagliatelle
- 1 cup grated parmesan cheese, plus more for serving
- 8 oz fresh mozzarella, cubed
- 1/2 cup fresh basil leaves, torn
- Kosher salt, to taste
- Black pepper, to taste
Instructions
Phase 1: Brown and Simmer
- Brown the Beef and VegetablesHeat the olive oil in a large heavy-bottomed pot or Dutch oven over medium-high heat. Add the ground beef and cook, breaking it up with a wooden spoon, until deeply browned and caramelized, about 8-10 minutes. Add the carrot, celery, and onion, and cook, stirring occasionally, until the vegetables are soft and golden, about 6-8 minutes. Stir in the garlic and cook until fragrant, about 1 minute.Look for The beef is deeply browned with crispy bits, and the vegetables are tender and translucent.Safe temperature 160°F (71°C) internal temperature (ground meat)Tip Don't rush the browning; it builds the foundation of the sauce's flavor.
- Simmer the SauceAdd the whole peeled tomatoes and beef broth to the pot, crushing the tomatoes with the spoon. Bring the mixture to a simmer, then reduce the heat to low. Let the ragù simmer gently, uncovered, for at least 45 minutes, stirring occasionally, until the sauce is thickened and the flavors have melded. Season with salt and pepper to taste.Look for The sauce is thick and glossy, with the oil slightly separated on top.Tip Simmering slowly allows the sauce to concentrate and deepen in flavor.
At this point, the kitchen smells incredible: browned beef, sweet vegetables, and garlic. The sauce should be bubbling gently, with the tomatoes breaking down and the liquid reducing. The color is a deep, brick red, and the surface shimmers with a little oil.
Give it a taste – it should be rich and savory, with a hint of sweetness from the vegetables. If it tastes too acidic, let it simmer a little longer; the sweetness will develop as it reduces.
Phase 2: Cook and Toss
- Cook the TagliatelleBring a large pot of salted water to a boil. Add the fresh tagliatelle and cook until al dente, about 2-3 minutes. Reserve about 1 cup of pasta water before draining.Look for The noodles are tender but still have a slight bite.Tip Fresh pasta cooks quickly; keep an eye on it to avoid overcooking.
- Toss Pasta with SauceAdd the drained tagliatelle directly to the pot with the ragù. Pour in about 1/2 cup of the reserved pasta water. Toss everything together with tongs, allowing the sauce to cling to the noodles. Fold in the grated parmesan and cubed mozzarella, tossing until the cheese is melted and creamy. If the sauce seems too thick, add more pasta water a little at a time until it reaches a silky consistency.Look for The pasta is coated in a glossy, cheesy sauce that clings to every strand.Tip Adding pasta water helps emulsify the sauce and makes it silkier.
The tagliatelle is al dente, and the sauce is thick and clinging. As you toss, the pasta water and cheese create a creamy, glossy emulsion. The mozzarella cubes are melting into stretchy pockets, and the parmesan is fully incorporated. The whole mixture looks luscious and inviting. Taste a strand – it should be perfectly seasoned and coated with sauce. Adjust salt and pepper if needed.
Phase 3: Finish and Serve
- Finish and ServeRemove the pot from the heat. Taste and adjust seasoning with salt and pepper. Divide the ragù and pasta among warm serving bowls. Top each bowl with a generous shower of grated parmesan and torn basil leaves.Look for The cheese melts into the sauce, and the basil adds a fresh, aromatic finish.Tip Serve immediately while the cheese is still melty and the pasta is hot.
The ragù is plated in warm bowls, each one topped with a shower of parmesan and torn basil. The cheese is slightly melted from the heat of the pasta, and the basil adds a fresh, aromatic pop of green. The sauce is thick and glossy, clinging to every ribbon. Take a bite: the beef is tender, the vegetables are soft, and the cheese is creamy. This is the moment to enjoy the fruits of your slow simmer.
Common mistakes
One common mistake is rushing the browning of the beef. If you stir it too often, it steams instead of browning, and you lose that deep, caramelized flavor. Let it sit in the pan for a few minutes before breaking it up. Another pitfall is adding the pasta before the sauce is sufficiently reduced; if the sauce is too thin, the final dish will be watery.
Simmer the sauce uncovered until it's thick enough to coat a spoon. Finally, don't skip the pasta water – it's the secret to a silky, emulsified sauce. Add it gradually until the sauce reaches the perfect consistency.
How to tell it’s done
The ragù is done when the sauce has thickened to a hearty, spoon-coating consistency and the flavors have melded into a rich, savory whole. The ground beef should be fully cooked and tender, and the vegetables should be soft and incorporated into the sauce.
If you're using a thermometer, the ground beef should reach an internal temperature of 160°F (71°C) during the browning step. The final dish is ready when the pasta is al dente and the cheese has melted into a glossy, creamy coating. Taste and adjust seasoning with salt and pepper before serving.
- Ground meat: 160°F (71°C) in the thickest part
Up next · Part 3 of 3
4 variations · storage & make-ahead · 5 answers · printable card
Tips, FAQ & printable recipe (Part 3)← Back to the ingredients (Part 1)