Dinner · Part 2 of 3: Instructions
Slow Cooker White Wine Pork Chops in Creamy Onion Sauce Step-by-step instructions
- Prep
- Cook
- Total
- Serves
- 6
Before you start
Fifteen minutes of setup is all this recipe asks. Pull out the slow cooker and set it where it will stay for the afternoon, away from cabinets and anything heat-sensitive. Slice one large yellow onion into rings — half-inch slices hold their shape through the braise — and smash four garlic cloves with the flat of a knife, leaving the skins behind.
Strip the leaves from a few thyme sprigs. Pat the pork chops dry with paper towels and season both sides with salt and pepper; drying first helps the seasoning adhere. Open the can of cream of chicken soup and measure the wine so everything is within arm's reach when assembly starts.
Ingredients at a glance (6)
- 6 boneless pork chops (about 1 1/2 inches thick)
- 1 large yellow onion, sliced into rings
- 4 garlic cloves, smashed
- 1 tsp fresh thyme leaves
- 3/4 cup dry white wine
- 1 (10.5-oz) can condensed cream soup, cream of chicken style
Instructions
Build the base
- Season and arrange the chopsPat the pork chops dry with paper towels and season both sides generously with salt and black pepper. Lay them in a single layer in the bottom of the slow cooker insert, fanning them slightly so they overlap as little as possible. Even coverage helps every chop braise at the same pace.Look for The chops sit snugly but not stacked, with the insert bottom barely visible between them.Tip Drying the surface first helps the seasoning cling and keeps the sauce from tasting watery.
- Scatter the aromaticsScatter the onion rings over and around the chops, letting them fall into the gaps. Tuck the smashed garlic cloves between the pieces of meat, then sprinkle the thyme leaves evenly over the top. The aromatics will soften and perfume the sauce as everything braises.Look for Onion rings drape over the chops and garlic peeks out between pieces, all in one even layer.Tip Smashed cloves stay whole during the long cook, so scoop them out or eat around them if preferred.
By the end of this phase the slow cooker is loaded and the hard work is done. The chops lie in a single layer, seasoned and barely overlapping, with onion rings draped over and around them, garlic cloves tucked into the gaps and thyme scattered across the top.
Nothing is liquid yet — the insert should look dry and organized, almost like a still life. Before moving on, confirm the lid seats properly and the cooker is set to low. A well-built base now means even braising later: every chop should touch the insert bottom or rest against a neighbor, never float above the aromatics.
Braise in the wine sauce
- Whisk the wine and soupIn a medium bowl, whisk the condensed cream soup until smooth, then pour in the white wine a little at a time, whisking until the mixture is completely blended with no streaks of soup left. The whisking keeps the sauce silky instead of letting it break into pockets of soup and wine.Look for The mixture pours like heavy cream, pale and uniform, with no separate wine floating on top.Tip Whisking the soup smooth before the wine goes in blends far faster than adding wine to an unopened can straight from the fridge.
- Pour over and cook low and slowPour the wine and soup mixture evenly over the chops and onions, nudging any exposed meat under the liquid with a spoon. Cover and cook on low for 4 to 5 hours, or on high for 2 to 2 1/2 hours, until the chops are tender and cooked through.Look for The liquid bubbles gently at the edges and the onions have gone soft and translucent into the sauce.Tip Resist lifting the lid; every peek releases heat and can add 20 minutes to the cook.
This is the long, quiet phase. The whisked wine and soup mixture pours over everything and the lid closes for hours. What you should notice as the afternoon passes is the smell: a savory, faintly sweet steam of onions, wine and thyme escaping whenever you pass the cooker. Late in the cook, the liquid at the edges trembles with a gentle bubble and the onions have gone from opaque white to soft gold, half-dissolved into the sauce. If the sauce looks separated or greasy on top, give it a gentle stir without lifting the chops — it will re-emulsify as it finishes.
Finish and serve
- Check the temperature and restNear the end of the cook, insert an instant-read thermometer into the thickest chop, away from any garlic clove. The pork is safely done at 145°F (63°C). If it reads below, cover and continue cooking, checking every 20 minutes. Once it reaches temperature, let the chops rest at least 3 minutes before serving so the juices settle back into the meat.Look for The thermometer reads at least 145°F (63°C) in the thickest part of the meat.Safe temperature 145°F (63°C) internal temperature (steaks, chops and roasts)Tip Pork chops this thick can vary; check the largest chop rather than the smallest.
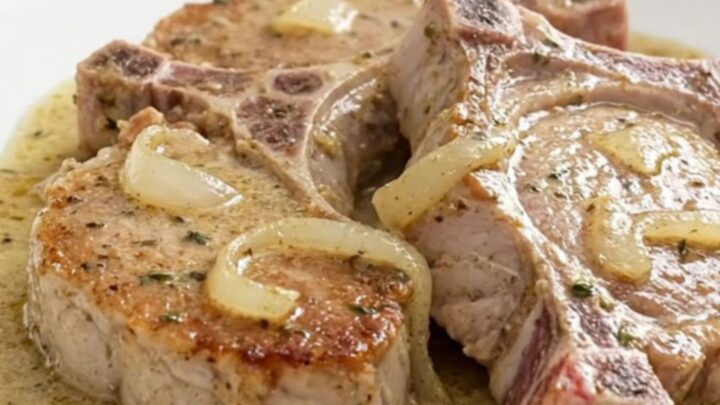
- Rest, then serve in the sauceTurn off the heat and leave the chops in the covered slow cooker to finish resting. Transfer each chop to a warm plate, spoon the creamy onion sauce generously over the top, and bring the whole cooker to the table for seconds.Look for The sauce coats the back of a spoon and clings to each chop in a thick, glossy layer.Tip A short rest in the sauce keeps the chops moist without overcooking them.
The final phase is quick and rewards attention. The lid comes off to a billow of steam and a sauce that has thickened to a creamy coating consistency, onions softened into it. The thermometer confirms 145°F (63°C) in the thickest chop, and after a 3-minute rest the meat yields to a fork with no resistance. Each chop plates up under a generous spoonful of sauce, the surface tender and moist with no sear marks — that is correct for this braise, not a flaw. The sauce should taste of wine, chicken and sweet onion in balance, never sour or flat.
Common mistakes
The most common slip is using thin chops, which turn chalky long before the sauce has developed. Thick-cut, boneless chops are worth seeking out. The second mistake is skipping the whisk: soup poured over wine without blending can separate into greasy streaks during the long cook.
Lifting the lid to check on things is the third — each peek costs heat and stretches the cook time. Finally, do not rely on color alone to judge doneness; pork can look pale while still under temperature, and the thermometer is the only honest answer. And resist turning the cooker to high to hurry things along unless the timing demands it.
How to tell it’s done
The chops are done when an instant-read thermometer inserted into the thickest chop reads at least 145°F (63°C), the safe internal temperature for whole cuts of pork, followed by a rest of at least 3 minutes. Visually, the meat pulls apart under gentle fork pressure rather than springing back, and the fibers separate in soft, moist strands.
The finished sauce is thick enough to coat a spoon and clings to the chops in a creamy, opaque layer with the softened onion rings suspended in it. Steam should rise readily from the surface when the lid comes off. If the meat resists the fork but has reached temperature, give it another 20 minutes on low; tenderness and temperature arrive together here.
- Steaks, chops and roasts: 145°F (63°C) in the thickest part, then a 3-minute rest
Up next · Part 3 of 3
4 variations · storage & make-ahead · 5 answers · printable card
Tips, FAQ & printable recipe (Part 3)← Back to the ingredients (Part 1)