Dinner · Part 2 of 3: Instructions
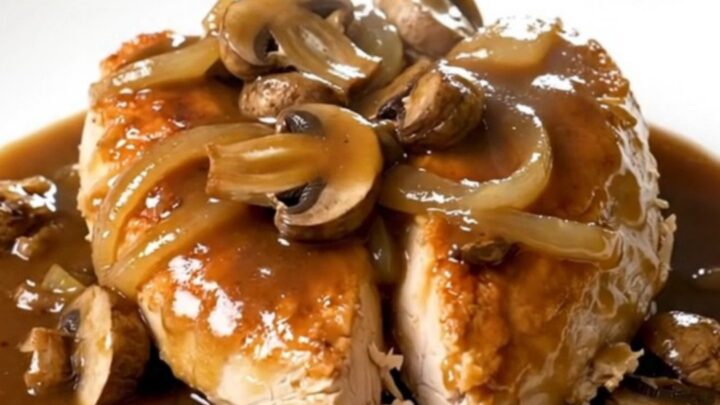
Slow Cooker Steakhouse Mushroom Chicken with Creamy Gravy Step-by-step instructions
- Prep
- Cook
- Total
- Serves
- 4
Before you start
Prepare for cooking by ensuring the slow cooker insert is clean and dry. Slice the mushrooms and onions into uniform pieces to ensure they cook at the same rate.
Measure out the beef broth and steak seasoning in advance so that the assembly process is quick and efficient, keeping the chicken chilled in the refrigerator until the very moment you are ready to place it into the slow cooker.
Ingredients at a glance (5)
- 4 pieces boneless skinless chicken breasts
- 8 oz sliced mushrooms
- 1 cup sliced onion
- 1 tbsp steak seasoning
- 1 cup beef broth
Instructions
Assembly phase
- Assemble the ingredientsPlace the boneless skinless chicken breasts into the bottom of the slow cooker insert. Arrange the sliced mushrooms and sliced onion evenly over the top of the chicken.Look for The chicken should be arranged in a single layer if possible to ensure even cooking throughout the braising process.Tip Ensure the mushrooms and onions are spread across the surface to allow their juices to penetrate the chicken during cooking.
The chicken breasts should be nestled securely in the base of the slow cooker, with the mushrooms and onions distributed evenly on top to create a flavorful bed for the braising process.
Seasoning phase
- Season and pourSprinkle the steak seasoning generously over the chicken, mushrooms, and onions. Pour the beef broth over the entire mixture, ensuring it flows around the chicken pieces.Look for The broth will pool at the bottom, creating the base for the flavorful gravy that develops as the ingredients braise.Tip Do not stir the ingredients; layering them allows the flavors to meld perfectly while the chicken stays moist.
The steak seasoning should be visible across the surface of the vegetables, and the beef broth should be poured steadily to coat the base, ready to create the savory braising liquid.
Braising phase
- Braise and serveCover and cook on low for 4 hours until the chicken is tender and reaches an internal temperature of 165°F (74°C). Allow the chicken to rest for 5 minutes before serving with the mushroom and onion gravy.Look for The gravy will thicken slightly, and the mushrooms will be soft and infused with the beefy, seasoned broth.Safe temperature 165°F (74°C) internal temperature (poultry)Tip Check the temperature at the thickest part of the breast to ensure it is fully cooked and safe for consumption.
The kitchen should smell savory and earthy as the chicken reaches its target temperature of 165°F (74°C), resulting in tender meat and a reduced, rich gravy ready for serving.
Common mistakes
Avoid lifting the slow cooker lid during the first three hours of cooking, as this releases essential heat and steam, significantly increasing the required cooking time.
Do not overcrowd the slow cooker; ensuring the chicken is in a single layer promotes even heat distribution.
Additionally, avoid adding too much liquid, as the vegetables will release their own water during the process.
How to tell it’s done
The chicken is done when it is opaque throughout and reaches an internal temperature of 165°F (74°C). The meat should be fork-tender, pulling away easily from the center.
The vegetables should be soft and translucent, and the liquid should have reduced into a flavorful, aromatic gravy.
- Poultry: 165°F (74°C) in the thickest part
Up next · Part 3 of 3
2 variations · storage & make-ahead · 3 answers · printable card
Tips, FAQ & printable recipe (Part 3)← Back to the ingredients (Part 1)