Dinner · Part 2 of 3: Instructions
Slow-Cooker Shallot Carrot Brown Gravy Pork Shoulder Step-by-step instructions
- Prep
- Cook
- Total
- Serves
- 8
Before you start
Before you start, make sure your slow cooker is clean and ready. If you're using a liner, place it in the insert. Gather all your ingredients – the pork shoulder, shallots (peeled), baby carrots, brown gravy, and butter. No need to pre-cook anything; this is a true dump-and-go recipe.
If your pork roast is tied with netting or string, remove it before placing it in the slow cooker. You might also want to have a cutting board and two forks ready for shredding later. This is a great recipe to start in the morning and come home to a finished dinner.
Ingredients at a glance (5)
- 4 lb boneless Boston butt pork shoulder roast
- 8 whole peeled whole shallots
- 1 lb baby carrots
- 2 cups rich brown gravy
- 4 tbsp unsalted butter, cut into pats
Instructions
Layer and Dump
- Layer the Roast and VegetablesPlace the pork shoulder roast in the center of a 6-quart slow cooker. Scatter the whole shallots and baby carrots around the roast, tucking them into any gaps. The vegetables will braise in the meat juices and gravy as the roast cooks.Look for The roast sits snugly in the pot with vegetables nestled around it.Tip No need to trim the fat – it melts into the gravy and keeps the meat moist.
- Add Gravy and ButterPour the rich brown gravy evenly over the roast and vegetables. Dot the top of the roast with the unsalted butter pats. The butter adds richness and helps create a glossy sauce as it melts.Look for The gravy pools around the meat and vegetables, with butter melting on top.Tip If the gravy is very thick, thin it with a little water or broth before pouring.
The raw pork sits in the center of the slow cooker with shallots and carrots scattered around. The gravy is poured over everything, and butter pats sit on top.
At this point, the scene is neat and tidy – the gravy should cover the bottom of the pot, and the butter will melt during cooking. There's no need to stir; the slow cooker will do that work. Just make sure the roast is snug and the vegetables are in contact with the liquid.
Low and Slow
- Cook Low and SlowCover the slow cooker and cook on LOW for 8 to 10 hours, or on HIGH for 5 to 6 hours, until the pork is fork-tender and shreds easily. The long, slow cooking breaks down the collagen in the shoulder, making it succulent and pull-apart tender. Let it rest for 3 minutes before slicing.Look for The meat is fork-tender and the gravy is bubbling gently around the edges.Safe temperature 145°F (63°C) internal temperature (steaks, chops and roasts)Tip Resist the urge to lift the lid – every peek releases heat and adds cooking time.
- Shred the PorkTransfer the roast to a cutting board and let it rest for at least 3 minutes. Using two forks, shred the pork into bite-sized ribbons, discarding any large pieces of fat. Return the shredded meat to the slow cooker and stir it into the gravy and vegetables.Look for The meat pulls apart easily into tender strands.Safe temperature 145°F (63°C) internal temperature (steaks, chops and roasts)Tip For extra flavor, let the shredded pork sit in the gravy for 10 minutes before serving.
After several hours, the kitchen fills with the rich aroma of braising pork and caramelizing vegetables. The gravy is bubbling gently around the edges, and the meat is visibly shrinking and becoming tender. When you insert a fork, it should slide in with little resistance. The shallots are soft and translucent, and the carrots are tender but still hold their shape. The sauce has darkened to a glossy mahogany.
Shred and Serve
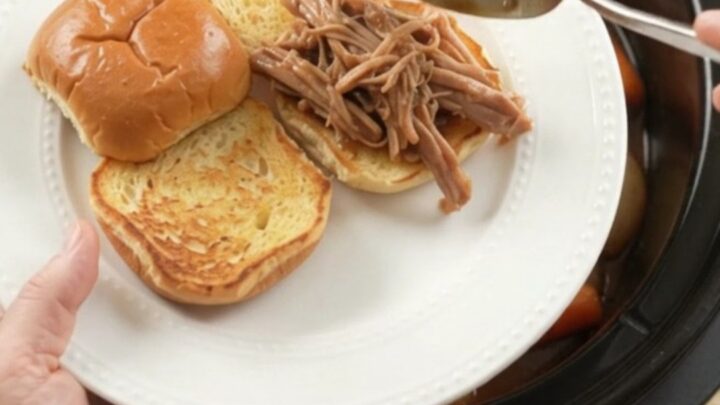
- Serve and EnjoySpoon the pulled pork, shallots, and carrots onto plates or into toasted brioche slider buns. Ladle extra gravy over the top. Serve hot.Look for Steaming pork with glossy gravy and tender vegetables.Tip Pair with a simple green salad or roasted potatoes to round out the meal.
The pork is shredded into ribbons and mixed back into the gravy. The shallots and carrots are nestled among the meat, and the sauce clings to everything. The dish is steaming and ready to serve. The texture is luscious – tender meat, sweet vegetables, and a rich, silky gravy. A spoonful should be thick and flavorful, with no watery separation.
Common mistakes
One common mistake is lifting the lid too often to check on the meat. Every time you open the slow cooker, you let out heat and steam, which can extend the cooking time significantly. Trust the process and resist the urge to peek. Another mistake is using a lean cut of pork, such as tenderloin – it will dry out and become tough.
Stick with pork shoulder. Also, be careful not to overseason the gravy, as the pork and vegetables will release their own savory juices. Finally, don't skip the rest time after shredding – it allows the meat to reabsorb juices and stay moist.
How to tell it’s done
The pork is done when it is fork-tender and easily pulls apart with a fork. The internal temperature should read at least 145°F (63°C) in the thickest part, but for optimal tenderness, it will likely be much higher – around 190°F to 200°F (88°C to 93°C) – which is fine.
The vegetables should be soft and easily pierced with a fork, and the gravy should be rich and flavorful. If the gravy seems thin, you can let it cook uncovered for the last 30 minutes to reduce, or thicken with a cornstarch slurry.
- Steaks, chops and roasts: 145°F (63°C) in the thickest part, then a 3-minute rest
Up next · Part 3 of 3
4 variations · storage & make-ahead · 5 answers · printable card
Tips, FAQ & printable recipe (Part 3)← Back to the ingredients (Part 1)