Dinner · Part 2 of 3: Instructions
Slow Cooker Savoie Sausage and White Wine Macaroni Step-by-step instructions
- Prep
- Cook
- Total
- Serves
- 4
Before you start
Before starting, ensure all ingredients are measured and ready. Slice the sausages into uniform rounds to ensure they cook at the same rate.
Check that the slow cooker is clean and positioned on a stable, heat-resistant surface with easy access to a power outlet to avoid any interruptions during the cooking process.
Ingredients at a glance (4)
- 1 lb diot sausages, sliced
- 1 lb dry macaroni pasta
- 1 bouillon cube, crumbled
- 2 cups white wine broth
Instructions
Layering the ingredients
- Assemble the basePlace the sliced sausages at the bottom of the slow cooker. Scatter the dry macaroni pasta evenly over the sausages, then sprinkle the crumbled bouillon cube over the top of the pasta to ensure even distribution during the cooking process.Look for Ingredients are layered in the slow cooker bowl.Tip Ensure the sausages are in a single layer for even heat distribution.
The sausages should be arranged in an even layer at the bottom of the cooker.
The macaroni should be spread out to ensure it is fully covered by the wine broth, preventing any dry spots during the long cooking time. Everything should look neat and ready for the liquid.
Simmering in the slow cooker
- Add liquids and cookPour the white wine broth over the ingredients in the slow cooker. Cover with the lid and set the slow cooker to low heat. Cook for 3 hours until the pasta is tender and the sausages reach an internal temperature of 160°F (71°C).Look for Liquid covers the pasta and sausages.Safe temperature 160°F (71°C) internal temperature (ground meat)Tip Do not stir too frequently to maintain the integrity of the pasta shape.
The liquid should be bubbling gently under the lid. As the time progresses, you will notice the aroma of the wine and sausage filling the kitchen. The pasta will gradually expand as it absorbs the flavorful broth, turning the thin liquid into a rich, savory sauce.
Final rest and service
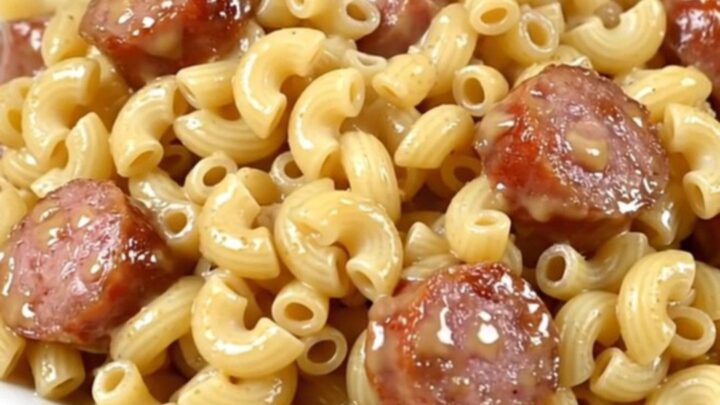
- Finish and serveCheck that the pasta has absorbed most of the liquid and the sausage is fully cooked. Allow the dish to rest for 5 minutes before serving to let the sauce thicken slightly and the flavors meld together perfectly.Look for The sauce is glossy and the pasta is soft.Tip Serve immediately while steaming hot for the best texture and flavor experience.
The final dish should appear steaming and glossy. The pasta should be tender but not falling apart, and the sausages should be perfectly cooked.
A short rest period allows the sauce to settle and coat the pasta uniformly, making it ready to be plated and served immediately.
Common mistakes
Avoid adding too much liquid at the beginning, as the pasta will release starch and the sausages will contribute their own juices, which can lead to a watery sauce if not monitored.
Also, avoid lifting the lid frequently during the cooking process, as this releases the trapped heat and steam, significantly increasing the total cooking time.
How to tell it’s done
The dish is done when the macaroni is al dente and the sausages are fully cooked. Use a meat thermometer to ensure the sausages have reached an internal temperature of 160°F (71°C). The sauce should be glossy and reduced enough to coat the back of a spoon comfortably.
- Ground meat: 160°F (71°C) in the thickest part
Up next · Part 3 of 3
2 variations · storage & make-ahead · 3 answers · printable card
Tips, FAQ & printable recipe (Part 3)← Back to the ingredients (Part 1)