Dinner · Part 2 of 3: Instructions
Slow Cooker Rustic Tomato and Vermicelli Soup Step-by-step instructions
- Prep
- Cook
- Total
- Serves
- 4
Before you start
Before starting, ensure all vegetables are properly cleaned and prepped. Dice the carrots into uniform pieces to ensure they cook at the same rate. Slice the onions thinly so they soften and melt into the broth effectively.
Have your measuring cups ready for the broth, and ensure your slow cooker is clean and placed on a level, heat-resistant surface away from any water sources.
Ingredients at a glance (6)
- 28 oz canned whole peeled tomatoes with juice
- 2 medium carrots, diced
- 1 medium onion, sliced
- 1 tsp dried oregano
- 4 cups chicken broth
- 4 oz dried vermicelli pasta
Instructions
Building the flavor base
- Combine ingredientsPlace the whole peeled tomatoes with their juice into the slow cooker. Add the diced carrots, sliced onions, and dried oregano into the vessel. Pour the chicken broth over the top of the vegetables.Look for Ensure the vegetables are evenly distributed in the broth.Tip Crush the whole tomatoes lightly with a wooden spoon for a more rustic texture.
At the end of this phase, the ingredients are layered in the slow cooker. The liquid should cover the vegetables to ensure they cook evenly. The kitchen should begin to smell like warm, aromatic tomatoes and herbs as the slow cooker starts to heat up. Check that the lid is securely in place to lock in the moisture and heat.
Slow cooking the vegetables
- Slow cook the baseCover the slow cooker with its lid and set to cook on low for 4 hours. This duration allows the flavors of the onions, carrots, and tomatoes to meld thoroughly into the broth.Look for The onions should be translucent and the carrots tender when pierced with a fork.Tip Avoid opening the lid frequently, as this releases heat and increases cooking time.
During this phase, the vegetables soften and release their flavors into the broth. The liquid will deepen in color and richness.
By the end of this time, the carrots should be easily pierced with a fork and the onions should be completely tender. This long, gentle simmer is essential for developing the deep, savory profile of the final soup.
Finishing with vermicelli
- Cook the pasta and serveStir in the vermicelli pasta during the last 15 minutes of cooking. Ensure the pasta is submerged in the hot liquid until cooked through and al dente. Ladle the hot soup into bowls and serve immediately while steaming.Look for The pasta should be soft but still hold its shape.Tip If the soup becomes too thick, add a small splash of hot water or extra broth.
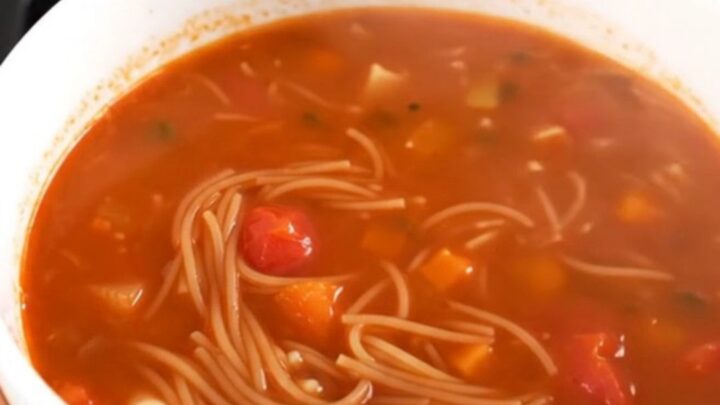
Once the pasta is added, it will absorb the seasoned broth. The soup reaches its final consistency as the vermicelli cooks through. The final product should be steaming, with the pasta clearly visible throughout the rich tomato base. Ensure the soup is served while hot to maintain the best texture of the noodles and the warmth of the broth.
Common mistakes
A common mistake is adding the pasta too early, which leads to overcooked, mushy noodles that lose their structure. Always add the vermicelli during the final stage of cooking to maintain the correct texture.
Another error is failing to account for the liquid absorption; if the soup appears too dry, adjust by adding a bit more broth or water to reach your desired consistency.
How to tell it’s done
The soup is ready when the vegetables are tender and the vermicelli pasta has reached an al dente texture. The broth should be fragrant and vibrant in color.
Because this recipe does not contain raw proteins, you do not need to check for internal temperatures; simply confirm the pasta is cooked through and the liquid is piping hot before serving.
Up next · Part 3 of 3
2 variations · storage & make-ahead · 3 answers · printable card
Tips, FAQ & printable recipe (Part 3)← Back to the ingredients (Part 1)