Dinner · Part 2 of 3: Instructions
Slow Cooker Provolone Kielbasa Cavatappi: Creamy One-Pot Pasta Step-by-step instructions
- Prep
- Cook
- Total
- Serves
- 6
Before you start
Before starting, slice the smoked kielbasa into 1/2-inch medallions and measure out the pasta, sauce, and cheeses. If using a block of provolone, shred it and set aside. Have your slow cooker ready and plugged in.
No need to preheat the slow cooker; it will heat up gradually as it cooks. Ensure all ingredients are at room temperature if possible, though cold ingredients are fine. This recipe requires minimal prep, so you can have everything in the Crockpot in under 10 minutes.
Ingredients at a glance (5)
- 2 lb smoked kielbasa, sliced into 1/2-inch medallions
- 12 oz cavatappi pasta
- 2 cups roasted garlic Parmesan cream sauce
- 1 cup whole-milk ricotta cheese
- 2 cups shredded provolone cheese
Instructions
Layer and Top
- Layer the IngredientsPlace the sliced smoked kielbasa medallions in the bottom of a 6-quart slow cooker in an even layer. Add the cavatappi pasta on top of the kielbasa. Pour the roasted garlic Parmesan cream sauce over the pasta, making sure the pasta is mostly submerged. Stir gently with a wooden spoon to combine the kielbasa, pasta, and sauce evenly.Look for The sauce should coat the pasta and kielbasa evenly, with no dry patches.Tip Use a spatula to scrape all the sauce from the jar or bowl into the slow cooker.
- Add the CheesesSpoon dollops of whole-milk ricotta over the top of the pasta mixture. Sprinkle the shredded provolone evenly over the entire surface, covering the ricotta dollops and the pasta. Do not stir the cheese into the mixture; leave it layered on top so it melts into a golden, bubbly crust during cooking.Look for The top should be fully covered with cheese, with visible ricotta dollops peeking through.Tip If the provolone is not pre-shredded, shred it from a block for better melting.
At the end of this phase, the slow cooker contains an even layer of kielbasa, pasta, and sauce, topped with dollops of ricotta and a blanket of shredded provolone.
The ingredients are not mixed; the cheese sits on top, ready to melt and form a golden crust. The setup looks neat and inviting, with the white and yellow cheeses contrasting against the pink sausage and creamy sauce.
Slow Cook and Bubble
- Slow Cook on LowCover the slow cooker with its lid. Cook on LOW for 4 hours, or until the pasta is tender and the sauce is bubbling around the edges. Do not lift the lid during the first 3 hours to keep the heat and steam inside. After 3 hours, check the pasta for doneness; if it is still firm, continue cooking for up to 1 more hour, checking every 15 minutes.Look for The sauce should be bubbling gently and the cheese melted and lightly browned at the edges.Tip If the pasta seems dry at the 3-hour mark, add 1/4 cup of water or broth, but avoid stirring too much.
- Stir and FinishOnce the pasta is al dente, gently stir the mixture to incorporate the melted cheese and ricotta into the sauce. The sauce will thicken slightly as it cools. Taste and adjust seasoning with salt and pepper if desired. If the mixture seems too thick, stir in a splash of warm water or milk to loosen it to your preferred consistency.Look for The sauce should be creamy and coat the pasta, with the cheese fully melted and stringy.Tip Stir gently to avoid breaking the pasta or mashing the kielbasa.
After cooking on low for 4 hours, the slow cooker is bubbling gently around the edges, and the cheese has melted into a glossy, golden layer. The aroma of roasted garlic and smoked sausage fills the kitchen. The pasta is tender, and the sauce has thickened slightly. A spoonful lifted from the center should show stretchy cheese and creamy sauce clinging to the cavatappi.
Finish and Serve
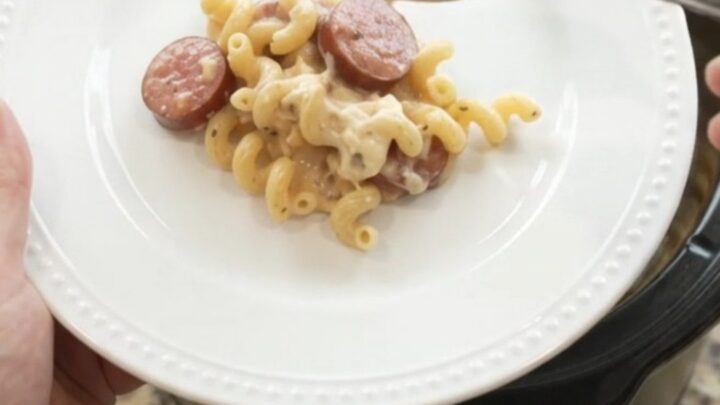
- Serve HotServe the creamy kielbasa cavatappi directly from the slow cooker, or spoon onto a large platter or individual bowls. Garnish with extra shredded provolone or fresh parsley if desired. Enjoy immediately while hot and creamy.Look for The pasta should be steaming and the cheese stretchy when lifted with a spoon.Tip Set the slow cooker to 'Keep Warm' while serving to maintain the perfect texture.
Once stirred, the dish is creamy and cohesive, with the cheese fully incorporated into the sauce. The kielbasa coins are caramelized at the edges, and the pasta is evenly coated. Serving directly from the slow cooker keeps it warm and inviting. The final presentation is a rustic, hearty pasta bake that looks as delicious as it tastes.
Common mistakes
One common mistake is lifting the lid too often, which releases heat and extends cooking time. Resist the urge to peek for the first 3 hours. Another issue is using too much liquid; the sauce should coat the pasta but not be watery.
If the sauce seems thin, cook uncovered for the last 30 minutes to thicken. Avoid over-stirring, which can break the pasta and make the dish mushy.
How to tell it’s done
The dish is done when the pasta is tender and cooked through, and the sauce is bubbling around the edges of the slow cooker. The cheese should be fully melted and lightly browned in spots. To check, taste a piece of pasta to ensure it's al dente.
If it's still firm, cook for an additional 15-30 minutes. The internal temperature of the dish should reach at least 165°F (74°C) for food safety, though the pasta will typically be done before that.
Up next · Part 3 of 3
4 variations · storage & make-ahead · 5 answers · printable card
Tips, FAQ & printable recipe (Part 3)← Back to the ingredients (Part 1)