Dinner · Part 2 of 3: Instructions
Slow-Cooker Pepper Jack Rotel Jalapeño Chicken Thighs Step-by-step instructions
- Prep
- Cook
- Total
- Serves
- 6
Before you start
Before starting, measure out all ingredients and have them ready. The queso blanco dip should be warmed slightly so it pours easily, and the pepper jack cheese should be shredded.
No other prep is needed—just layer everything in the slow cooker and turn it on. This is a true 'dump and go' meal, perfect for busy days.
Ingredients at a glance (5)
- 6 boneless skinless chicken thighs
- 1 can (10 oz) fire-roasted diced tomatoes with green chiles
- 1/2 cup sliced pickled jalapeños
- 1 cup warm white queso blanco dip
- 1 cup shredded spicy pepper jack cheese
Instructions
Layer and Go
- Layer the IngredientsPlace the boneless skinless chicken thighs in the bottom of a 6-quart slow cooker in a single layer. Pour the fire-roasted diced tomatoes with green chiles over the chicken, spreading them evenly. Scatter the sliced pickled jalapeños over the tomatoes.Look for The chicken thighs should be mostly covered by the tomatoes and jalapeños.Tip No need to stir; the layers will meld during cooking.
- Add the CheesesPour the warm white queso blanco dip over the tomato mixture, then sprinkle the shredded spicy pepper jack cheese evenly over the top. Do not stir.Look for The top should be covered with queso and shredded cheese.Tip Warming the queso dip makes it easier to pour and helps it melt evenly.
At the end of this phase, the slow cooker contains raw chicken thighs topped with tomatoes, jalapeños, and a layer of queso and shredded cheese.
The ingredients should be evenly distributed, with the chicken in a single layer. The cheese is not yet melted, but the queso dip should be pourable and the shredded cheese evenly sprinkled.
Slow-Cook to Tender
- Slow-Cook the ChickenCover the slow cooker and cook on low for 4 hours, or until the chicken thighs are tender and cooked through. The sauce will be bubbling and the cheese will have melted into a creamy sauce.Look for The chicken should be fork-tender and easily shred; the sauce should be thick and bubbly.Safe temperature 165°F (74°C) internal temperature (poultry)Tip Avoid lifting the lid during cooking to keep the heat steady.
After 4 hours on low, the slow cooker should be bubbling gently, with a rich, spicy aroma filling the kitchen. The cheese will have melted into a creamy sauce, and the chicken should be fork-tender. The sauce will be slightly thick and cling to the chicken. Check that the chicken reaches 165°F (74°C) before proceeding.
Serve the Fiesta
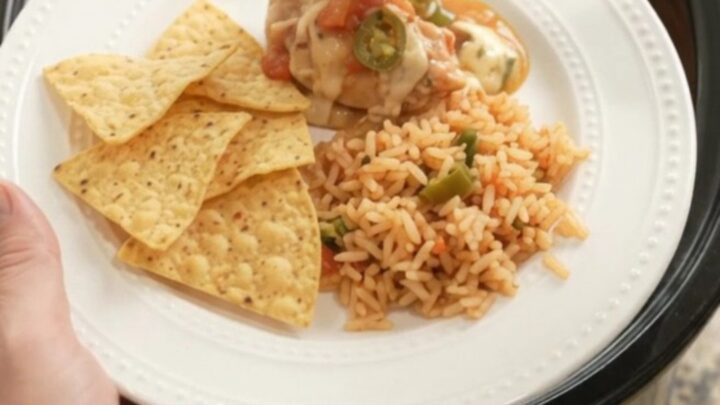
- Serve the ChickenOnce the chicken is cooked through, stir gently to coat with the sauce. Serve the chicken and sauce over Mexican rice or with tortilla chips, using a spoon to scoop the saucy chicken onto plates.Look for The chicken should be coated in a creamy, spicy sauce.Tip For a thicker sauce, let the slow cooker sit uncovered for 10 minutes before serving.
The final dish should be a bubbling pot of saucy, tender chicken. The sauce will be creamy and slightly spicy, with visible bits of tomato and jalapeño. The chicken should shred easily with a spoon. Serve immediately over rice or with chips, and enjoy the rich, cheesy sauce.
Common mistakes
A common mistake is lifting the lid too often to check on the food, which lets heat escape and slows cooking. Another is using chicken breasts instead of thighs, which can dry out.
Also, don't skip warming the queso dip—cold dip can cause the sauce to be lumpy. Finally, resist stirring during cooking; the layers will meld on their own.
How to tell it’s done
The chicken is done when it reaches an internal temperature of 165°F (74°C) and is fork-tender. The sauce should be bubbling and the cheese fully melted into a creamy, cohesive sauce.
If the sauce seems too thin, let the slow cooker cook uncovered for an additional 15-20 minutes to reduce it. The chicken should easily shred with a fork.
- Poultry: 165°F (74°C) in the thickest part
Up next · Part 3 of 3
4 variations · storage & make-ahead · 5 answers · printable card
Tips, FAQ & printable recipe (Part 3)← Back to the ingredients (Part 1)