Dinner · Part 2 of 3: Instructions
Slow-Cooker Parmesan Pepperoni Sausage Cavatappi Step-by-step instructions
- Prep
- Cook
- Total
- Serves
- 6
Before you start
Before you start, make sure your slow cooker is clean and ready. If you are using raw Italian sausage, you can brown it in a skillet for extra flavor, but it's not necessary—the slow cooker will cook it through.
Have all your ingredients measured and at hand: sliced pepperoni, sausage with casings removed, cavatappi pasta, garlic cream sauce, and the two types of cheese. You'll also need a large spoon for stirring and an instant-read thermometer to check the doneness of the sausage.
Ingredients at a glance (6)
- 6 oz thick-cut pepperoni, sliced
- 1 lb Italian sausage, casings removed
- 12 oz cavatappi pasta
- 3 cups garlic Parmesan cream sauce
- 2 cups shredded Italian four-cheese blend
- 1/2 cup freshly grated Parmigiano-Reggiano
Instructions
Layer and Sauce
- Layer the meat and pastaPlace the sliced pepperoni in the bottom of the slow cooker. Add the Italian sausage (casings removed) in an even layer. Pour the cavatappi pasta over the meat.Look for The bottom of the slow cooker is covered with meat and pasta.Tip If the sausage is in large chunks, break it up with your hands for even cooking.
- Add the saucePour the garlic Parmesan cream sauce over the pasta and meat, making sure the pasta is mostly submerged. Stir gently to combine.Look for The sauce covers the pasta and meat evenly.Tip Use a spatula to scrape all the sauce from the jar or bowl.
At the end of this phase, you'll have a colorful layering of pepperoni, sausage, cavatappi, and sauce in the slow cooker. The pasta is dry, and the sauce is poured over, creating a marbled effect.
The cheese is sprinkled on top, forming a white blanket. The aroma is already enticing—garlic and herbs from the sauce, with the savory scent of pepperoni. Before moving on, ensure the pasta is mostly submerged in the sauce to allow even cooking.
Slow Cook
- Top with cheeseSprinkle the shredded Italian four-cheese blend evenly over the top. Then add the freshly grated Parmigiano-Reggiano.Look for The top is covered with a layer of cheese.Tip Grate the Parmesan just before adding for the best flavor.
- Cook on lowCover the slow cooker and cook on low for 3 to 4 hours, until the pasta is tender and the sausage is cooked through. Do not lift the lid during cooking.Look for The sauce is bubbling at the edges and the cheese is melted.Safe temperature 160°F (71°C) internal temperature (ground meat)Tip Resist the urge to stir—keeping the lid on helps the pasta cook evenly.
After several hours on low, the slow cooker will be bubbling gently around the edges. The cheese has melted into a golden, bubbly crust, and the sauce has thickened and turned a rich, creamy color. The kitchen smells incredible—garlic, pepperoni, and Parmesan. The pasta should be tender when pierced with a fork, and the sausage should be cooked through. Check the sausage temperature with a thermometer; it should be at least 160°F (71°C).
Finish and Serve
- Stir and check temperatureAfter 3 hours, stir the pasta gently. Check that the sausage has reached an internal temperature of 160°F (71°C) using an instant-read thermometer. If not, continue cooking for another 30 minutes.Look for The sauce is creamy and the pasta is tender.Safe temperature 160°F (71°C) internal temperature (ground meat)Tip If the sauce seems too thick, add a splash of warm water or milk.
- Serve hotSpoon the pasta onto plates or into bowls. Serve immediately, with extra Parmesan on the side if desired.Look for The pasta is creamy and steaming.Tip Let the pasta rest for 5 minutes before serving to allow the sauce to thicken slightly.
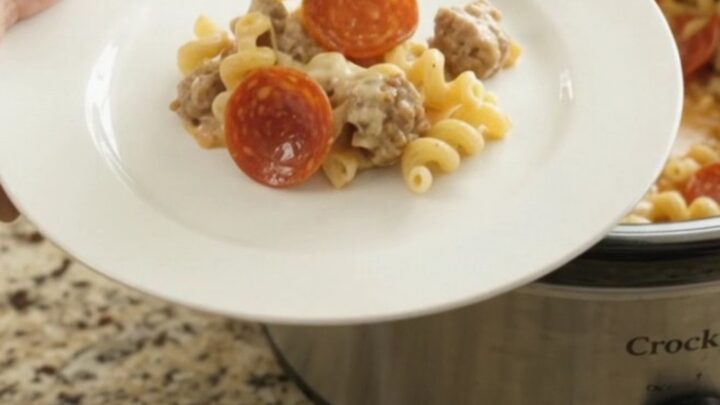
The final dish is a bubbling, cheesy, creamy pasta bake. The sauce is thick and coats each cavatappi perfectly. The pepperoni has curled slightly at the edges, and the sausage is browned and savory. The top is crusty with melted cheese, and when you scoop into it, you get a satisfying stretch. The dish is ready to be served immediately, with the cheese pulling in long strands. Let it rest for a few minutes to set slightly before plating.
Common mistakes
One common mistake is lifting the lid too often to check on the pasta. Each time you open the slow cooker, heat escapes, which can increase cooking time. Another mistake is adding too much liquid—remember that the pasta will release some starch, thickening the sauce.
If you add extra broth or water, you might end up with a soupy consistency. Finally, resist the urge to stir too frequently; stirring can break the pasta and make it mushy. Let the slow cooker do its job, and you'll be rewarded with perfect texture.
How to tell it’s done
The dish is done when the pasta is tender but still has a slight bite (al dente), and the sauce is thick and creamy. The cheese should be fully melted and bubbly. To ensure the sausage is safe to eat, insert an instant-read thermometer into a few pieces of the sausage; it should read at least 160°F (71°C).
If the pasta is still hard, continue cooking for another 15-30 minutes, checking again. Once done, let the dish rest for a few minutes before serving to allow the sauce to thicken.
- Ground meat: 160°F (71°C) in the thickest part
Up next · Part 3 of 3
4 variations · storage & make-ahead · 5 answers · printable card
Tips, FAQ & printable recipe (Part 3)← Back to the ingredients (Part 1)