Dinner · Part 2 of 3: Instructions
Slow-Cooker Oaxaca Queso Taco Pinto Chicken Thighs Step-by-step instructions
- Prep
- Cook
- Total
- Serves
- 6
Before you start
Before you start, drain and rinse the pinto beans to remove excess sodium and any canning liquid. Shred the Oaxaca cheese and measure the Mexican cheese blend so they're ready to sprinkle. Have the salsa and taco seasoning measured and within reach.
The slow cooker should be clean and ready. You'll need a 6-quart slow cooker, a measuring cup, measuring spoons, and a spoon for spreading the salsa. If you plan to serve over rice, start the rice before you begin layering so it's ready when the chicken is done.
Ingredients at a glance (6)
- 2 lb boneless skinless chicken thighs
- 2 tbsp taco seasoning mix
- 1 can (15 oz) pinto beans, drained and rinsed
- 1 1/2 cups chunky salsa
- 8 oz Oaxaca cheese, shredded
- 8 oz Mexican four-cheese blend, shredded
Instructions
Layer and Top
- Layer the Chicken and SeasoningsPlace the chicken thighs in the bottom of a 6-quart slow cooker in a single layer. Sprinkle the taco seasoning evenly over the chicken. Spoon the drained pinto beans over the top, then pour the salsa over everything, spreading it into an even layer.Look for The chicken is covered with seasoning, beans, and salsa.Tip No need to stir – the layers will meld as they cook.
- Top with CheeseSprinkle the shredded Oaxaca cheese and Mexican four-cheese blend evenly over the top of the salsa layer. Cover the slow cooker with the lid.Look for The cheese forms a full blanket over the top.Tip Use a mix of cheeses for a gooey, stretchy topping.
The slow cooker insert holds the chicken in a single layer, covered with taco seasoning, pinto beans, salsa, and a thick layer of shredded cheese. The colors are vibrant: the red salsa, the cream and orange cheeses, and the dark beans. The aroma is fresh and spicy. Everything is ready for the lid to go on and the slow cooker to do its work.
Slow-Cook and Shred
- Slow-Cook on LowCook on low for 4 hours, or until the chicken is tender and easily shreds with a fork. The cheese will melt and blister in spots, and the sauce will be thick and bubbling.Look for The edges of the cheese are blistered and the sauce bubbles gently.Safe temperature 165°F (74°C) internal temperature (poultry)Tip Resist lifting the lid – each peek adds 20 minutes of cook time.
- Check the Chicken TemperatureAfter 4 hours, check the internal temperature of the thickest chicken thigh with an instant-read thermometer. It must read at least 165°F (74°C). If not, continue cooking in 30-minute increments until it does.Look for Thermometer reads 165°F (74°C) or higher.Safe temperature 165°F (74°C) internal temperature (poultry)Tip If the chicken isn't done, cover and cook longer – it will get there.
- Shred the ChickenUsing two forks, shred the chicken thighs directly in the slow cooker, mixing them into the salsa-bean sauce. The meat should pull apart easily. Leave some chunks for texture if desired.Look for The chicken shreds easily and is coated in the sauce.Tip Shred gently to keep the meat moist and tender.
After 4 hours on low, the slow cooker is bubbling gently around the edges. The cheese has melted into a blistered, golden blanket with some crispy spots.
The sauce is thick and fragrant with cumin, chili, and tomato. The chicken is fork-tender and reaches 165°F (74°C). Shredding it into the sauce creates a rich, chunky mixture that's ready to serve.
Serve and Enjoy
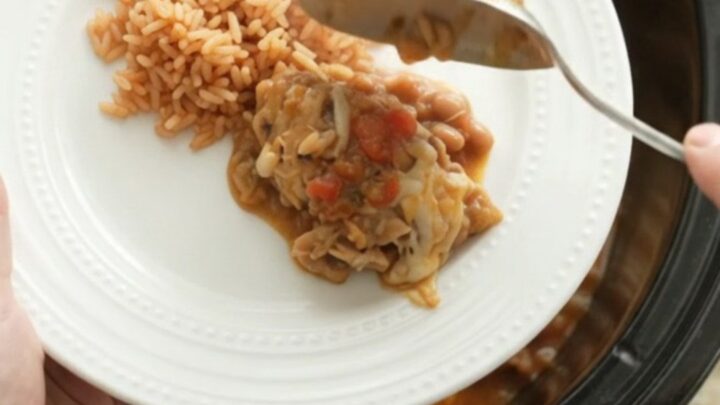
- Serve Over RiceSpoon the steaming chicken mixture over warm Spanish rice on plates. Use a slotted spoon to control the amount of sauce. Serve hot, with extra cheese or salsa on the side if desired.Look for The chicken is piled over rice, with sauce and melted cheese.Tip Warm the rice before serving so the dish stays hot.
The shredded chicken mixture is piled over steaming Spanish rice, with the sauce and melted cheese clinging to every bite. The plate is colorful and inviting, with the golden cheese, the red-tinted sauce, and the white rice. The dish is hot and aromatic, ready to be devoured. The final touch is a satisfied sigh as you take the first bite.
Common mistakes
One common mistake is lifting the lid too often to check on the food, which releases heat and extends the cooking time. Try to resist the urge – trust the slow cooker. Another mistake is using salsa that is too watery, which can make the final dish thin.
Look for a chunky, thick salsa. Overcooking can also be an issue, especially if you use chicken breasts – they can become dry and stringy. Stick to thighs for the most forgiving result. Finally, don't skip the cheese topping – it's what makes this dish special.
How to tell it’s done
The chicken is done when it reaches an internal temperature of 165°F (74°C) measured with an instant-read thermometer inserted into the thickest part of a thigh. The meat should shred easily with a fork, and the sauce should be thick and bubbling around the edges.
The cheese on top should be fully melted, with some blistered spots and a golden-brown color. The dish should be fragrant with salsa and spices, and the beans should be tender. If the sauce seems too thin, you can let it simmer uncovered for an additional 15–20 minutes to reduce.
- Poultry: 165°F (74°C) in the thickest part
Up next · Part 3 of 3
4 variations · storage & make-ahead · 5 answers · printable card
Tips, FAQ & printable recipe (Part 3)← Back to the ingredients (Part 1)