Dinner · Part 2 of 3: Instructions
Slow-Cooker Mango Teriyaki Chicken Drumsticks Step-by-step instructions
- Prep
- Cook
- Total
- Serves
- 4
Before you start
Before you start, make sure the chicken drumsticks are thawed if they were frozen. Pat them dry with paper towels—this helps the glaze cling better. Measure out the mango cubes and dice the red bell pepper.
If using a store-bought teriyaki glaze, give the bottle a good shake. Have your slow cooker ready, and if you're serving with rice, start it before you begin layering the ingredients so everything is ready at the same time.
Ingredients at a glance (5)
- 8 chicken drumsticks
- 2 cups ripe mango cubes
- 1 large red bell pepper, diced
- 1/2 cup teriyaki glaze
- 1 tbsp toasted sesame seeds
Instructions
Layer and Cook
- Layer the IngredientsArrange the chicken drumsticks in a single layer in the bottom of the slow cooker, forming a circle. Scatter the mango cubes and diced red bell pepper evenly over the chicken. Pour the teriyaki glaze over everything, then sprinkle with the toasted sesame seeds.Look for The drumsticks should be nestled together with mango and peppers filling the gaps.Tip No need to stir; the layers will meld as they cook.
- Cover and CookCover the slow cooker with the lid and cook on LOW for 4 to 5 hours, or on HIGH for 2 1/2 to 3 hours, until the chicken is tender and cooked through.Look for The sauce will be bubbling gently and the chicken will be pulling away from the bone.Safe temperature 165°F (74°C) internal temperature (poultry)Tip Avoid lifting the lid during cooking to keep the heat steady.
You should see the raw chicken nestled with mango and pepper, all coated in a shiny teriyaki glaze. The slow cooker is full but not overflowing.
As it cooks, you'll smell the sweet, savory aroma building. After the time is up, the chicken should be tender and the sauce bubbling.
Verify Temperature
- Check for DonenessAfter the cooking time, check that the chicken has reached an internal temperature of 165°F (74°C) in the thickest part, away from the bone. The meat should be very tender and starting to fall off the bone.Look for A fork should twist easily in the thickest part of a drumstick.Tip If not quite done, return the lid and cook for another 30 minutes.
The glaze is now a rich caramel-brown, and the chicken is glistening. A meat thermometer inserted into the thickest part reads 165°F (74°C). The meat is pulling away from the bone, and the mango pieces are soft and translucent.
Serve
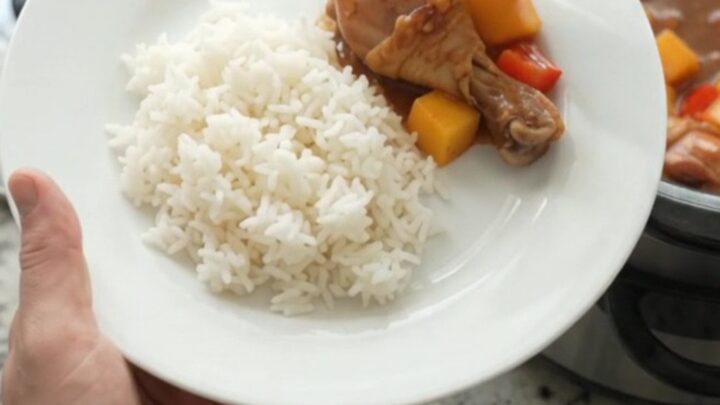
- Serve Over RiceSpoon steamed jasmine rice onto a serving plate. Use a slotted spoon to lift the chicken, mango, and peppers from the slow cooker and arrange them over the rice. Spoon some of the glaze over the top.Look for The glaze should be thick and sticky, coating the chicken and fruit.Tip For extra glaze, simmer the juices in a saucepan for a few minutes to reduce.
The chicken and fruit are piled over steamed rice, with extra glaze spooned on top. The dish looks vibrant and appetizing, with the sesame seeds adding a nutty finish. The chicken is so tender it falls apart at the touch of a fork.
Common mistakes
One common mistake is lifting the lid too often to check on the chicken. Every time the lid is lifted, heat escapes and adds to the cooking time. Trust the recipe and keep the lid on.
Another pitfall is using too much liquid—the chicken and mango release plenty of juices, so resist the urge to add extra broth or water. Finally, don't skip the check for doneness; slow cookers vary, and undercooked chicken is unsafe.
How to tell it’s done
The chicken is done when it reaches an internal temperature of 165°F (74°C) in the thickest part, away from the bone. The meat should be very tender and easily pull away from the bone with a fork.
The sauce should be bubbling and slightly thickened, and the mango pieces should be soft but still intact. If you prefer a thicker glaze, transfer the sauce to a saucepan and simmer for a few minutes to reduce.
- Poultry: 165°F (74°C) in the thickest part
Up next · Part 3 of 3
4 variations · storage & make-ahead · 5 answers · printable card
Tips, FAQ & printable recipe (Part 3)← Back to the ingredients (Part 1)