Dinner · Part 1 of 3: Ingredients
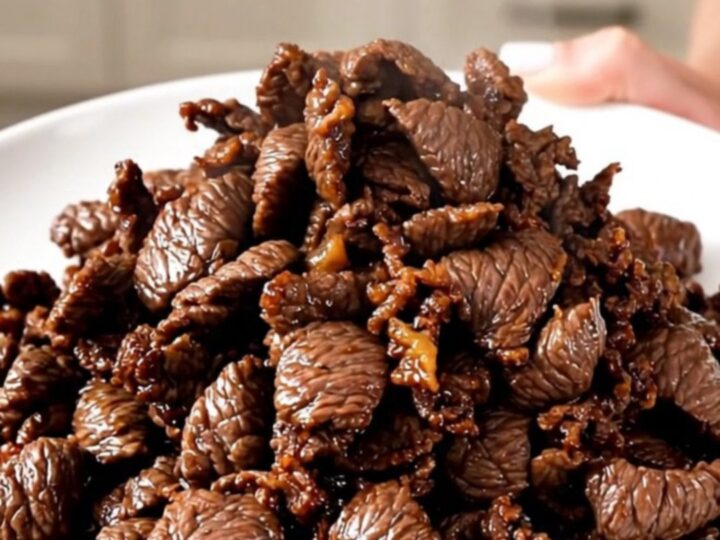
Slow Cooker Korean Beef Bulgogi for an Easy Weeknight Dinner
- Prep
- Cook
- Total
- Serves
- 4
Transform humble beef chuck roast into a succulent, sweet, and savory Korean-inspired feast using only a slow cooker. This method simplifies the traditional bulgogi preparation, making it an ideal choice for busy households seeking a comforting, flavor-packed meal without standing over a hot stove for hours.
The slow cooking process tenderizes the meat perfectly while allowing the soy and garlic base to infuse every fiber with bold, authentic flavor.
Korean beef bulgogi is traditionally known for its thinly sliced, marinated meat that is seared quickly. This slow-cooked adaptation captures those same iconic flavors by braising the beef in a balanced mixture of soy sauce, brown sugar, and aromatic garlic.
The result is a deeply savory, slightly sweet dish with a glossy finish that pairs beautifully with steamed white rice or fresh lettuce wraps. By utilizing the slow cooker, the connective tissue in the chuck roast breaks down, resulting in incredibly tender meat that practically melts in the mouth, providing a stress-free dinner solution for any night of the week.
Ingredients
Main Ingredients
- 1 lb beef chuck roast, thinly sliced
- 1 medium yellow onion, sliced
Sauce
- 1 tbsp minced garlic
- 1/3 cup brown sugar
- 3/4 cup soy sauce
Why this recipe works
The slow cooker method is highly effective for this dish because it maintains a gentle, consistent heat that allows the tougher chuck roast to become fork-tender. Unlike high-heat searing, which can sometimes result in chewy meat if not handled perfectly, the long, moist cooking environment ensures that the beef absorbs the savory-sweet marinade completely, creating a succulent texture that is difficult to achieve otherwise.
Additionally, the slow cooker acts as a hands-off vessel that eliminates the need for constant monitoring. By layering the ingredients and letting them simmer together, the flavors of the garlic and soy sauce permeate the beef and onions simultaneously. This approach not only saves time but also ensures that the final result is consistent, flavorful, and incredibly easy to prepare for a satisfying family dinner.
Notes and substitutions
For the best results, use a well-marbled beef chuck roast. The fat content in this cut is essential for the slow cooking process, as it keeps the meat moist and flavorful. If the beef is too lean, it may dry out during the extended cooking time.
Aim for thin, uniform slices to ensure they cook evenly. If your grocery store does not offer thinly sliced chuck roast, you can slice a whole roast yourself by placing it in the freezer for about 30 minutes to firm it up, making it much easier to achieve thin, consistent slices.
Equipment-wise, a standard oval or round slow cooker works perfectly. Ensure the lid fits securely to trap moisture, which is vital for the braising process. While the recipe calls for basic soy sauce, using a high-quality, naturally brewed variety can enhance the depth of flavor.
If you prefer a more intense garlic profile, feel free to increase the amount slightly, as the slow cooking process mellows the garlic significantly over time.
- beef chuck roast: boneless ribeye or sirloin, thinly sliced against the grain for a similar tender texture
- brown sugar: coconut sugar or honey for a slightly different depth of flavor
Equipment
- slow cooker
- glass measuring cup
- knife
- cutting board
Up next · Part 2 of 3
3 steps · 4 h of cooking · what to look for at each stage
Step-by-step instructions (Part 2)