Dinner · Part 2 of 3: Instructions
Slow Cooker Honey Walnut Roasted Butternut Squash Step-by-step instructions
- Prep
- Cook
- Total
- Serves
- 4
Before you start
Before starting, ensure the butternut squash is peeled and cut into uniform one-inch cubes to guarantee consistent cooking. Have all ingredients measured and ready to add to the slow cooker insert. Clean the countertop area where you will be working to keep the workspace organized.
Check the slow cooker insert to ensure it is clean and dry before adding any ingredients. Having everything prepped in advance makes the assembly process seamless and quick, allowing the slow cooker to do all the heavy lifting once the ingredients are layered inside.
Ingredients at a glance (4)
- 2 lbs butternut squash, peeled and cubed
- 1/2 cup walnut halves
- 1 tsp ground cinnamon
- 3 tbsp honey
Instructions
Layering the ingredients
- Prepare the slow cookerPlace the cubed butternut squash into the bottom of the slow cooker insert. Ensure the cubes are distributed evenly to allow for uniform cooking throughout the process.Look for Even layer of squash cubesTip Peel the squash thoroughly to remove all tough, waxy skin.
The ingredients should be neatly arranged in the slow cooker with the squash at the base. Ensure the honey is drizzled over the top to allow it to melt down through the layers as the temperature rises. Everything should look prepared and ready for the slow, steady cooking process.
Infusing the flavors
- Add flavorings and aromaticsScatter the walnut halves over the squash cubes. Sprinkle the ground cinnamon evenly over the mixture, then drizzle the honey over the top to coat the ingredients effectively.Look for Honey drizzled across the surfaceTip Use a light hand when sprinkling cinnamon to avoid overpowering the natural sweetness.
During this phase, the cinnamon and honey begin to interact with the natural juices released by the squash. The kitchen will start to smell faintly of warm spices. The walnuts will begin to absorb the moisture and honey, preparing them to become a delicious, glazed component of the finished dish.
Final glaze development
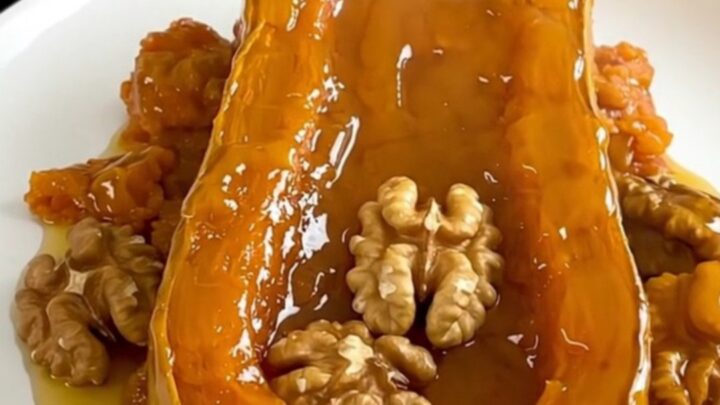
- Cook and serveCover the slow cooker and cook on low for 4 hours until the squash is fork-tender and the honey has created a glossy glaze. Serve immediately on a warm plate.Look for Squash is tender and glossyTip Check for tenderness by piercing a cube with a fork.
In the final stage, the glaze will thicken and become more concentrated. The squash should look glossy and vibrant. Check to ensure the edges of the squash are tender. Once the desired level of tenderness is reached, the dish is ready to be plated and served immediately.
Common mistakes
A common mistake is cutting the squash into pieces that are too small, which can cause them to turn into mush during the long cooking time.
Aim for uniform one-inch cubes for the best results. Another potential issue is overloading the slow cooker; ensure there is enough space for the heat to circulate properly around the squash.
Avoid lifting the lid frequently during the cooking process, as this releases heat and moisture, which can significantly increase the total cooking time and affect the final texture of the glaze.
How to tell it’s done
The squash is perfectly cooked when it is tender enough to be easily pierced with a fork without falling apart entirely. The honey and cinnamon should have formed a thick, glossy glaze that coats the squash pieces and the walnuts.
The walnuts should be softened but still offer a distinct, pleasant crunch when bitten. If the squash still feels firm, continue cooking for an additional thirty minutes until the desired texture is achieved. The final dish should be aromatic, with a deep golden hue and a sweet, savory scent that fills the kitchen.
Up next · Part 3 of 3
2 variations · storage & make-ahead · 3 answers · printable card
Tips, FAQ & printable recipe (Part 3)← Back to the ingredients (Part 1)