Dinner · Part 2 of 3: Instructions
Slow Cooker Grandma-Style Veal Tendrons with Savory Bacon Step-by-step instructions
- Prep
- Cook
- Total
- Serves
- 4
Before you start
Before beginning, ensure that all ingredients are prepared and ready for the slow cooker. Peel the pearl onions thoroughly and slice the carrots into consistent rounds so they cook at the same rate. If using bacon lardons, ensure they are cut into small, uniform pieces.
Take the veal out of the refrigerator about 20 minutes before starting to take the chill off, which helps the meat cook more evenly. Verify that your slow cooker basin is clean and dry before adding the ingredients to ensure a consistent cooking environment.
Ingredients at a glance (6)
- 2 lb veal tendrons
- 6 oz bacon lardons
- 1 cup pearl onions, peeled
- 2 cups carrots, sliced
- 1 tsp dried thyme
- 2 cups chicken broth
Instructions
Assembling the slow cooker
- Assemble the basePlace the veal tendrons at the bottom of the slow cooker basin. Arrange the bacon lardons, peeled pearl onions, and sliced carrots evenly over the meat to ensure balanced flavor distribution throughout the cooking process.Look for Ingredients should be layered compactly for even heat distribution.Tip Ensure the slow cooker is placed on a heat-resistant surface.
The ingredients should be layered neatly in the bottom of the slow cooker, creating a stable base for the liquid. The veal is at the bottom, topped with a colorful arrangement of bacon, onions, and carrots, ready to absorb the flavors during the long, slow cook.
Seasoning and liquid
- Season and liquidSprinkle the dried thyme across the surface of the ingredients. Pour the chicken broth over the top, ensuring it reaches the bottom edges to facilitate gentle poaching of the meat and vegetables during the long cook time.Look for The liquid should partially submerge the ingredients.Tip Use high-quality low-sodium broth to control final seasoning.
The dried thyme is evenly distributed, and the chicken broth has been poured in to create the base of the braising liquid. The slow cooker is covered, and the environment is now set to begin the transformation of the meat and vegetables into a tender, savory meal.
Slow cooking and resting
- Slow cook and serveCover and cook on low for 8 hours until the veal reaches an internal temperature of 145°F (63°C). Once finished, allow the meat to rest for at least 3 minutes before serving the tender veal and savory sauce on warm plates.Look for The meat is fork-tender and pulls away from connective tissue easily.Safe temperature 145°F (63°C) internal temperature (steaks, chops and roasts)Tip Check internal temperature with a meat thermometer.
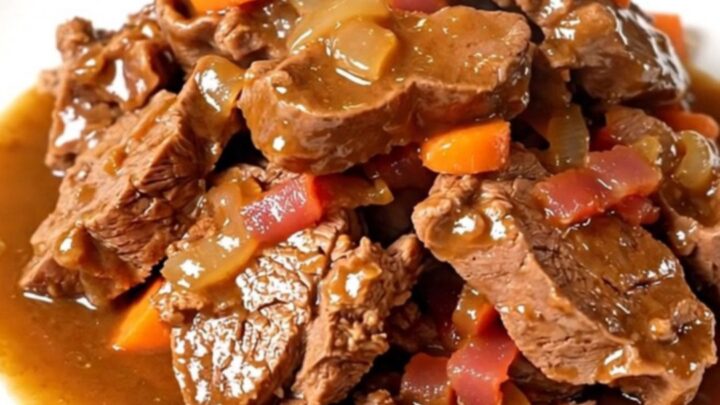
After 8 hours, the kitchen should smell rich and savory. The veal is tender, the vegetables are soft, and the sauce has developed a glossy, cohesive appearance. Check the internal temperature, ensure it is 145°F (63°C), and let the meat rest before plating.
Common mistakes
A common mistake is overcrowding the slow cooker, which prevents the heat from circulating properly and can lead to uneven cooking. Ensure there is enough space for the broth to move around the ingredients.
Another error is checking the temperature too early; since this is a slow-cooking method, the meat needs the full time to become truly tender.
Avoid using a broth that is too salty, as the bacon will contribute significant saltiness as it renders over the long cooking period, potentially unbalancing the final flavor profile.
How to tell it’s done
The veal is done when it reaches an internal temperature of 145°F (63°C) and is fork-tender. The meat should offer almost no resistance when pierced with a fork, and the sauce should be glossy and slightly thickened from the rendering of the bacon fat and the juices released by the meat.
Always use a meat thermometer inserted into the thickest part of the veal to ensure safety. Allow the meat to rest for at least 3 minutes before serving to ensure the juices redistribute.
- Steaks, chops and roasts: 145°F (63°C) in the thickest part, then a 3-minute rest
Up next · Part 3 of 3
2 variations · storage & make-ahead · 3 answers · printable card
Tips, FAQ & printable recipe (Part 3)← Back to the ingredients (Part 1)