Dinner · Part 2 of 3: Instructions
Slow-Cooker Garlic Butter Chuck Roast Step-by-step instructions
- Prep
- Cook
- Total
- Serves
- 6
Before you start
Before you start, make sure you have a 6-quart slow cooker and a cutting board. Smash the garlic cloves by placing the flat side of a chef's knife over each clove and pressing down firmly. Rinse the fresh rosemary and thyme sprigs and pat them dry.
If using a store-bought compound butter, take it out of the refrigerator to soften slightly so it's easier to slice into medallions. If making your own, prepare it ahead of time and chill it until firm.
Ingredients at a glance (6)
- 3 1/2 lb beef chuck roast
- 12 garlic cloves, smashed
- 4 sprigs fresh rosemary
- 6 sprigs fresh thyme
- 4 oz garlic-herb compound cowboy butter, cut into medallions
- 12 oz buttered egg noodles, for serving
Instructions
Layer and Top
- Layer the Roast and AromaticsPlace the beef chuck roast in the center of a 6-quart slow cooker insert. Scatter the smashed garlic cloves, rosemary sprigs, and thyme sprigs evenly over the top of the roast.Look for The roast sits snugly in the slow cooker with herbs and garlic scattered across the surface.Tip Smashing the garlic cloves releases their flavor without the need to mince.
- Add the Cowboy ButterArrange the medallions of garlic-herb compound cowboy butter on top of the roast, spacing them evenly so they melt over the meat as it cooks.Look for The butter medallions sit on the roast, ready to melt into the meat during cooking.Tip If the butter is very cold, let it sit at room temperature for a few minutes to make it easier to slice.
At the end of this phase, the chuck roast sits in the slow cooker with smashed garlic cloves and fresh herb sprigs scattered across the top. The medallions of cowboy butter are arranged evenly over the surface. The raw beef should be at room temperature for no more than 30 minutes before cooking. The scene is set for a long, slow simmer.
Slow-Cook and Shred
- Slow-Cook the RoastCover the slow cooker and cook on LOW for 8 to 10 hours, or on HIGH for 4 to 5 hours, until the beef is fork-tender and easily shreds apart. Let it rest for 3 minutes before slicing.Look for The roast is bubbling gently and the meat pulls apart with a fork.Safe temperature 145°F (63°C) internal temperature (steaks, chops and roasts)Tip Do not lift the lid during cooking — each peek adds 20 minutes to the cooking time.
- Shred the BeefOnce the roast is fully tender, transfer it to a cutting board. Use two forks to shred the beef into bite-sized pieces, discarding any large pieces of fat. Return the shredded beef to the slow cooker and stir it into the garlic-herb butter gravy.Look for The beef shreds easily and is coated in a rich, buttery gravy.Tip For extra flavor, let the shredded beef sit in the gravy for 10 minutes before serving.
- Rest the MeatLet the shredded beef rest in the warm slow cooker for at least 10 minutes before serving. This allows the juices to redistribute and the flavors to meld.Look for The beef is moist and tender, and the gravy has thickened slightly.Tip Resting the meat is essential for maximum tenderness.
After hours of slow cooking, the kitchen smells richly of garlic, rosemary, and thyme. The beef is fork-tender and shreds easily, and the liquid has transformed into a golden, buttery gravy.
The garlic cloves are soft and sweet, and the herbs have infused the sauce. The shredded beef is returned to the gravy and allowed to rest before serving.
Serve and Enjoy
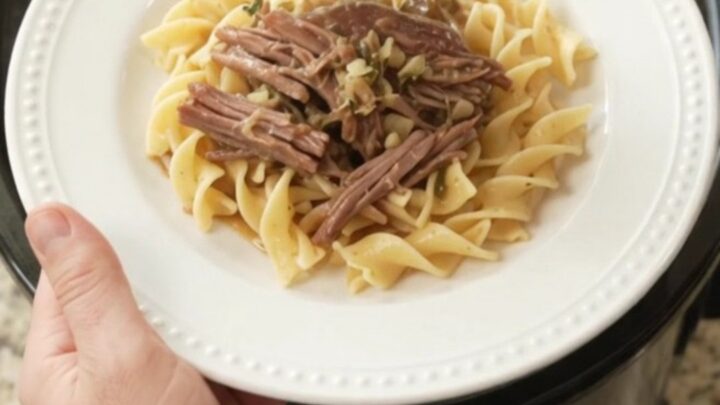
- Serve Over NoodlesPlace a generous portion of warm buttered egg noodles on each plate. Spoon the shredded beef and garlic-herb butter gravy over the noodles, making sure to include some of the roasted garlic cloves and herb sprigs.Look for The beef is piled high on the noodles, with gravy soaking into every bite.Tip For a low-carb option, serve the roast over cauliflower mash instead of noodles.
The final phase is all about serving. Warm buttered egg noodles are piled onto plates, and the shredded beef is spooned generously over the top. The gravy soaks into the noodles, and the roasted garlic cloves are scattered throughout. The dish looks rustic and inviting, with steam rising and the rich aroma of garlic and herbs filling the air.
Common mistakes
One common mistake is lifting the lid to check on the roast too often. Each time you open the slow cooker, heat escapes and adds 20 to 30 minutes to the cooking time. Another mistake is skipping the rest period after shredding — letting the meat sit in the gravy for a few minutes allows it to soak up more flavor and stay moist.
Finally, don't skip the garlic and herbs; they are essential for building the gravy's flavor. If you're short on time, you can use dried herbs, but fresh ones give a much brighter taste.
How to tell it’s done
The roast is done when it is fork-tender: insert a fork into the thickest part of the meat, and it should twist easily with no resistance.
The internal temperature should read at least 145°F (63°C) when measured with an instant-read thermometer, but for the most tender result, cook it until it reaches 195°F to 205°F (91°C to 96°C) — this allows the collagen to fully break down. Let the meat rest for at least 3 minutes before shredding to allow the juices to redistribute.
- Steaks, chops and roasts: 145°F (63°C) in the thickest part, then a 3-minute rest
Up next · Part 3 of 3
4 variations · storage & make-ahead · 5 answers · printable card
Tips, FAQ & printable recipe (Part 3)← Back to the ingredients (Part 1)