Appetizers · Part 2 of 3: Instructions
Crockpot Fried Pickle Ranch Dip with Bacon and Cheddar Step-by-step instructions
- Prep
- Cook
- Total
- Serves
- 12
Before you start
Before starting, dice the dill pickles finely and set aside. Soften the cream cheese by leaving it at room temperature for about 30 minutes. Shred the white cheddar cheese if not pre-shredded. Cook the bacon until crispy, then crumble it into small pieces.
Measure out the sour cream and ranch seasoning. Have the slow cooker insert ready. For the topping, melt the butter in a small skillet and toast the panko breadcrumbs until golden, then chop the fresh dill. Keep all ingredients within reach for easy assembly.
Ingredients at a glance (9)
- 2 cups finely diced kosher dill pickles
- 16 oz cream cheese, softened
- 2 1/2 cups shredded white cheddar cheese
- 1 cup sour cream
- 1 packet ranch seasoning mix
- 1 cup crispy cooked bacon, crumbled
- 1/2 cup panko breadcrumbs
- 1 tbsp butter, melted
- 2 tbsp fresh chopped dill
Instructions
Mix the Dip Base
- Combine the Dip BaseIn the insert of a slow cooker, combine the finely diced dill pickles, softened cream cheese, shredded white cheddar, sour cream, ranch seasoning mix, and crumbled bacon. Stir until the mixture is well combined and evenly distributed.Look for The mixture should look chunky and well mixed, with no large streaks of cream cheese.Tip Soften the cream cheese beforehand so it blends smoothly without lumps.
- Transfer to Slow CookerSpoon the combined mixture into the ceramic insert of the slow cooker. Spread it into an even layer so it melts and bubbles uniformly.Look for The surface should be relatively level for even cooking.Tip Use a spatula to scrape every bit of the mixture into the cooker.
After combining all the ingredients in the slow cooker insert, the mixture should look chunky but well blended, with the cream cheese softened and spread throughout.
The pickles, bacon, and cheese should be evenly distributed, and there should be no large lumps of cream cheese. The mixture will not be smooth at this stage, but it should be cohesive enough to hold together when scooped.
Slow-Cook Until Bubbling
- Slow-Cook on LowCover the slow cooker and cook on LOW for 90 minutes, until the dip is bubbling around the edges and the cheese is fully melted. Stir once halfway through if possible.Look for The dip will turn smooth and creamy, with small bubbles breaking the surface.Tip Avoid lifting the lid too often; it releases heat and extends cooking time.
- Toast the PankoWhile the dip cooks, melt the butter in a small skillet over medium heat. Add the panko breadcrumbs and stir constantly for 2 to 3 minutes, until golden and fragrant. Remove from heat and set aside.Look for The panko should be evenly golden brown and smell nutty.Tip Keep stirring so the crumbs toast evenly without burning.
- Check the DipAfter 90 minutes, check that the dip is hot and bubbling. Stir gently to ensure the cheese is fully melted and the mixture is smooth.Look for The dip should be thick, creamy, and steaming, with no visible lumps of cream cheese.Tip If the dip seems too thick, stir in a splash of milk or reserved pickle juice.
After 90 minutes on low, the dip should be bubbling around the edges and the surface should look glossy and smooth. The cheese should be fully melted, and the dip should have thickened to a creamy, spoonable consistency. The aroma of dill, ranch, and bacon will fill the kitchen. Stir gently to check that the texture is even, then proceed to the topping.
Crown and Serve
- Crown with Toasted PankoSprinkle the toasted panko breadcrumbs evenly over the top of the hot dip. Then scatter the fresh chopped dill over the panko.Look for The topping should cover the surface with a crunchy, herby layer.Tip Add the panko right before serving to keep it crisp.
- Serve WarmServe the dip straight from the slow cooker on the warm or low setting, with wavy potato chips or crinkle-cut pickles for dipping.Look for The dip should be bubbling and creamy, with a golden crunchy top.Tip Keep the slow cooker on warm to maintain the perfect dipping consistency.
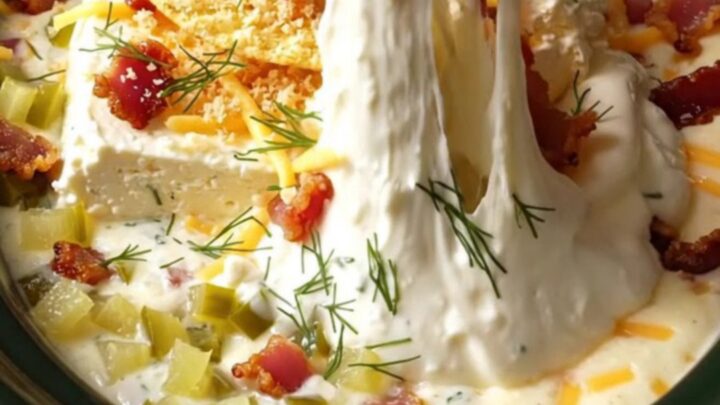
Once the toasted panko and fresh dill are sprinkled over the top, the dip should look inviting with a golden, crunchy crust and bright green herbs. The dip underneath should still be hot and bubbling. When scooped with a chip, the topping should cling to the creamy dip, providing a satisfying contrast of textures. Serve immediately for the best crunch.
Common mistakes
One common mistake is using pre-shredded cheese, which often contains anti-caking agents that can make the dip grainy. Shredding the cheddar yourself ensures a smooth melt. Another mistake is overcooking the dip on high, which can cause the dairy to separate and become oily.
Stick to the low setting and the recommended time. Also, be careful not to overmix the dip once it is hot, as vigorous stirring can break down the cheese emulsion. Finally, add the panko topping only at the end so it stays crisp.
How to tell it’s done
The dip is done when it is hot, bubbling gently around the edges, and the cheese is fully melted and smooth. The texture should be thick and creamy, not watery or greasy.
If you stir it and it seems too thin, cook for an additional 10 to 15 minutes. The panko topping should be golden and crisp, and the fresh dill should be bright green. Serve immediately while the dip is warm and the topping is crunchy.
Up next · Part 3 of 3
4 variations · storage & make-ahead · 5 answers · printable card
Tips, FAQ & printable recipe (Part 3)← Back to the ingredients (Part 1)