Dinner · Part 2 of 3: Instructions
Slow Cooker Creamy Tomato Chicken Penne Step-by-step instructions
- Prep
- Cook
- Total
- Serves
- 4
Before you start
Before starting, ensure the work surface is clean and all ingredients are measured and ready. Cut the chicken into consistent 1-inch pieces to ensure even cooking throughout the process.
Prepare the slow cooker by positioning it near an outlet, ensuring the cord is clear of any water or heat sources. Having all components ready allows for a smooth assembly process, which is the key to achieving the best results with this one-pot method.
Ingredients at a glance (5)
- 1 lb boneless skinless chicken breasts, cut into bite-sized pieces
- 12 oz penne pasta, uncooked
- 1 tbsp garlic powder
- 1 tbsp dried basil
- 2 cups tomato coulis
Instructions
Layering the ingredients
- Assemble the ingredientsPlace the cut chicken pieces into the bottom of the slow cooker. Scatter the uncooked penne pasta evenly over the chicken layer.Look for ensure chicken is evenly distributedTip keeping the chicken at the bottom allows it to cook more effectively in the juices.
At this stage, the slow cooker contains the raw chicken at the base, topped with the dry penne. The ingredients should be arranged in a neat, even layer to ensure they heat uniformly. Ensure the chicken is completely covered by the pasta to facilitate better cooking, and keep the cooking area tidy by wiping up any stray sauce or herbs immediately after they are added.
Seasoning and saucing
- Season and sauceSprinkle the garlic powder and dried basil over the pasta and chicken. Pour the tomato coulis over all ingredients, ensuring the pasta is mostly submerged.Look for evenly coat the ingredientsTip do not stir yet, as the layers will meld during the slow cooking process.
The garlic, basil, and tomato coulis have been added over the pasta. The tomato coulis should be poured evenly to ensure all pasta is covered, as this liquid is what hydrates the noodles during the cooking cycle. Check that the herbs are distributed across the surface and refrain from stirring, allowing the ingredients to settle into their respective positions before the lid is closed.
Cooking to perfection
- Cook and serveCover and cook on low for 4 hours. Once the chicken reaches an internal temperature of 165°F (74°C) and the pasta is tender, stir the mixture to combine the sauce, then serve immediately.Look for pasta is al dente and sauce is glossySafe temperature 165°F (74°C) internal temperature (poultry)Tip let the dish rest for 5 minutes before serving to allow the sauce to thicken slightly.
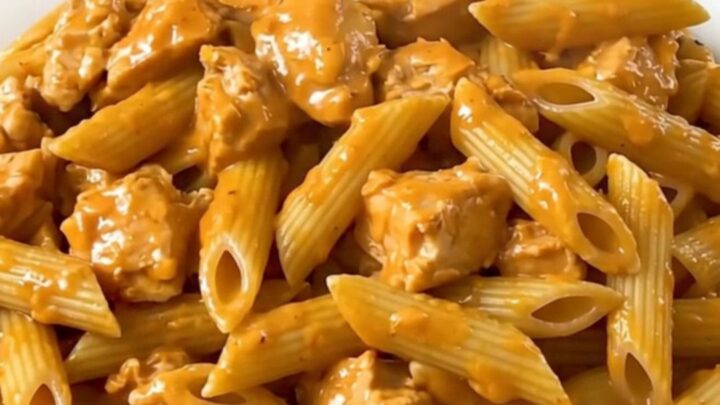
The slow cooker has finished its cycle and the kitchen smells of fragrant herbs and savory tomato. The sauce should be thick and glossy, clinging to the tender chicken and perfectly cooked penne.
Before serving, give the mixture a thorough stir to combine the bottom juices with the top pasta, ensuring every bite is flavorful and the sauce is perfectly distributed across the entire dish.
Common mistakes
A common mistake is overcooking the pasta, which can lead to a mushy texture. Avoid this by adhering strictly to the suggested cooking time and checking the pasta firmness early.
Another potential issue is crowding the slow cooker too much; ensure there is enough room for the sauce to circulate around the ingredients. Finally, do not stir the ingredients until the end of the cooking process, as this helps maintain the structural integrity of the pasta and the texture of the chicken.
How to tell it’s done
The dish is done when the chicken pieces reach an internal temperature of 165°F (74°C). The pasta should be tender but still retain a slight bite, known as al dente. The sauce should appear glossy, thick, and well-integrated with the pasta and chicken.
Use a food thermometer inserted into the thickest part of the chicken to confirm it has reached the safe temperature before turning off the slow cooker and proceeding to plate the meal.
- Poultry: 165°F (74°C) in the thickest part
Up next · Part 3 of 3
2 variations · storage & make-ahead · 3 answers · printable card
Tips, FAQ & printable recipe (Part 3)← Back to the ingredients (Part 1)