Breakfast · Part 2 of 3: Instructions
Slow Cooker Brioche French Toast for Easy Mornings Step-by-step instructions
- Prep
- Cook
- Total
- Serves
- 4
Before you start
Before beginning, gather all ingredients and ensure the slow cooker is clean and ready for use. Slice the brioche into thick pieces, approximately one inch wide.
Prepare the custard by whisking the eggs and milk thoroughly in a glass measuring cup until no streaks of egg white remain. Ensure the butter is cut into small, uniform cubes to allow for even melting throughout the cooking process.
Ingredients at a glance (5)
- 1 loaf brioche bread, cut into thick slices
- 4 tbsp salted butter, cut into small cubes
- 1/3 cup brown sugar
- 4 large eggs
- 1 cup whole milk
Instructions
Layering the bread and butter
- Layering the ingredientsPlace the thick slices of stale brioche into the bottom of the slow cooker, arranging them to create an even base. Scatter the small cubes of salted butter over the bread slices, then sprinkle the brown sugar evenly across the top to ensure a caramelized flavor throughout the dish.Look for The bread should be arranged in a single or slightly overlapping layer to allow for even cooking in the slow cooker.Tip Using stale bread is essential as it absorbs the custard mixture better without becoming overly mushy during the slow cooking process.
The bread should be arranged in the slow cooker with the butter and brown sugar distributed evenly across the surface.
This sets the foundation for the caramelization that will occur during the cooking process, ensuring the flavors are well-integrated from the bottom up.
Adding the custard base
- Adding the custardIn a glass measuring cup, whisk together the eggs and milk until the mixture is completely uniform. Pour the egg and milk custard evenly over the brioche, butter, and brown sugar already in the slow cooker, making sure every slice is well-moistened by the liquid.Look for Ensure the custard covers the bread completely so that all pieces are saturated before the cooking cycle begins.Tip Pour slowly to ensure the liquid reaches the bottom layers of the bread stack for consistent texture throughout.
The custard should be poured slowly over the bread, ensuring that each piece is well-saturated. Once the liquid is added, the ingredients should appear moist and ready for the heating process, with the custard filling the gaps between the bread slices.
Slow cooking to perfection
- Cooking the French toastCover the slow cooker and cook on low for 2 hours. To ensure the eggs are fully cooked through, they must reach an internal temperature of 160°F (71°C).Look for The French toast is done when the edges are golden and the center is set.Safe temperature 160°F (71°C) internal temperature (egg dishes)Tip Avoid lifting the lid too often during the cooking process to maintain a consistent temperature inside the slow cooker.
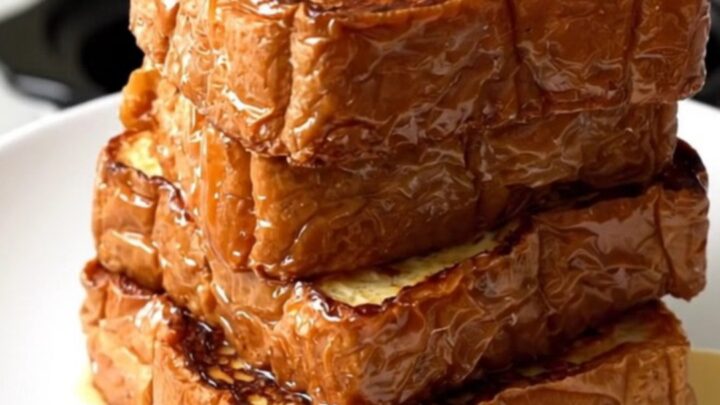
After two hours, the French toast should be golden and steaming. The custard will have thickened around the brioche, creating a cohesive, pudding-like consistency that is tender and flavorful throughout, indicating that it is ready to be served.
Common mistakes
A common mistake is using bread that is too fresh; fresh bread tends to turn into mush under the weight of the custard. Always opt for slightly stale or lightly toasted bread.
Another error is overfilling the slow cooker, which can prevent the custard from circulating properly. Ensure the bread is placed in a single layer or slightly overlapping to allow even distribution of the liquid and heat.
How to tell it’s done
The dish is finished when the custard is set and the edges appear golden brown. Use a digital thermometer to check the center of the dish; it should reach an internal temperature of 160°F (71°C) to ensure the eggs are fully cooked.
The surface should look glossy and feel firm to the touch, and the kitchen should be filled with the sweet, buttery aroma of caramelized sugar.
- Egg dishes: 160°F (71°C) in the thickest part
Up next · Part 3 of 3
2 variations · storage & make-ahead · 3 answers · printable card
Tips, FAQ & printable recipe (Part 3)← Back to the ingredients (Part 1)