Dinner · Part 2 of 3: Instructions
Slow Cooker Braised Leeks with White Wine and Mustard Step-by-step instructions
- Prep
- Cook
- Total
- Serves
- 4
Before you start
Before starting, ensure you have properly cleaned the leeks. Halve them lengthwise and rinse thoroughly under cold running water to remove any grit trapped in the layers. Prepare your minced shallots, ensuring they are finely chopped for even distribution.
Measure out your white wine and mustard mixture, whisking it briefly to ensure the mustard is fully incorporated into the wine. Have your slow cooker ready on a flat, stable surface, and ensure all ingredients are at room temperature for the best results when starting the cooking cycle.
Ingredients at a glance (4)
- 4 large leeks, halved lengthwise and cleaned
- 2 tbsp shallots, minced
- 3 tbsp unsalted butter, cubed
- 1/2 cup white wine and mustard broth
Instructions
Layering the leeks
- Prepare the slow cooker basePlace the cleaned, halved leeks into the bottom of the slow cooker, arranging them tightly so they sit in a single, even layer to ensure consistent cooking throughout the process.Look for Leeks should be packed tightly in an oval slow cooker.Tip Ensure the leeks are thoroughly washed, as dirt often hides between the inner layers.
The leeks should be arranged in a tight, single layer at the bottom of the slow cooker, creating a stable base. Ensure they are positioned to allow the liquid to circulate around each piece during the cooking process. Check that you have removed any damaged or tough outer leaves before placing them in the cooker.
Adding aromatics
- Add aromatics and butterScatter the minced shallots evenly over the top of the leeks. Distribute the cubes of unsalted butter across the leeks to provide richness as they melt during the slow cooking process.Look for Shallots and butter are distributed evenly over the leeks.Tip Keep the butter cubes uniform in size to ensure they melt at the same rate.
The shallots and butter should be dispersed evenly across the surface of the leeks. At this stage, the ingredients are ready to begin the infusion process. Ensure the butter is cut into uniform, small cubes so that it melts evenly throughout the braise, contributing to the final richness of the sauce.
Braising to perfection
- Pour broth and braisePour the white wine and mustard broth over the leeks. Cover the slow cooker and cook on low for 4 hours until the leeks are tender, glossy, and easily pierced with a fork.Look for Leeks are tender and the liquid has reduced into a glossy sauce.Tip Avoid lifting the lid frequently to maintain a consistent temperature inside the slow cooker.
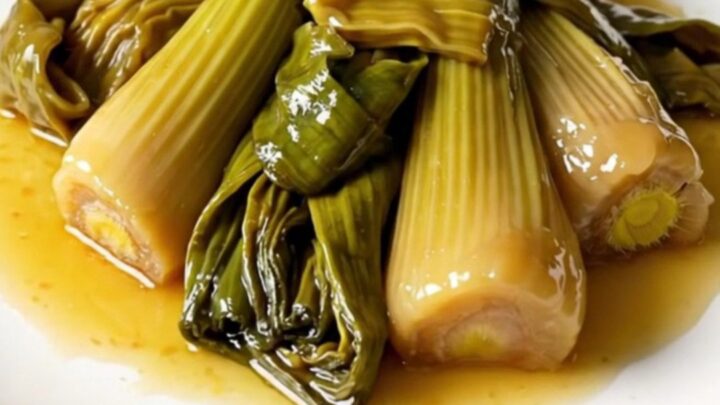
The leeks should be soft, tender, and coated in a glossy, savory sauce. The kitchen should smell fragrant and savory. Check for doneness by piercing the thickest part of a leek; it should yield instantly to pressure. Ensure the sauce has reduced to a syrupy consistency before transferring to a serving plate.
Common mistakes
A common mistake is failing to clean the leeks properly, which can lead to a gritty final dish. Always rinse between the leaves.
Another error is over-crowding the slow cooker in a way that prevents the broth from touching all the leeks; while they should be packed, they must be submerged enough in the liquid to braise.
Avoid using high heat settings, as this can cause the delicate layers to fall apart or the sauce to break; always stick to the low setting for the most consistent texture.
How to tell it’s done
The leeks are done when they are completely tender and can be easily pierced with the tip of a sharp knife or fork with no resistance. The texture should be silky and soft, not mushy.
The cooking liquid should have reduced slightly to form a glossy, thickened sauce that coats the leeks. If the leeks still feel firm, continue cooking for an additional 30 minutes, as cooking times can vary slightly depending on the specific model and heat intensity of the slow cooker.
Up next · Part 3 of 3
2 variations · storage & make-ahead · 3 answers · printable card
Tips, FAQ & printable recipe (Part 3)← Back to the ingredients (Part 1)