Dinner · Part 2 of 3: Instructions
Slow Cooker Apple Pie Pork Chops Step-by-step instructions
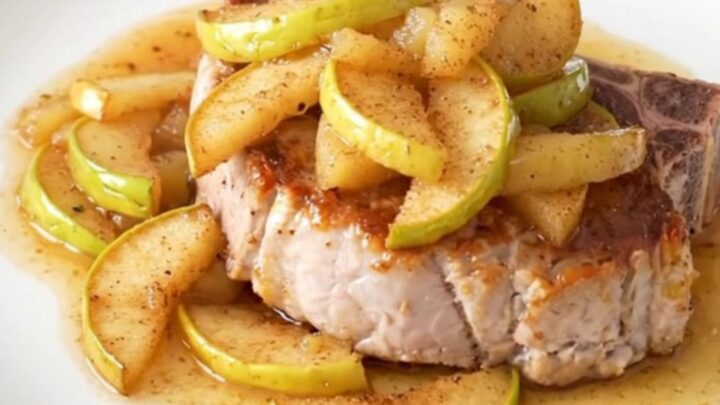
- Prep
- Cook
- Total
- Serves
- 4
Before you start
Before beginning, ensure the pork chops are thoroughly thawed if they were frozen. Remove them from the refrigerator about 20 minutes before cooking to take the chill off, which helps with even heat distribution.
Have the apple pie filling, butter, and ground cinnamon ready to go, and ensure the slow cooker insert is clean and dry. Preparing these components in advance makes the assembly process seamless and ensures the cooking cycle can begin immediately.
Ingredients at a glance (4)
- 4 bone-in pork chops
- 21 oz apple pie filling
- 2 tbsp butter
- 1 tsp ground cinnamon
Instructions
Preparation and layering
- Arrange the porkPlace the bone-in pork chops into the bottom of the slow cooker insert. Ensure they are arranged in an even layer, overlapping them slightly if necessary to fit the space.Look for The chops should be lying flat on the bottom of the insert.Tip Pat the chops dry with paper towels before placing them in the cooker to improve the texture.
The pork chops should be arranged in the bottom of the slow cooker insert in a single layer. Ensure the meat is clean and properly spaced so that the heat can circulate effectively. Check that the slow cooker is plugged in and ready to be set to the low heat setting before proceeding to add the sauce.
Adding the apple sauce
- Add the apple mixtureIn a medium bowl, combine the apple pie filling, butter, and cinnamon. Pour the mixture evenly over the pork chops in the slow cooker, ensuring each chop is well-coated.Look for The apple mixture should completely cover the surface of the meat.Tip Distribute the butter in small pieces over the top to ensure even melting.
The apple pie filling, butter, and cinnamon should be combined into a uniform mixture. Once poured over the pork, verify that the chops are fully coated.
The slow cooker should be covered securely with the lid to ensure that the moist, aromatic environment is maintained throughout the entire duration of the cooking cycle.
Braising and finishing
- Cook and serveCover the slow cooker and cook on low for 4 to 6 hours. Before serving, verify the internal temperature of the pork reaches 145°F (63°C) and let the meat rest for at least 5 minutes before transferring to plates.Look for The pork should be very tender and easily pierced with a fork.Safe temperature 145°F (63°C) internal temperature (steaks, chops and roasts)Tip Check the temperature in the thickest part of the chop, avoiding the bone.
At the end of the cooking time, the kitchen should smell fragrant with cinnamon and baked apples. The pork should be tender enough to be easily pierced with a fork. Verify the internal temperature of 145°F (63°C) and confirm that the sauce has thickened slightly before turning off the heat and beginning the resting phase.
Common mistakes
Avoid lifting the lid frequently during the cooking process, as this releases heat and steam, significantly increasing the required cooking time. Another common error is using overly lean chops, which can dry out even in a slow cooker; stick with bone-in cuts for the best texture.
Finally, do not forget to let the meat rest before serving, as cutting into the pork immediately upon removing it from the cooker will result in a loss of valuable juices and a drier final result.
How to tell it’s done
The pork is perfectly cooked when it reaches an internal temperature of 145°F (63°C). At this stage, the meat should be opaque throughout and pull away from the bone with minimal resistance. Use a digital meat thermometer inserted into the thickest portion of the chop to confirm the temperature.
Once confirmed, allow the chops to rest for at least 5 minutes; this resting period allows the juices to redistribute throughout the meat, ensuring that every bite remains succulent and flavorful.
- Steaks, chops and roasts: 145°F (63°C) in the thickest part, then a 3-minute rest
Up next · Part 3 of 3
2 variations · storage & make-ahead · 3 answers · printable card
Tips, FAQ & printable recipe (Part 3)← Back to the ingredients (Part 1)