Dinner · Part 2 of 3: Instructions
Slow Cooker Amish Molasses Chicken for a Tender Dinner Step-by-step instructions
- Prep
- Cook
- Total
- Serves
- 4
Before you start
Before starting, ensure the chicken is properly thawed if previously frozen. Peel the garlic and slice the onions into uniform strips to ensure they cook evenly.
Have your slow cooker ready on a flat, heat-resistant surface, and make sure you have a pair of sturdy tongs available for transferring the tender chicken once the cooking cycle is complete.
Ingredients at a glance (4)
- 4 lbs chicken thighs, bone-in and skin-on
- 1/2 cup molasses
- 2 large onions, sliced
- 1 head garlic, cloves peeled
Instructions
Building the base
- Prepare the slow cooker bedPlace the sliced onions and the peeled whole garlic cloves at the bottom of the slow cooker to create a flavor base for the chicken. Ensure they are distributed evenly across the surface to provide support for the meat.Look for Onions are evenly spreadTip Adding the onions first prevents the chicken from sticking to the bottom of the pot.
The base is ready when the onions are layered at the bottom of the slow cooker. This provides a flavorful foundation and ensures the chicken does not directly touch the base of the pot, which helps in preventing any burning of the molasses glaze during the long, slow-cooking process.
Glazing and cooking
- Add the chicken and glazeArrange the chicken thighs on top of the onion and garlic layer. Pour the molasses evenly over the chicken pieces, ensuring each thigh is well-coated. Cover the slow cooker with the lid to begin the slow braising process.Look for Chicken is coated in molassesTip Use tongs to ensure the molasses reaches under the chicken thighs.
The chicken is ready for the slow cooker once it is thoroughly coated in the molasses. At this stage, ensure the lid is sealed properly to lock in the moisture. The aroma will begin to develop as the molasses warms up and starts to coat the chicken pieces during the initial phase.
Finalizing the meal
- Slow cook and serveCook on low for 4 to 6 hours. Check that the chicken reaches an internal temperature of 165°F (74°C). Once finished, remove the chicken from the slow cooker, let it rest for 5 minutes, and serve with the reduced pan juices.Look for Meat pulls away from the bone easilySafe temperature 165°F (74°C) internal temperature (poultry)Tip The residual heat in the slow cooker helps keep the chicken warm until serving time.
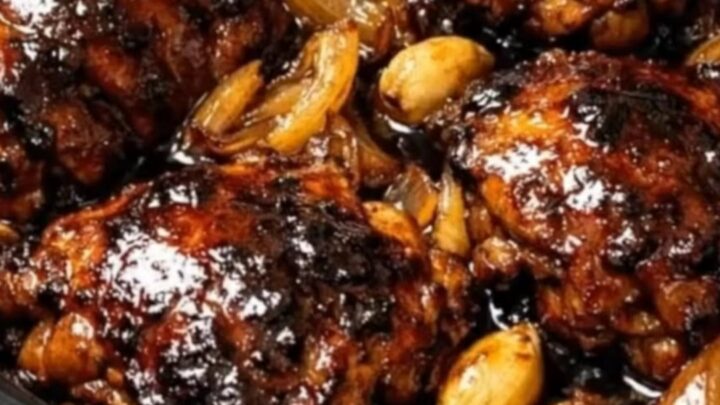
The chicken is finished when it is tender and easily yields to a fork. The glaze should be dark, thick, and glossy, clinging to the meat.
Verify the internal temperature with a thermometer to ensure it reaches the safe threshold before removing the chicken for a brief rest prior to serving.
Common mistakes
A common mistake is overcrowding the slow cooker, which can lead to uneven cooking and excess liquid accumulation. Ensure there is enough space for the heat to circulate.
Another error is lifting the lid too frequently, which releases essential heat and moisture, significantly increasing the total cooking time needed to reach the desired tenderness for the chicken thighs.
How to tell it’s done
The chicken is done when the internal temperature reaches 165°F (74°C) as measured by a meat thermometer inserted into the thickest part of the thigh, avoiding the bone.
Visually, the meat should be pulling away from the bone and be soft enough to be easily shredded with a fork, indicating that the collagen has fully broken down during the slow-cooking process.
- Poultry: 165°F (74°C) in the thickest part
Up next · Part 3 of 3
2 variations · storage & make-ahead · 3 answers · printable card
Tips, FAQ & printable recipe (Part 3)← Back to the ingredients (Part 1)