Dinner · Part 1 of 3: Ingredients
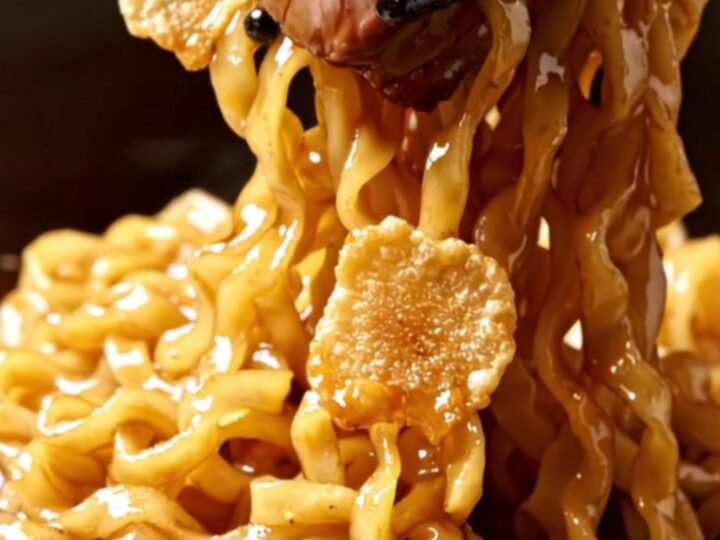
Seared Wagyu Steak Bites over Garlic Butter Soy Ramen in 10 Minutes
- Prep
- Cook
- Total
- Serves
- 2
Seared Wagyu ribeye bites over garlic butter soy ramen is midnight luxury on a weeknight clock. Paper-thin garlic fries crisp in cultured butter, cubes of marbled beef flash-sear in their own tallow, and wavy noodles tumble straight into that foaming soy glaze. One skillet, about ten minutes of cooking, and a bowl that eats like a steakhouse splurge.
This bowl borrows the best trick of the teppanyaki counter: intense heat, minimal handling, and a sauce built from the drippings instead of a separate pot. The Wagyu ribeye is cut into cubes rather than steaks, which means more crust per bite and a faster sear.
Those cubes rest while the ramen noodles boil briefly, then everything converges in one pan — garlic butter, rendered beef fat, aged shoyu, and mirin reducing into a glossy glaze that clings to every wavy strand. Crispy garlic chips go back on top at the end for crunch. The whole dish moves in a straight line from cutting board to bowl, with no stage waiting on another, which is exactly why it comes together in about ten minutes of actual cooking once the prep is done.
Ingredients
- 10 1/2 oz Wagyu ribeye steak, cut into 1 1/2-inch cubes
- 8 cloves garlic, sliced paper-thin
- 3 tbsp cultured butter
- 3 tbsp aged soy sauce (aged shoyu)
- 2 tbsp mirin
- 12 oz wavy ramen noodles (fresh or dried)
Why this recipe works
Cubing the ribeye before searing is what makes the timing work. A whole steak needs four to five minutes per side to build a crust; cubes present six small faces to the pan and brown in about a minute, before the interior has time to overshoot. The high searing temperature renders the abundant Wagyu fat into the pan, and that tallow becomes the flavor engine of the entire dish — the noodles are not tossed in oil, they are tossed in beef fat seasoned by the sear itself.
The glaze depends on sequence, not volume. Frying the garlic first perfumes the butter, searing the beef leaves browned bits and tallow behind, and the soy sauce and mirin then deglaze and reduce in that same pan.
Mirin's sugar caramelizes slightly and balances the salt of the shoyu, while the butter emulsifies everything into a glaze thick enough to coat noodles rather than pool under them. Three ingredients, one pan, and the sauce tastes like it took far longer than a minute.
Notes and substitutions
Seek out genuinely marbled Wagyu ribeye if the budget allows — the fat is what flavors the noodles — but a well-marbled conventional ribeye sears by the same method and stays excellent. Aged shoyu tastes rounder and less sharply salty than standard soy sauce, though either works.
Cultured butter brings a slight tang that plain sweet butter lacks; use unsalted either way, since the soy sauce carries the salt. Wavy ramen noodles, fresh or dried, are the point: the ridges trap the glaze.
A cast-iron skillet is the ideal pan because it holds its temperature when cold beef hits the surface, which is the difference between searing and steaming. An instant-read thermometer removes all guesswork from the doneness of the cubes.
If the pan feels crowded, sear in two batches and keep the first on a warm plate — a second of crowding costs more crust than the extra two minutes ever will. Have everything chopped and measured before the butter melts; this dish moves fast.
- Wagyu ribeye steak: Regular well-marbled ribeye works beautifully; sear it the same way and expect a slightly leaner, less buttery bite.
- aged soy sauce: Any good Japanese soy sauce can stand in; aged shoyu simply brings a deeper, rounder maltiness to the glaze.
- mirin: Stir 1 1/2 tbsp rice wine with 1/2 tsp sugar to mimic mirin's gentle sweetness.
- wavy ramen noodles: Fresh chow mein or lo mein noodles hold the glaze nearly as well; cook them just until pliable before tossing.
Equipment
- cast-iron skillet
- sharp chef's knife
- cutting board
- large pot
- colander
- instant-read thermometer
- kitchen tongs
Up next · Part 2 of 3
9 steps · 10 min of cooking · what to look for at each stage
Step-by-step instructions (Part 2)