Desserts · Part 2 of 3: Instructions
Rich Chocolate Layered Dessert Step-by-step instructions
- Prep
- Cook
- Total
- Serves
- 9
Before you start
Before beginning, ensure that the cream cheese is removed from the refrigerator at least thirty minutes in advance to reach room temperature. Gather all necessary equipment, including the electric mixer and the square glass dish, to ensure a smooth assembly process.
Prepare a clean workspace to allow for the cooling and setting time required later, as this dessert needs adequate time in the refrigerator to develop its final texture. Verify that the refrigerator has enough flat space to accommodate the dish securely without tilting.
Ingredients at a glance (4)
- 16 oz cream cheese, softened
- 1 cup heavy whipping cream
- 1 cup semi-sweet chocolate chips
- 1/2 cup dark chocolate, chopped
Instructions
Cream Preparation
- Prepare the cream layerIn a large mixing bowl, beat the softened cream cheese until completely smooth and free of lumps. Gradually pour in the heavy whipping cream while continuing to beat on medium-high speed. Continue whipping until the cream mixture reaches a thick, stiff consistency that holds its shape cleanly.Look for The mixture should be thick, smooth, and hold stiff peaks.Tip Ensure the cream cheese is fully at room temperature to avoid small lumps in the final cream layer.
The cream mixture should be thick, uniform, and hold stiff peaks when the beaters are lifted. Check for any lingering lumps of cream cheese, ensuring the mixture is completely homogeneous and holds its structural volume.
Assembly
- Assemble the dessertTransfer the whipped cream mixture into an 8x8 inch square glass dish. Use a rubber spatula to spread it evenly across the bottom, creating a smooth and level surface. Ensure all corners and edges are filled completely to create clean, attractive layers when sliced later.Look for The surface should be perfectly flat and reach all four corners of the dish.Tip Wet the spatula slightly with water to prevent sticking while smoothing the cream layer.
The cream layer should be spread evenly to the edges of the dish, creating a perfectly flat base. Ensure the surface is smooth to provide a professional foundation for the chocolate topping.
Topping Application
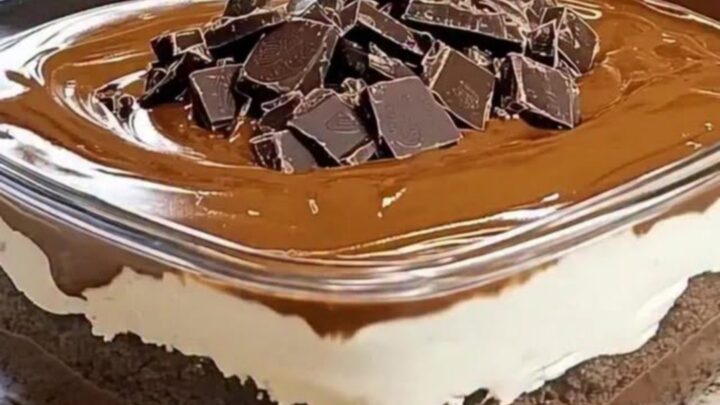
- Add the chocolate toppingMelt the semi-sweet chocolate chips in a small saucepan over low heat, stirring constantly until glossy and smooth. Pour the melted chocolate over the cream layer, spreading it gently to cover the surface. Immediately scatter the chopped dark chocolate chunks over the top while warm. Refrigerate for at least two hours before slicing.Look for The chocolate should be glossy and the chunks should adhere to the surface.Tip Work quickly when spreading the chocolate to prevent it from setting before the dark chocolate chunks are added.
The chocolate should be glossy, smooth, and evenly distributed across the cream. The dark chocolate chunks should be evenly dispersed, and the entire dish should be ready for refrigeration.
Ensure that the surface is completely covered and that the chocolate is not too hot when applying it to the cream base to maintain the integrity of the layers.
Common mistakes
A common mistake is using cream cheese that is too cold, which prevents the mixture from becoming perfectly smooth and results in small, undesirable lumps. Another frequent error is rushing the cooling process; if the dessert is not refrigerated for the full two hours, the layers will not set properly, making it impossible to achieve clean slices.
Finally, ensure the melted chocolate is not boiling hot when poured over the cream layer, as excessive heat can cause the cream base to soften or melt, ruining the distinct layer separation.
How to tell it’s done
The dessert is ready when the chocolate topping has fully set and the cream layer is firm to the touch. When slicing, the knife should pass through both layers with minimal resistance, leaving clean, distinct lines.
The cream layer should hold its shape on the plate without spreading or sagging. Because there are no raw proteins involved, doneness is strictly a matter of achieving the desired firm, chilled texture that allows for perfect, decadent servings every time.
Up next · Part 3 of 3
2 variations · storage & make-ahead · 3 answers · printable card
Tips, FAQ & printable recipe (Part 3)← Back to the ingredients (Part 1)