Desserts · Part 1 of 3: Ingredients
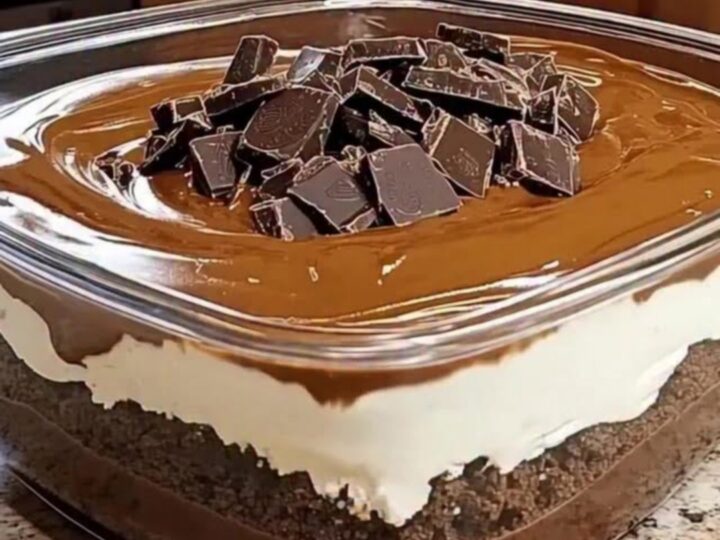
Rich Chocolate Layered Dessert
- Prep
- Cook
- Total
- Serves
- 9
Discover the art of creating a decadent, multi-layered chocolate dessert that is as beautiful to look at as it is delicious to eat. This recipe provides a simple yet elegant solution for those moments when a rich, creamy indulgence is required, offering a perfect balance of textures in every single spoonful.
This dessert centers on a velvety, whipped cream cheese base paired with a rich, glossy chocolate topping. It is designed for ease and elegance, making it an excellent choice for gatherings or a quiet evening treat.
By focusing on high-quality ingredients and precise layering, the result is a sophisticated dessert that impresses with its clean, sharp layers and deep chocolate flavor profile. Follow these instructions to achieve a flawless finish every time, ensuring a stable structure that slices cleanly for a professional presentation.
Ingredients
Cream Layer
- 16 oz cream cheese, softened
- 1 cup heavy whipping cream
Topping
- 1 cup semi-sweet chocolate chips
- 1/2 cup dark chocolate, chopped
Why this recipe works
The whipped cream cheese base provides a stable, dense foundation that supports the heavier chocolate layer without collapsing. By incorporating the heavy cream slowly, air is introduced, resulting in a luxurious mouthfeel that contrasts beautifully with the snap of the chocolate topping. This method ensures that the dessert retains its shape while remaining soft enough to yield to a fork easily, creating a harmonious balance between the airy cream and the dense, silky ganache.
Using a glass dish allows for the visual appreciation of the distinct layers, which is crucial for the presentation of this dessert. The cold temperature of the refrigerator serves a functional purpose, firming the fats in both the cream cheese and the chocolate.
This process not only stabilizes the structure for clean slicing but also deepens the flavor profile, as the chill allows the ingredients to meld together into a cohesive, decadent experience that is refreshing yet satisfyingly rich.
Notes and substitutions
Selecting high-quality chocolate is paramount for this recipe, as the topping provides the primary flavor contrast to the mild cream base. Using semi-sweet chips with a cocoa content of at least 60% ensures a balanced sweetness, while the addition of chopped dark chocolate chunks adds a necessary textural element.
If dark chocolate is unavailable, extra-dark cocoa nibs can be used to provide a similar crunch, though they will offer a more intense, bitter flavor profile than the suggested dark chocolate chunks.
The choice of equipment is straightforward, though an 8x8 inch square glass dish is ideal for achieving the perfect layer thickness. If a different sized dish is used, the thickness of the layers will change, which may affect the setting time.
An electric hand mixer is essential for achieving the required consistency of the cream layer, as manual whisking may not incorporate enough air to maintain the desired structural integrity. Always ensure that the cream cheese is fully softened to achieve the smoothest possible texture.
- semi-sweet chocolate chips: bittersweet chocolate chips for a more intense flavor profile
- cream cheese, softened: mascarpone cheese for a milder, slightly sweeter cream layer profile
Equipment
- 8x8 inch square glass dish
- Electric hand mixer
- Large mixing bowl
- Rubber spatula
- Small saucepan
- Dessert spatula