Desserts · Part 3 of 3: Tips & recipe card
Red Velvet Cheesecake Brownies with Fudgy Swirls Tips, FAQ & printable recipe
- Prep
- Cook
- Total
- Serves
- 16
Tips for success
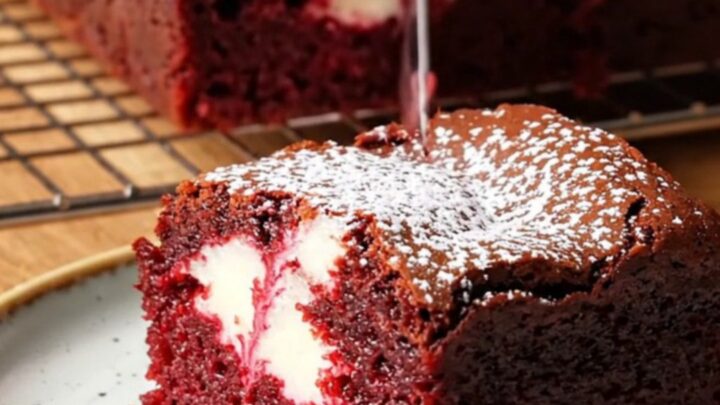
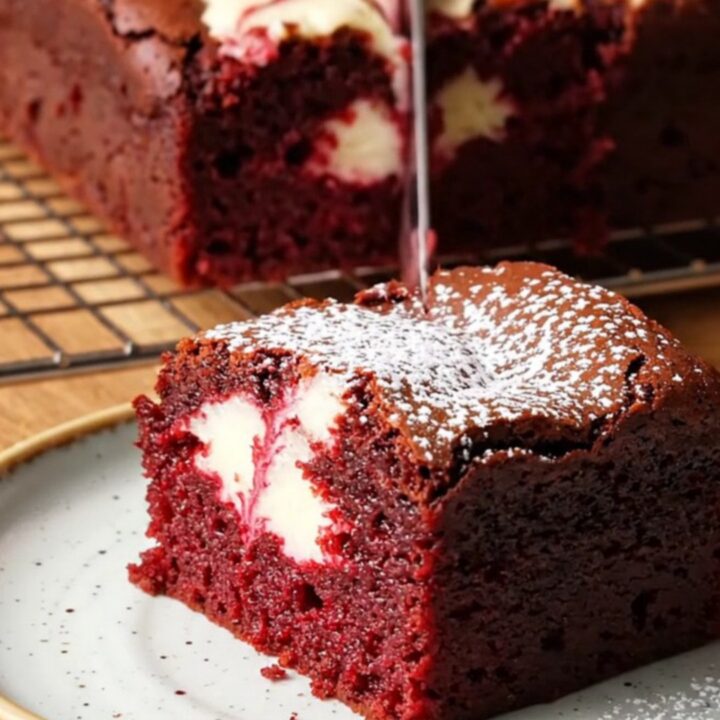
For perfectly clean slices, use a large chef's knife and wipe it with a damp paper towel between cuts. Chilling the brownies for at least 1 hour (or up to overnight) makes them much easier to cut.
If you prefer warm brownies, gently reheat individual squares in the microwave for 10-15 seconds. The swirl looks best when you drag the toothpick in a figure-eight pattern, but avoid overdoing it or the colors will muddy.
To achieve a shiny, crackly top on the brownies, beat the eggs and sugar together until pale and thick before adding the melted butter and other wet ingredients. However, the video shows a simpler method of whisking everything together, which yields a more rustic, fudgy texture.
For an extra chocolate hit, sprinkle a few chocolate chips on top before baking. The brownies are delicious on their own, but a scoop of vanilla ice cream makes them even more indulgent.
Variations
- Chocolate Chip Swap: Instead of dark chocolate chips, use white chocolate chips or a mix of dark and white for a sweeter, more colorful contrast. The white chocolate will complement the cheesecake swirl nicely.
- Add a Crunch: Fold 1/2 cup of chopped pecans or walnuts into the red velvet batter for a nutty crunch. Toast the nuts first for deeper flavor. This adds texture without overwhelming the fudgy base.
- Peppermint Twist: Add 1/2 teaspoon of peppermint extract to the red velvet batter and crush a candy cane over the top before baking for a holiday version. The peppermint pairs well with the chocolate and cream cheese.
- Gluten-Free Option: Substitute the all-purpose flour with a 1:1 gluten-free baking flour blend. Ensure the blend contains a binder like xanthan gum. The texture will be slightly more tender but still fudgy.
Storage and make-ahead
- Fridge
- Store in an airtight container in the refrigerator for up to 1 week. Let come to room temperature before serving for best flavor.
- Freezer
- Wrap individually or in a single layer in an airtight container and freeze for up to 3 months. Thaw in the refrigerator or at room temperature.
- Reheat
- Reheat individual brownies in the microwave for 10-15 seconds or in a 300°F (150°C) oven for 5-10 minutes until warm.
Store leftover brownies in an airtight container at room temperature for up to 3 days, or in the refrigerator for up to a week. The cheesecake swirl stays creamy when chilled, and the brownies remain fudgy. If refrigerated, let them sit at room temperature for about 15 minutes before serving to soften slightly. To keep them longer, freeze as described below.
These brownies can be made 1-2 days ahead and stored in the refrigerator. They are actually easier to slice when fully chilled, so making them ahead is convenient. You can also prepare the batters separately and refrigerate them for up to a day before swirling and baking, though you may need to add a couple of minutes to the baking time if starting from cold. For longer storage, freeze the baked and cooled brownies.
Serving ideas
Serve the brownies at room temperature or slightly chilled. They're perfect with a glass of milk, a cup of coffee, or a scoop of vanilla ice cream. Cut into 16 squares, they are ideal for sharing at parties, bake sales, or holiday gatherings.
The red and white swirl makes them especially festive for Valentine's Day, Christmas, or any celebration. For an elegant presentation, dust with a little confectioners' sugar just before serving, though the video doesn't show this.
For a more indulgent dessert, warm a brownie in the microwave for 10 seconds and top with a scoop of ice cream and a drizzle of chocolate sauce. The contrast of warm fudgy brownie and cold creamy ice cream is irresistible.
If serving a crowd, cut the brownies into smaller bite-sized pieces and arrange on a platter. They are sturdy enough to be served as finger food, but a fork is recommended if the cheesecake swirl is very soft.
Frequently asked questions
Can these brownies be made ahead of time?
Why did your cheesecake swirl disappear into the brownie batter?
How can you tell when the brownies are done without overbaking?
Can you use milk chocolate chips instead of dark?
What is the best way to cut these brownies cleanly?
Red Velvet Cheesecake Brownies with Fudgy Swirls
Ingredients
- 1/2 cup unsalted butter, melted
- 3/4 cup granulated sugar
- 1/4 cup unsweetened cocoa powder
- 1 tbsp red food coloring
- 1 tsp pure vanilla extract
- 1 tsp white vinegar
- 2 large eggs
- 3/4 cup all-purpose flour
- 1/2 cup dark chocolate chips
- 8 oz cream cheese, softened
- 1/4 cup granulated sugar
- 1 large egg yolk
- 1/2 tsp pure vanilla extract
Instructions
- In a large bowl, whisk the melted butter, granulated sugar, cocoa powder, red food coloring, vanilla extract, and vinegar until smooth. Add the eggs one at a time, whisking well after each addition. Fold in the all-purpose flour and dark chocolate chips until just combined, being careful not to overmix.
- In a separate bowl, beat the softened cream cheese with an electric mixer until smooth. Add the granulated sugar, egg yolk, and vanilla extract, and beat until the mixture is creamy and free of lumps.
- Pour the red velvet batter into a parchment-lined 8x8-inch baking pan and spread it evenly. Dollop the cheesecake mixture over the top in spoonfuls. Use a toothpick or knife to gently swirl the two batters together, creating marbled patterns.
- Preheat the oven to 350°F (175°C). Bake the brownies for 28 minutes, or until the edges are set and the center is dense and fudgy. The center should not jiggle excessively; a toothpick inserted near the edge should come out with moist crumbs.
- Remove the brownies from the oven and let them cool completely in the pan on a wire rack. Once cool, refrigerate for at least 1 hour to make cutting easier. Cut into 16 squares with a sharp knife, wiping the blade between cuts for clean edges.
Estimated nutrition per serving
- Calories
- 280
- Protein
- 4 g
- Carbohydrates
- 30 g
- Fat
- 16 g
Next recipe
4-Ingredient Snickers Stuffed Dates: A Sweet Treat
See the recipe → →This recipe is based on a short cooking video and is published under the pen name Clara Weller. It was checked before publication, but errors can slip through. Nutrition, when shown, is an estimate. Read more in our editorial policy and on our food safety page.
More recipes to try
Brown Butter Brookies: Fudgy Brownie & Cookie in One Pan
Total time: 1 h
S'mores Quesadilla: Gooey Campfire Treat in 15 Minutes
Total time: 12 min
Crispy Apple Pie Chimichangas Ready in Ten Minutes
Total time: 18 min
Crispy Churro Tortilla Mille-Feuille with Tres Leches Cream
Total time: 40 min
Wacky Cake — Fudgy One-Pan Chocolate Cake, No Eggs Needed
Total time: 1 h 55 min