Dinner · Part 3 of 3: Tips & recipe card
Pull-Apart Minced Meat Pan Pide: Golden, Cheesy, and Irresistible Tips, FAQ & printable recipe

- Prep
- Cook
- Total
- Serves
- 8
Tips for success
For the softest, airiest dough, use a kitchen scale for the flour and measure the water temperature with a thermometer. The dough should be tacky but not sticky; adjust with small amounts of flour or water as needed. Letting the dough rise in a warm, draft-free spot is crucial—an oven with the light on is perfect. When shaping, use oiled fingers and press gently to avoid deflating the dough. The ridges should be about 1/2 inch deep to hold the filling well.
To achieve the perfect cheese crust, use a combination of kaşar and mozzarella for the best stretch and flavor. Grate the cheese yourself rather than using pre-shredded, which often contains anti-caking agents that affect melting.
Bake on the middle rack to ensure even browning, and avoid opening the oven for the first 15 minutes. If the top browns too quickly, tent with foil. Letting the pide rest for 5 minutes after baking helps the cheese set slightly, making it easier to slice and serve.
Variations
- Spicy Lamb Pide: Use ground lamb instead of beef, and add 1 teaspoon of red pepper flakes and a pinch of cinnamon to the filling. The lamb’s richness pairs well with the warm spices, creating a more aromatic and slightly spicy version.
- Vegetarian Mushroom Pide: Replace the ground beef with 1 lb of finely chopped mushrooms sautéed with onions, garlic, and thyme. Add a splash of soy sauce for umami. The mushrooms provide a meaty texture and earthy flavor that satisfies even carnivores.
- Cheese Lover's Pide: Add an extra cup of shredded cheese, mixing kaşar with mozzarella and a bit of feta for tang. Sprinkle some cheese on top of the filling and also fold some into the dough for a double-cheese experience.
- Herb and Garlic Pide: Stir 2 tablespoons of chopped fresh parsley or cilantro into the meat filling, and add a teaspoon of dried oregano to the dough. Serve with a garlic-yogurt sauce on the side for a fresh, herby twist.
Storage and make-ahead
- Fridge
- Refrigerate leftovers in an airtight container for up to 4 days. Reheat in a 350°F oven for 5-10 minutes to restore crispness.
- Freezer
- Freeze the baked pide whole or in slices, wrapped tightly in plastic wrap and foil, for up to 3 months. Thaw overnight in the fridge.
- Reheat
- Reheat frozen pide in a 350°F oven for 15-20 minutes, or until hot and cheese is melted. Avoid microwaving to preserve texture.
Store leftover pide in an airtight container or wrapped tightly in foil at room temperature for up to 2 days. To keep the crust from becoming soggy, place a paper towel inside the container to absorb excess moisture. For longer storage, refrigerate for up to 4 days.
Reheat in a 350°F (175°C) oven for 5 to 10 minutes, or until warmed through and the cheese is melted again. Avoid microwaving, as it can make the bread rubbery. The pide is best enjoyed fresh, but it still tastes great the next day.
The dough can be prepared up to a day ahead: after the first rise, punch it down, cover tightly, and refrigerate. The next day, bring it to room temperature for about 30 minutes before shaping. The filling can also be cooked a day in advance and stored in the refrigerator; reheat gently before assembling.
You can assemble the entire pide (without baking) up to 2 hours ahead, cover it loosely with plastic wrap, and refrigerate. Let it sit at room temperature for 30 minutes before baking. This makes it perfect for entertaining.
Serving ideas
Serve the pull-apart pide warm, straight from the pan, as the star of a casual dinner or a festive appetizer. Pull the pieces apart with your hands and enjoy the contrast of the crispy edges, soft crumb, and gooey cheese.
It pairs beautifully with a simple green salad dressed with lemon and olive oil, or a bowl of yogurt with fresh herbs. For a heartier meal, serve alongside a bowl of lentil soup or a tomato and cucumber salad. The pide is also delicious dipped into a garlicky yogurt sauce or a spicy tomato relish.
For a party, cut the pide into smaller pieces and arrange on a platter with extra cheese on the side. It’s a crowd-pleaser that disappears quickly. If you have leftovers, they make a great lunch—reheat and enjoy with a side of pickles. You can also use the pide as a base for other toppings, such as sautéed peppers and onions, or a drizzle of hot honey for a sweet-spicy twist. The possibilities are endless, but the classic version is truly hard to beat.
Frequently asked questions
Can this pull-apart pide be made ahead of time?
What is kaşar cheese, and where can it be found?
Why is the dough not rising?
Can this recipe be made gluten-free?
How should leftovers be reheated?
Pull-Apart Minced Meat Pan Pide: Golden, Cheesy, and Irresistible

Ingredients
- 3 1/2 cups all-purpose flour
- 2 1/4 tsp instant yeast
- 1 tbsp granulated sugar
- 1 1/2 tsp kosher salt
- 1 1/2 cups warm water (110°F/45°C)
- 1/4 cup olive oil, plus more for the pan and hands
- 1 lb ground beef
- 1 medium onion, finely chopped
- 2 cloves garlic, minced
- 1 tsp smoked paprika
- 1 tsp ground cumin
- 1/2 tsp black pepper
- 2 cups shredded kaşar cheese
Instructions
- In a large bowl, whisk together the flour, instant yeast, sugar, and salt. Add the warm water and olive oil, and stir with a spatula until a shaggy dough forms. Turn the dough out onto a lightly floured surface and knead for 6 to 8 minutes, until smooth and elastic. The dough should be soft and slightly tacky but not sticky. Place the dough in a lightly oiled bowl, cover with plastic wrap, and let rise in a warm spot for 45 to 60 minutes, until doubled in size.
- While the dough rises, heat a skillet over medium-high heat. Add the ground beef and cook, breaking it up with a spatula, until browned and cooked through, about 6 to 8 minutes. Drain off excess fat. Add the chopped onion and garlic, and cook for 2 to 3 minutes until softened. Stir in the smoked paprika, cumin, and black pepper. Remove from heat and let cool slightly.
- Preheat the oven to 400°F (200°C). Generously oil a 10-inch round baking pan, including the sides. Punch down the risen dough and transfer it to the pan. Using oiled fingertips, gently stretch and press the dough to cover the bottom of the pan, letting it climb slightly up the sides. Press deep parallel ridges into the dough with your fingers, creating trenches. Spoon the seasoned ground beef mixture evenly into the trenches.
- Sprinkle the shredded kaşar cheese generously over the meat-filled ridges, covering them completely. The cheese should blanket the filling, with some gaps to allow the dough to puff up during baking.
- Place the pan in the preheated oven and bake for 25 minutes, or until the crust is puffed tall and golden brown, and the cheese is blistered and toasted in spots. The bread should sound hollow when tapped on the bottom. Remove from the oven and let cool in the pan for 5 minutes before serving.
- Using a spatula, lift a thick slice from the pan, letting the cheese stretch. Serve warm, pulling apart the pieces to reveal the soft, cotton-like crumb and the juicy spiced meat. Enjoy as a main or share as an appetizer.
Estimated nutrition per serving
- Calories
- 420
- Protein
- 18 g
- Carbohydrates
- 45 g
- Fat
- 18 g
Next recipe

Crispy Copycat McChicken Sandwich You Can Make at Home
See the recipe → →This recipe is based on a short cooking video and is published under the pen name Clara Weller. It was checked before publication, but errors can slip through. Nutrition, when shown, is an estimate. Read more in our editorial policy and on our food safety page.
More recipes to try

Sealed Stuffed Burger Pockets with Molten Cheddar
Total time: 1 h 2 min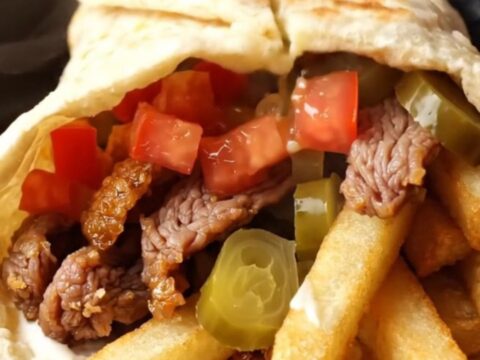
Crispy Beef Shawarma Wraps with Garlic Sauce
Total time: 55 min
One-Pan Whole Vegetable Meatball Fusilli
Total time: 55 min
Whole Roasted Vegetable Shell Pasta
Total time: 50 min
Stuffed Round Zucchini With Beef and Chickpeas
Total time: 1 h 10 min