Desserts · Part 2 of 3: Instructions
Peanut Butter Chocolate Layer Dessert Step-by-step instructions
- Prep
- Cook
- Total
- Serves
- 12
Before you start
Before beginning, ensure all ingredients are measured and ready. Soften the cream cheese at room temperature for about thirty minutes to facilitate easy mixing.
Clear sufficient space in your refrigerator to accommodate the 9x13 inch dish, as the dessert requires a flat surface to set properly. Have your electric mixer and spatulas cleaned and ready to use, as the assembly process moves quickly once the layers are prepared.
Ingredients at a glance (8)
- 2 cups graham cracker crumbs
- 1/2 cup unsalted butter, melted
- 1 cup creamy peanut butter
- 8 oz cream cheese, softened
- 2 packages instant chocolate pudding mix
- 16 oz whipped topping
- 1 cup chopped peanut butter cups
- 1/2 cup colorful candies
Instructions
Foundation and Filling
- Prepare the CrustCombine the graham cracker crumbs and melted butter in a medium bowl until the mixture resembles wet sand. Press the mixture firmly into the bottom of a 9x13 inch glass casserole dish to create an even base.Look for The crumbs should hold together when pinched.Tip Use the bottom of a flat measuring cup to press the crumbs down firmly for a stable base.
- Mix Peanut Butter FillingIn a separate large bowl, beat the softened cream cheese and peanut butter together using an electric mixer until smooth and creamy. Spread this mixture evenly over the prepared graham cracker crust.Look for The mixture should be light and fluffy without any visible lumps.Tip Ensure the cream cheese is at room temperature to prevent lumps in the filling.
The crust is pressed firmly into the bottom of the dish, creating a solid base. The peanut butter filling is smooth, glossy, and uniform in color, with no visible lumps of cream cheese. The surface of the filling is leveled off to ensure the subsequent chocolate layer sits perfectly flat.
Chocolate Layering
- Prepare Chocolate LayerPrepare the instant chocolate pudding mix according to the package instructions. Let the pudding set for a few minutes before spreading it carefully over the peanut butter layer.Look for The pudding should be thick enough to spread without running.Tip Whisk vigorously for two minutes to ensure the pudding thickens properly.
The chocolate pudding is thick, smooth, and fully incorporated. It is spread gently over the peanut butter layer without disturbing the base. The surface of the chocolate layer is even, providing a dark, rich contrast to the peanut butter filling beneath it.
Topping and Setting
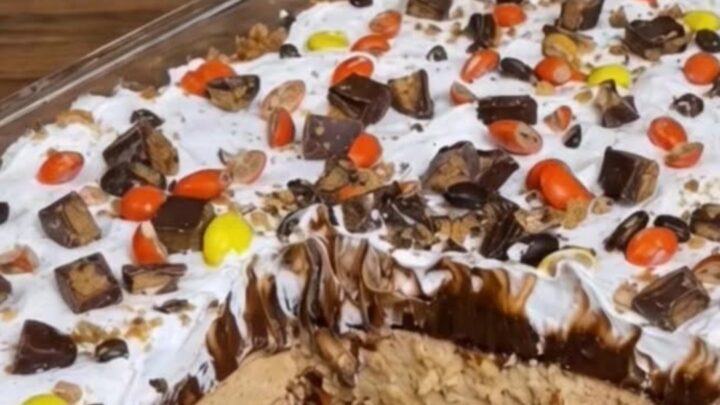
- Assemble and GarnishSpread the whipped topping over the chocolate layer, ensuring full coverage to the edges. Sprinkle the chopped peanut butter cups and colorful candies evenly over the top. Refrigerate the dish for at least two hours before slicing and serving.Look for The layers should be distinct and set after chilling.Tip Chill the dessert thoroughly to ensure clean slices when serving.
The whipped topping is spread evenly, covering the chocolate layer completely. The peanut butter cups and candies are scattered across the top for visual appeal.
The entire dessert looks cohesive and is ready to be chilled until it is firm enough to be sliced into clean, distinct portions.
Common mistakes
A common mistake is using cold cream cheese, which results in a lumpy filling. Another error is not letting the pudding thicken sufficiently before adding it to the dessert, which can cause the layers to bleed together.
Avoid rushing the chilling process, as two hours is the minimum time needed for the structure to stabilize for clean, beautiful slices.
How to tell it’s done
This dessert does not require baking, so doneness is determined by the setting of the layers. After refrigeration, the pudding should be firm to the touch, and the peanut butter layer should hold its shape when sliced.
If the layers seem loose, extend the refrigeration time to ensure the dessert is properly set before serving.
Up next · Part 3 of 3
2 variations · storage & make-ahead · 3 answers · printable card
Tips, FAQ & printable recipe (Part 3)← Back to the ingredients (Part 1)