Desserts · Part 2 of 3: Instructions
Rich Oreo Earthquake Cake with Gooey Marshmallow Step-by-step instructions
- Prep
- Cook
- Total
- Serves
- 8
Before you start
Before starting, ensure all ingredients are at room temperature to ensure proper mixing and baking. Preheat the oven and prepare the baking dish by greasing it well with butter or cooking spray.
Have the Oreos crushed and ready to go so that the final assembly can be completed quickly while the cake is still warm from the oven.
Ingredients at a glance (4)
- 1 box chocolate cake mix (prepared according to package directions)
- 7 oz marshmallow cream
- 1/2 cup chocolate glaze (store-bought or made ahead)
- 10 whole Oreos, crushed
Instructions
Base preparation
- Prepare the cake basePreheat the oven to 350°F (175°C). Prepare the chocolate cake mix in a large bowl according to the package instructions until smooth. Pour the batter evenly into a greased 9x13-inch baking dish, ensuring the surface is level for the layers to follow.Look for Batter should be smooth and free of large lumps.Tip Grease the pan thoroughly to prevent sticking.
At the end of this phase, the batter should be perfectly smooth and evenly spread in the baking dish. It is essential to ensure the pan is properly greased so the cake releases easily later. Check that the oven has reached the correct temperature before proceeding to ensure even rising.
Layering the filling
- Add the marshmallow layerDrop spoonfuls of marshmallow cream evenly over the top of the raw cake batter. Use a knife or skewer to gently swirl the marshmallow cream into the batter, creating a marbled effect that will result in gooey pockets throughout the finished cake.Look for Marshmallow should be distributed in visible swirls.Tip Warm the spoon slightly to help the marshmallow cream slide off easily.
The marshmallow cream should be distributed in distinct, generous dollops across the batter. When swirling, aim for gentle motions to maintain the integrity of the layers.
The goal is to see a beautiful marble pattern, which indicates that the marshmallow will be perfectly incorporated throughout the cake.
Baking and topping
- Bake and finishBake the cake for 45 minutes or until a toothpick inserted into the center comes out clean. Once removed, drizzle the chocolate glaze over the warm cake and sprinkle with the crushed Oreos. Let the cake rest for 15 minutes before slicing and serving warm.Look for The cake should be set and springy to the touch.Safe temperature 160°F (71°C) internal temperature (egg dishes)Tip The residual heat will help the glaze set perfectly.
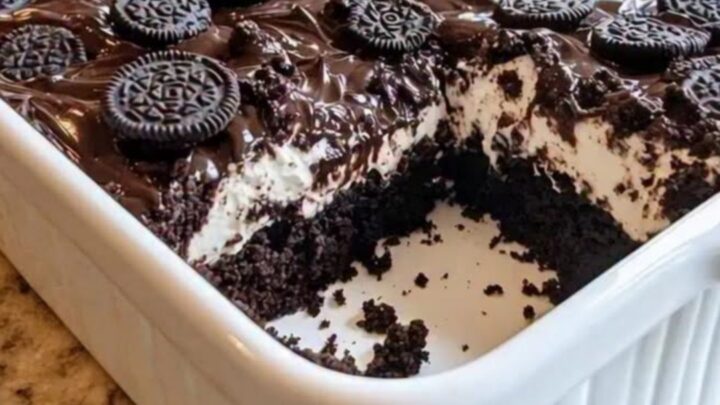
Once finished, the cake should look golden and set, with the marshmallow slightly caramelized in the spots where it touched the edges of the pan. The glaze should be applied evenly across the surface, and the cookie crumbs should be distributed generously to provide a uniform crunch in every bite.
Common mistakes
A common mistake is over-mixing the marshmallow cream into the batter, which can cause the layers to disappear rather than remain as distinct pockets.
Another error is applying the chocolate glaze while the cake is still piping hot, which can cause the glaze to soak in completely rather than creating a visible, beautiful layer on top. Always allow the cake to rest for the specified time to allow the structure to set.
How to tell it’s done
The cake is done when the edges are firm and pulling slightly away from the sides of the baking dish. A toothpick inserted into the center, avoiding the marshmallow pockets, should come out clean.
The internal temperature of the cake, which contains eggs, should reach 160°F (71°C) to ensure it is fully cooked and safe to enjoy.
- Egg dishes: 160°F (71°C) in the thickest part
Up next · Part 3 of 3
2 variations · storage & make-ahead · 3 answers · printable card
Tips, FAQ & printable recipe (Part 3)← Back to the ingredients (Part 1)