Dinner · Part 1 of 3: Ingredients
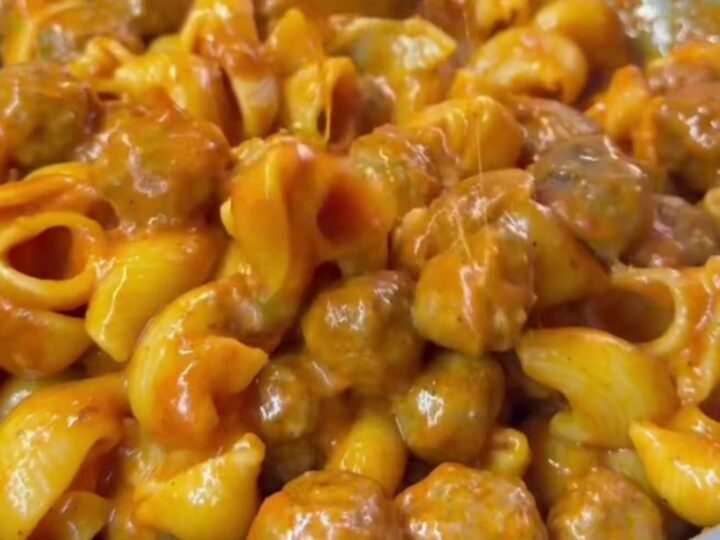
One-Pot Stuffed Shells and Meatballs Skillet
- Prep
- Cook
- Total
- Serves
- 6
This one-pot stuffed shells and meatballs skillet is the ultimate weeknight comfort food. Tender jumbo pasta shells cradle juicy mini meatballs, all smothered in a spiced tomato sauce and topped with a blanket of melted mozzarella and parmesan. The cheese pull is glorious, and the entire dish comes together in a single skillet, making cleanup a breeze. Perfect for busy evenings when you crave something hearty and satisfying without spending hours in the kitchen.
This skillet dinner combines two beloved Italian-American classics—stuffed shells and meatballs—into one efficient, flavor-packed meal. Instead of baking individual stuffed shells, the shells are nestled into a rich tomato sauce alongside mini meatballs, then topped with cheese and melted until bubbly.
The result is a cohesive, saucy, and cheesy dish that's both visually stunning and deeply satisfying. The recipe is designed for simplicity: one pan, minimal fuss, and maximum flavor. Whether you're feeding a family or meal-prepping for the week, this dish delivers comfort and ease in every bite.
Ingredients
- 1 lb ground beef (80% lean)
- 1/2 cup plain breadcrumbs
- 1 large egg
- 1/4 cup grated onion
- 2 cloves garlic, minced
- 1 tsp dried Italian herbs
- 1/2 tsp kosher salt
- 1/4 tsp black pepper
- 2 tbsp olive oil
- 12 oz jumbo pasta shells
- 3 cups spiced tomato sauce
- 1 1/2 cups shredded mozzarella cheese
- 1/2 cup grated parmesan cheese
- 1/4 cup fresh basil leaves, torn
Why this recipe works
The method here is all about building layers of flavor in a single skillet. Browning the meatballs first creates a flavorful fond on the bottom of the pan, which is then deglazed with the tomato sauce.
This adds a deep, savory richness to the sauce that you just can't get from simply simmering meatballs in sauce. The pasta shells are cooked separately to al dente, so they retain their shape and provide a satisfying bite, rather than becoming mushy in the sauce.
The cheese topping is the crowning glory. A combination of mozzarella and parmesan provides both gooey stretch and sharp, nutty flavor. Covering the skillet allows the cheese to melt evenly and create a bubbling, golden crust. The fresh basil added at the end brightens the dish with a pop of color and a fresh, herbal note that cuts through the richness. The result is a balanced, hearty meal that tastes like it simmered for hours, but comes together in under an hour.
Notes and substitutions
For the best texture, use 80% lean ground beef; it has enough fat to keep the meatballs juicy without being greasy. If you prefer a leaner option, ground turkey or chicken work well, but add a tablespoon of olive oil to the mixture to prevent dryness.
The grated onion adds moisture and sweetness; if you don't have a grater, finely mince the onion. The breadcrumbs help bind the meatballs, so don't skip them—panko or even crushed crackers are fine substitutes.
The spiced tomato sauce can be a good-quality marinara or your own homemade version. If using a plain marinara, consider adding a pinch of dried oregano or a dash of red pepper flakes for extra depth.
Jumbo pasta shells are essential for stuffing; if unavailable, use large rigatoni or conchiglioni. The skillet should be oven-safe if you plan to broil the cheese, but a standard lid works perfectly for melting. A 12-inch skillet is ideal to fit everything without overcrowding.
- ground beef: Ground turkey or Italian sausage (if using sausage, skip the salt and reduce the herbs).
- plain breadcrumbs: Panko breadcrumbs or crushed saltine crackers for a lighter texture.
- spiced tomato sauce: Use a good-quality marinara and add 1/2 teaspoon dried oregano and a pinch of red pepper flakes.
- jumbo pasta shells: Conchiglioni or large rigatoni; adjust cooking time as needed.
Equipment
- Large skillet with lid
- Mixing bowl
- Wooden spoon
- Measuring cups and spoons
- Box grater
Up next · Part 2 of 3
7 steps · 25 min of cooking · what to look for at each stage
Step-by-step instructions (Part 2)