Dinner · Part 2 of 3: Instructions
One-Pan Zucchini Tomato Pasta with Parmesan Step-by-step instructions
- Prep
- Cook
- Total
- Serves
- 4
Before you start
Before starting, bring a large pot of salted water to a boil for the pasta. Have all ingredients prepped: mince the garlic, slice the zucchini into thin coins, halve the cherry tomatoes, tear the basil leaves, and grate the parmesan. Measure the olive oil, chili flakes, and salt.
Reserve a cup of pasta water before draining — this is crucial for the sauce. Set out a large skillet and tongs. The entire cooking process takes about 15 minutes after the water boils, so having everything ready ensures smooth, stress-free cooking.
Ingredients at a glance (10)
- 12 oz spaghetti or other long pasta
- 3 tbsp extra virgin olive oil
- 4 cloves garlic, minced
- 1/2 tsp red chili flakes
- 2 medium zucchini, thinly sliced into coins
- 2 cups cherry tomatoes, halved
- 1 cup starchy pasta water, reserved
- 1/2 cup freshly grated parmesan cheese, plus more for serving
- 1/2 cup fresh basil leaves, torn
- Kosher salt, to taste
Instructions
Cook the Pasta and Sauté the Vegetables
- Cook the PastaBring a large pot of salted water to a boil. Add the spaghetti and cook according to package instructions until al dente. Reserve 1 cup of the starchy pasta water before draining. Drain the pasta but do not rinse it.Look for The pasta should be tender but still firm to the bite.Tip Salt the pasta water generously — it seasons the pasta from within.
- Sauté the AromaticsWhile the pasta cooks, heat the olive oil in a large skillet over medium heat. Add the minced garlic and red chili flakes, and sauté for 30 seconds until fragrant, stirring constantly to prevent burning.Look for The garlic should be sizzling and fragrant but not browned.Tip Keep the heat at medium so the garlic softens without scorching.
- Cook the ZucchiniAdd the sliced zucchini to the skillet in a single layer if possible. Cook for 4-5 minutes, stirring occasionally, until the zucchini is tender and golden on the edges. Season with a pinch of salt.Look for The zucchini should be tender and lightly browned in spots.Tip Don't overcrowd the pan; cook in batches if needed for even browning.
The pasta is boiling while the garlic and chili flakes sizzle in olive oil, filling the kitchen with a warm, spicy aroma. The zucchini slices are added and begin to soften, turning golden at the edges. The skillet should look vibrant with green and red, and the vegetables should be tender but not mushy. The garlic should be fragrant, not browned or burnt. Before moving on, the zucchini should be cooked through and lightly caramelized.
Combine and Create the Sauce
- Add the TomatoesAdd the halved cherry tomatoes to the skillet. Cook for 2-3 minutes, stirring gently, until the tomatoes start to soften and release their juices. They should still hold their shape.Look for The tomatoes should be glossy and slightly burst, with juices pooling in the pan.Tip Let the tomatoes sit undisturbed for a minute to get a little char.
- Combine Pasta and VegetablesAdd the drained spaghetti to the skillet along with 1/2 cup of the reserved pasta water. Toss everything together with tongs, using a gentle tossing motion to coat the pasta with the tomato-zucchini mixture.Look for The pasta should be well coated and the sauce slightly thickened.Tip Add more pasta water a splash at a time if the mixture seems dry.
- Finish with Parmesan and BasilRemove the skillet from the heat. Sprinkle the grated parmesan over the pasta and add the torn basil leaves. Toss vigorously until the cheese melts and creates a creamy, glossy sauce. Season with salt to taste.Look for The cheese should melt into a silky sauce that clings to the pasta.Tip Tossing off the heat prevents the cheese from clumping.
The cherry tomatoes are added and start to burst, releasing their sweet-tart juices into the pan. The drained spaghetti goes in with a splash of starchy pasta water, and tossing brings everything together.
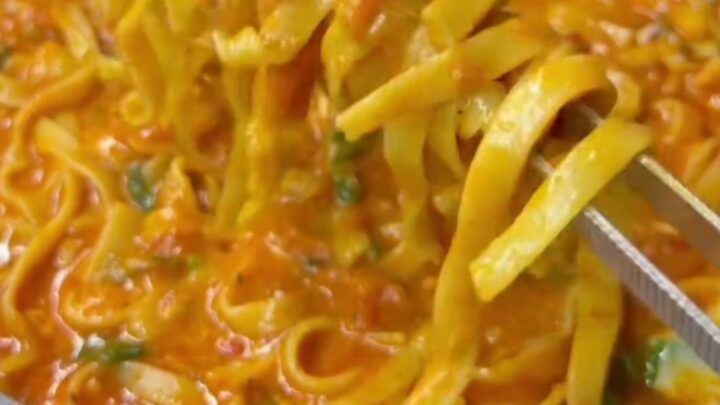
The mixture should look glossy and slightly saucy. As the parmesan is added off the heat, it melts into a creamy coating that clings to the pasta. The basil leaves brighten the dish with their fresh aroma. The sauce should be silky, not watery or thick.
Serve with a Final Shower
- Serve with Extra ToppingsDivide the pasta among serving bowls. Top each portion with an extra shower of grated parmesan and a drizzle of olive oil. Garnish with a few whole basil leaves if desired.Look for The pasta should look glossy, with melted cheese and fresh herbs on top.Tip Serve immediately while hot and creamy — the sauce thickens as it cools.
The pasta is plated, topped with extra parmesan and a drizzle of olive oil. The dish looks fresh and inviting, with glistening noodles, tender vegetables, and bright green basil. The cheese is melted and creamy, and the oil adds a glossy sheen. Each bite should be flavorful — sweet tomatoes, savory zucchini, salty parmesan, and a hint of heat. Serve immediately while hot and creamy.
Common mistakes
One common mistake is overcooking the pasta — it will become mushy when tossed in the skillet. Cook it al dente, as it will continue to cook slightly in the pan. Another pitfall is burning the garlic; keep the heat at medium and stir constantly.
Skipping the pasta water is a frequent error — without it, the sauce won't come together properly. Also, adding the cheese over high heat can cause it to clump; remove the skillet from the heat before stirring in the parmesan. Finally, don't overcrowd the zucchini; cook in batches if necessary to get golden edges.
How to tell it’s done
The pasta is done when it is al dente — tender but still firm to the bite. The zucchini should be tender and lightly golden, and the tomatoes should have softened and released their juices. The final dish should have a glossy, creamy sauce that coats the pasta without being watery.
Taste and adjust salt if needed. Since there is no raw protein in this recipe, there is no specific internal temperature to check; the visual cues and texture are the best indicators of doneness.
Up next · Part 3 of 3
4 variations · storage & make-ahead · 5 answers · printable card
Tips, FAQ & printable recipe (Part 3)← Back to the ingredients (Part 1)