Dinner · Part 1 of 3: Ingredients
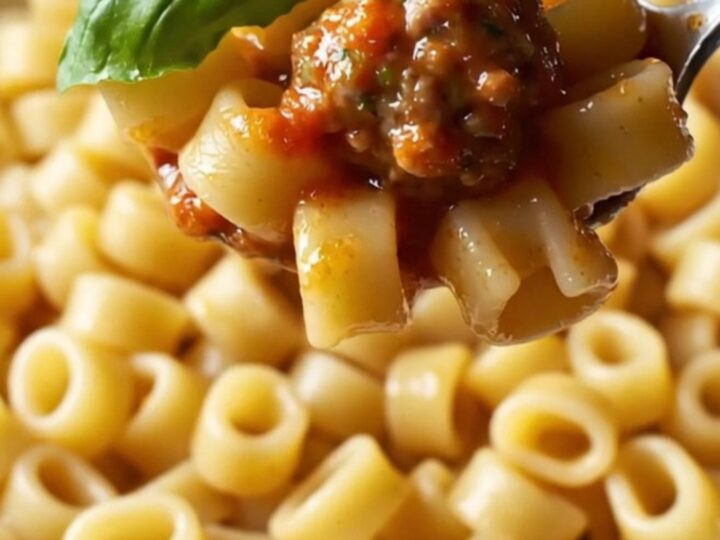
One-Pan Tomato Mini Meatball Ditalini Pasta
- Prep
- Cook
- Total
- Serves
- 4
This one-pan tomato mini meatball ditalini pasta is the ultimate weeknight comfort food. Whole ripe tomatoes simmer with seasoned beef meatballs in olive oil until they collapse into a silky, sweet ragù. Then, cooked ditalini pasta is tossed right in the skillet, absorbing all that rich flavor.
The result is a glossy, satisfying dish that comes together in under 30 minutes. Perfect for busy evenings when you need a hearty meal without a pile of dishes. Fresh basil adds a bright finish, making every bite taste like a warm hug.
Imagine a skillet where whole tomatoes slowly soften in olive oil, releasing their juices, while tiny meatballs brown and infuse the sauce with savory depth. That's the magic of this one-pan pasta. You simmer the tomatoes and meatballs together, then mash the tomatoes into a silky ragù and toss in cooked ditalini pasta with a splash of pasta water.
The pasta absorbs the sauce, creating a cohesive, comforting dish. It's simple, honest cooking that lets quality ingredients shine. With minimal prep and just one skillet, this recipe is a weeknight lifesaver.
Ingredients
- 1/2 cup olive oil
- 4 whole ripe tomatoes
- 20 seasoned ground beef mini meatballs
- 1 tbsp tomato paste
- 1 tsp salt
- Black pepper to taste
- Red chili flakes to taste
- 250 g ditalini pasta
- 1/4 cup pasta water
- Fresh basil leaves for garnish, to taste
Why this recipe works
Simmering whole tomatoes in olive oil concentrates their sweetness and creates a rich, velvety sauce without any chopping or seeding.
The low, slow heat breaks down the tomatoes' cell walls, releasing their natural juices and pectin, which thickens the sauce to a glossy, spoon-coating consistency. This method is hands-off and yields a deeply flavorful ragù that tastes like it simmered for hours.
Cooking the meatballs directly in the same skillet means they absorb the tomato juices and olive oil, staying juicy and tender. The pasta water, added at the end, is key: its starch helps the sauce cling to every ditalini ring, creating a silky, cohesive dish.
This technique, borrowed from classic Italian pasta cooking, ensures the pasta is perfectly coated and every bite is full of flavor.
Notes and substitutions
Choose ripe, in-season tomatoes for the best flavor. If tomatoes are out of season, you can substitute canned whole tomatoes, but the video specifies fresh. The meatballs should be small, about 1 inch in diameter, so they cook through in the same time as the tomatoes. If using larger meatballs, increase the simmering time and ensure they reach 160°F (71°C) internally.
Ditalini is a short, tube-shaped pasta that catches the sauce well. You can use other small shapes like tubetti or small shells. The pasta water is essential—reserve it before draining. If the sauce seems too thick, add a little more pasta water to loosen it. Fresh basil is a must for garnish; it adds a aromatic contrast to the rich sauce.
- ditalini pasta: Other short pasta like tubetti, small shells, or elbow macaroni
- seasoned ground beef mini meatballs: Store-bought frozen meatballs or homemade turkey meatballs (adjust cooking time)
- fresh basil: Dried oregano or thyme (add with the tomatoes)
Equipment
- Large skillet with lid
- Tweezers or tongs
- Wooden spoon or spatula
- Pot for boiling pasta
- Colander
- Measuring cups and spoons
Up next · Part 2 of 3
5 steps · 20 min of cooking · what to look for at each stage
Step-by-step instructions (Part 2)