Dinner · Part 2 of 3: Instructions
One-Pan Honey Mustard Bacon Chicken Skillet Step-by-step instructions
- Prep
- Cook
- Total
- Serves
- 4
Before you start
Before starting, dice the bacon into small pieces and pat the chicken cutlets dry with paper towels. Season the chicken with garlic powder on both sides. In a small bowl, whisk together the Dijon mustard, whole-grain mustard, and honey until smooth.
Have the heavy cream measured and ready. Set a large cast-iron skillet over medium heat so it is hot when you add the bacon. If using a thermometer, keep it nearby to check the chicken's internal temperature.
Ingredients at a glance (7)
- 6 strips thick-cut applewood bacon, diced
- 1 1/2 lb chicken breast cutlets
- 1 tsp garlic powder
- 1/4 cup Dijon mustard
- 1/4 cup whole-grain mustard
- 1/3 cup honey
- 1/2 cup heavy cream
Instructions
Phase 1: Prep and Crisp
- Prep the bacon and chickenDice the bacon into small lardons. Pat the chicken cutlets dry with paper towels and season both sides with garlic powder. In a small bowl, whisk together the Dijon mustard, whole-grain mustard, and honey until smooth.Look for The bacon is diced, the chicken is seasoned, and the sauce is whisked.Tip For even cooking, pound thicker chicken cutlets to an even 1/2-inch thickness.
- Crisp the baconPlace a large cast-iron skillet over medium heat and add the diced bacon. Cook, stirring occasionally, until the bacon is crispy and the fat has rendered, about 6 to 8 minutes. Use a slotted spoon to transfer the bacon to a plate, leaving the fat in the skillet.Look for The bacon is browned and crisp, and the skillet has about 2 tablespoons of hot fat.Tip Don't overcrowd the pan; cook the bacon in a single layer for even crisping.
By the end of this phase, the bacon is crispy and the fat is rendered, filling the kitchen with a smoky aroma. The chicken is seasoned and ready, and the honey mustard sauce is whisked and waiting. The skillet is hot and the bacon is crackling. This is the foundation of the dish, and it should take about 10 minutes.
Phase 2: Sear and Sauce
- Sear the chickenIncrease the heat to medium-high and carefully place the chicken cutlets in the hot bacon fat. Sear until golden brown and cooked through, 4 minutes per side. The internal temperature should reach 165°F (74°C) when measured with an instant-read thermometer. Transfer the chicken to a plate.Look for The chicken is deeply golden on both sides and registers 165°F (74°C).Safe temperature 165°F (74°C) internal temperature (poultry)Tip Avoid moving the chicken while it sears to get a nice crust.
- Make the honey mustard cream sauceReduce the heat to medium. Pour the honey mustard mixture into the skillet, scraping up any browned bits from the bottom. Stir in the heavy cream and bring to a gentle simmer. Let the sauce bubble for 1 to 2 minutes until slightly thickened.Look for The sauce is smooth, lightly bubbling, and has a glossy sheen.Tip Scraping the browned bits adds flavor to the sauce; don't skip it.
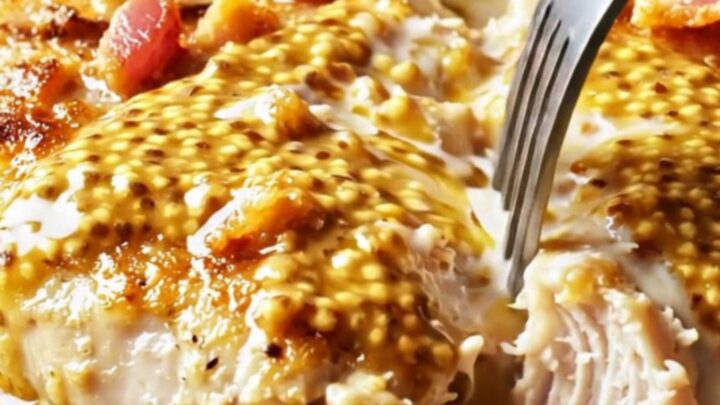
The chicken should be deeply golden on both sides, with a crisp crust. The sauce, once added, will bubble and thicken, turning into a glossy, amber-colored glaze.
The smell is sweet and tangy with a hint of smoke. The chicken should be cooked through by the end of this phase, so check the temperature to ensure it is safe to proceed.
Phase 3: Simmer and Serve
- Simmer chicken in the sauceReturn the chicken to the skillet, nestling it into the sauce. Add the crispy bacon back to the pan. Let everything simmer together over medium-low heat for 3 minutes, spooning sauce over the chicken as it cooks.Look for The sauce is bubbling gently around the chicken, and the bacon is scattered on top.Safe temperature 165°F (74°C) internal temperature (poultry)Tip Simmering helps the flavors meld and the chicken stay moist.
- Serve the skilletRemove the skillet from the heat. Slice the chicken cutlets and serve immediately with extra sauce spooned over the top.Look for The chicken is juicy and coated in the tangy-sweet sauce.Tip Serve with crusty bread or mashed potatoes to soak up the sauce.
The final simmer brings everything together. The sauce coats the chicken and bacon evenly, and the aroma is irresistible. The chicken is tender and juicy, and the sauce is thick enough to cling to each piece. The skillet is ready to come to the table, garnished with nothing more than the bacon and sauce already in the pan.
Common mistakes
One common mistake is overcrowding the skillet when searing the chicken. If the cutlets overlap, they will steam instead of brown, leading to a pale crust and less flavor. Cook in batches if necessary.
Another mistake is adding the cream too early or boiling it too vigorously, which can cause it to curdle. Keep the heat at a gentle simmer and stir frequently. Finally, resist the urge to skip the deglazing step; the browned bits in the pan are packed with flavor and will enrich the sauce.
How to tell it’s done
The chicken is done when it is golden brown on both sides and the internal temperature reaches 165°F (74°C) when measured with an instant-read thermometer inserted into the thickest part. The sauce should be thick enough to coat the back of a spoon, and the bacon should be crispy.
When you slice into a cutlet, the juices should run clear, and the meat should be moist, not dry. If the sauce is too thin, let it simmer a little longer; if it is too thick, add a splash of chicken broth or water.
- Poultry: 165°F (74°C) in the thickest part
Up next · Part 3 of 3
4 variations · storage & make-ahead · 5 answers · printable card
Tips, FAQ & printable recipe (Part 3)← Back to the ingredients (Part 1)