Dinner · Part 2 of 3: Instructions
One-Pan Crispy Roasted Chicken Drumsticks and Potatoes Step-by-step instructions
- Prep
- Cook
- Total
- Serves
- 4
Before you start
Before beginning the cooking process, ensure that all ingredients are properly prepped and organized. Wash and thoroughly dry the potatoes and peppers. Cut the potatoes into even wedges and slice the peppers into thick strips.
Pat the chicken drumsticks completely dry with paper towels; any surface moisture on the skin will create steam in the oven, preventing it from achieving that coveted crispy texture. Arrange everything nearby so you can easily assemble the pan.
Ingredients at a glance (3)
- 8 bone-in, skin-on chicken drumsticks
- 4 large potatoes, cut into wedges
- 2 bell peppers, sliced
Instructions
Preparation and Arrangement
- Preheat and PrepPreheat the oven to 400°F (204°C). Pat the chicken drumsticks dry with paper towels to ensure the skin gets crispy. Place them on a clean plate.Look for The chicken skin should feel dry to the touch.Tip Drying the skin thoroughly is the key to achieving a crispy texture.
- Arrange the VegetablesToss the potato wedges and sliced peppers together on a large rimmed baking sheet. Arrange them in an even, single layer to ensure they roast properly rather than steaming.Look for The vegetables should be evenly spread across the baking sheet.Tip Spread the vegetables out to avoid crowding, which can cause them to steam.
- Nestle the ChickenNestle the chicken drumsticks among the potatoes and peppers on the baking sheet. Ensure the chicken skin is seasoned and the drumsticks are in direct contact with the pan.Look for The chicken should be evenly distributed among the vegetables.Tip Ensure the chicken is in direct contact with the baking sheet for even browning.
At the end of this phase, the chicken drumsticks, potatoes, and peppers should be prepped and arranged in a single, uncrowded layer on the baking sheet. The chicken should be nestled comfortably among the vegetables, ready to enter the preheated oven.
Initial Roasting and Basting
- Initial RoastPlace the baking sheet in the preheated oven and roast for 25 minutes, until the chicken skin starts to look golden-brown and the potatoes begin to soften.Look for The chicken skin will start to look golden-brown and opaque.Tip Do not open the oven door too often to keep the heat consistent.
- Baste the ChickenCarefully remove the baking sheet from the oven. Use a spoon to baste the glossy chicken drumsticks with the rich, savory pan juices that have accumulated in the pan.Look for The chicken skin should look glossy and moist after basting.Tip Basting helps keep the chicken juicy while adding flavor to the skin.
After the initial roast, the kitchen will be filled with the rich aroma of roasting chicken. The chicken skin will start to look opaque and slightly golden, and the potatoes will begin to soften.
Savory, bubbling juices will have accumulated at the bottom of the pan. Basting the drumsticks at this point coats them in these rich juices, creating a glossy, flavorful glaze that promotes further browning.
Final Crisp and Doneness Check
- Final Roast and Temp CheckReturn the pan to the oven and roast for an additional 15 to 20 minutes. The chicken is done when an instant-read thermometer inserted into the thickest part of a drumstick registers at least 165°F (74°C), and the potatoes are tender.Look for The chicken skin must be crispy and sizzling, and the potatoes tender.Safe temperature 165°F (74°C) internal temperature (poultry)Tip Always check the temperature in multiple drumsticks to ensure even doneness.
- Rest and ServeRemove the baking sheet from the oven and let the dish rest for 5 minutes before serving to allow the juices to redistribute throughout the meat.Look for The sizzling will slow down as the dish rests.Tip Resting ensures the chicken remains juicy when you bite into it.
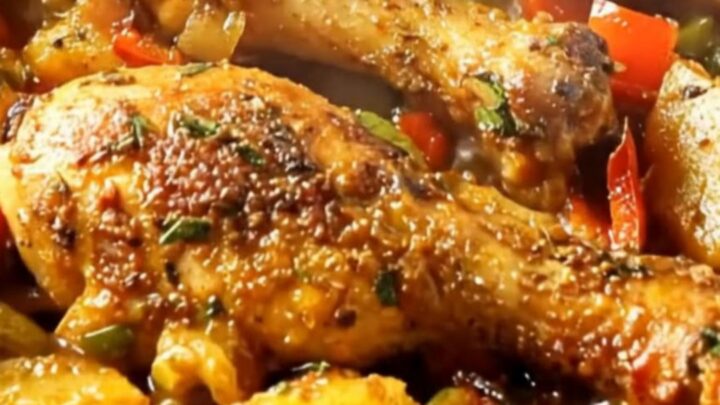
At the final checkpoint, the chicken skin must be deeply golden-brown, crispy, and sizzling actively. The potatoes should have caramelized, crispy edges and be easily pierced with a fork, while the peppers should be tender and slightly charred. Most importantly, the internal temperature of the thickest part of the drumsticks must register a safe and succulent 165°F (74°C) on a digital thermometer.
Common mistakes
One of the most common mistakes is crowding the baking sheet. When ingredients are packed too tightly, they release moisture that traps steam, resulting in soggy chicken skin and mushy potatoes.
Another error is failing to pat the chicken dry before cooking, which prevents the skin from crispying properly. Lastly, skipping the basting step can lead to drier chicken skin; basting reintroduces moisture and fat to the surface, helping the skin brown beautifully and stay flavorful.
How to tell it’s done
To accurately determine doneness, always rely on a digital meat thermometer rather than visual cues alone. Insert the thermometer probe into the thickest part of the largest drumstick, making sure it does not touch the bone, which can conduct heat and give a false high reading.
The safe internal temperature for poultry is 165°F (74°C). At this temperature, the meat will be tender, the juices will run completely clear, and the potatoes will be perfectly tender throughout.
- Poultry: 165°F (74°C) in the thickest part
Up next · Part 3 of 3
2 variations · storage & make-ahead · 3 answers · printable card
Tips, FAQ & printable recipe (Part 3)← Back to the ingredients (Part 1)