Desserts · Part 1 of 3: Ingredients
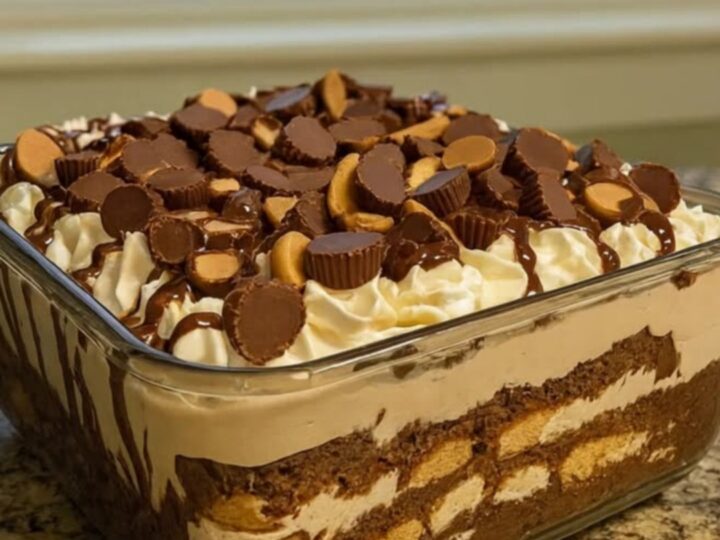
Decadent No-Bake Peanut Butter Cup Lush Dessert
- Prep
- Cook
- Total
- Serves
- 12
Discover the art of creating a decadent, no-bake layered dessert that combines the iconic flavors of rich chocolate and creamy peanut butter. This recipe delivers a sophisticated treat that requires minimal effort but offers maximum visual and flavor appeal, making it an ideal choice for any occasion where a show-stopping sweet is required.
The no-bake peanut butter cup lush is a classic layered dessert that relies on the contrast between silky peanut butter, smooth chocolate ganache, and light whipped cream. By carefully layering these components in a clear glass dish, the resulting dessert showcases distinct, beautiful tiers that are as pleasing to the eye as they are to the palate.
This recipe focuses on achieving the perfect balance of textures, ensuring each bite is creamy, rich, and deeply satisfying. Whether prepared for a weekend treat or a holiday gathering, this lush dessert provides a reliable and impressive outcome every single time it is prepared in the home kitchen.
Ingredients
Base
- 1 1/2 cups creamy peanut butter
Filling
- 1 1/2 cups chocolate ganache
Topping
- 2 cups whipped cream
- 10 peanut butter cups, chopped
Why this recipe works
The method of layering chilled components in a clear dish creates a stunning visual effect that elevates a simple dessert into something special. Each layer is allowed to set slightly before the next is added, which ensures that the distinct boundaries between the peanut butter, chocolate, and cream remain visible when the dessert is sliced and served to guests.
By utilizing a completely no-bake approach, this recipe eliminates the need for oven time or stove cooking, which is especially beneficial during warm summer days.
The steady cooling process in the refrigerator serves to firm up each layer, allowing the flavors to meld together while maintaining the structural integrity required for cutting clean, beautiful slices that hold their shape on a plate.
Notes and substitutions
For the best results, use a high-quality creamy peanut butter that does not separate easily, as this provides the most consistent texture for the base layer.
If the peanut butter is too stiff, place the jar in a bowl of warm water for a few minutes to soften it slightly, which will make it much easier to spread across the bottom of the glass dish without dragging or pulling.
When selecting a chocolate ganache, ensure it has cooled to room temperature before pouring it over the peanut butter to prevent any unwanted melting of the base layer.
The choice of whipped cream can range from a light commercial variety to a homemade version stabilized with a little confectioners' sugar, depending on the desired richness and preference for sweetness in the final dessert.
- creamy peanut butter: almond butter for a different nut profile
- chocolate ganache: chocolate pudding for a lighter texture
Equipment
- 9x13 inch glass baking dish
- rubber spatula
- chef knife
- mixing bowls
- metal server