Desserts · Part 2 of 3: Instructions
Molten Nutella Skillet Lava Brownie with Crackly Top Step-by-step instructions
- Prep
- Cook
- Total
- Serves
- 6
Before you start
Before starting, measure all ingredients and bring the eggs to room temperature if possible. Chop the dark chocolate and cut the butter into pieces. Freeze the Nutella in a disk shape at least 2 hours ahead, or overnight. Butter the skillet and set it aside.
Heat the oven to 350°F (175°C) and position a rack in the center. Have the flour and cocoa sifted together. Prepare the ice cream and toasted hazelnuts for serving, but keep the ice cream in the freezer until the brownie is ready.
Ingredients at a glance (9)
- 150 g dark chocolate, chopped
- 100 g butter, plus extra for the skillet
- 150 g brown sugar
- 2 large eggs
- 50 g all-purpose flour
- 30 g unsweetened cocoa powder
- 1/2 cup Nutella, frozen into a disk
- 1/4 cup chopped hazelnuts, toasted
- vanilla bean ice cream, for serving
Instructions
Melt and whip
- Melt and whip the baseMelt the dark chocolate and butter together in a heatproof bowl set over a pan of simmering water, stirring until glossy and smooth. Remove from the heat and let cool slightly. Add the brown sugar and eggs, then beat vigorously for 2 minutes until the mixture is pale, thick, and glossy. This vigorous beating creates the shiny, crackly top as the brownie bakes.Look for The mixture should be pale, thick, and fall in a ribbon when the whisk is lifted.Tip Beating for the full 2 minutes is key for the crackly crust; do not rush this step.
- Fold in the dry ingredientsSift the flour and cocoa powder over the chocolate mixture. Fold gently with a rubber spatula until just combined and no streaks of flour remain. Do not overmix, as that can make the brownie tough. The batter will be thick and fudgy.Look for The batter should be uniformly dark and slightly thick, with no dry patches.Tip Sifting the cocoa removes lumps and ensures an even, smooth batter.
The chocolate and butter should be melted until glossy, and after beating with sugar and eggs, the mixture should be pale, thick, and fall in a ribbon.
The color will lighten noticeably, and the texture will become airy and creamy. This is the foundation for the crackly top, so take the time to beat it well.
Assemble and bake
- Assemble the skilletButter a 10-inch cast iron skillet generously. Pour half of the brownie batter into the skillet and spread it evenly. Place the frozen Nutella disk in the center, then pour the remaining batter over it, covering the disk completely. Smooth the top gently.Look for The frozen disk should be fully hidden under the batter, with the top smooth.Tip Make sure the Nutella disk is frozen solid so it stays intact during baking and creates a distinct lava core.
- Bake until set around the edgesHeat the oven to 350°F (175°C). Bake the brownie for 20 minutes, until the edges are set and the center is soft but not liquid. The top should look crackly and slightly shiny. A toothpick inserted near the edge should come out with moist crumbs, but the center will remain gooey.Look for The edges look dry and set, while the center still wobbles gently when the skillet is nudged.Safe temperature 160°F (71°C) internal temperature (egg dishes)Tip Do not overbake; the center should remain molten, so pull it out while the middle is still soft.
The skillet is filled with batter, the frozen Nutella disk is hidden in the center, and the top is smoothed. As it bakes, the edges will set and pull away from the pan, while the center remains soft. The top will develop a shiny, crackly crust, and the kitchen will smell intensely of chocolate and hazelnut.
Top and serve
- Top and serve warmLet the brownie cool for 5 minutes on a wire rack. Top with a scoop of vanilla bean ice cream and sprinkle with toasted chopped hazelnuts. Scoop into the warm center to reveal the molten Nutella lava. Serve immediately while the center is still flowing.Look for The ice cream begins to melt against the warm brownie, and the Nutella flows out when scooped.Tip Use a large spoon to dig straight down to get the best contrast of warm brownie, cold ice cream, and molten filling.
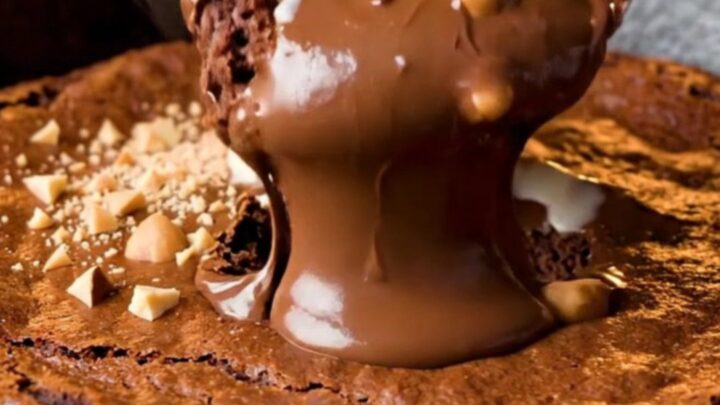
After a short rest, the brownie is crowned with a scoop of vanilla ice cream and a shower of toasted hazelnuts. When the spoon cuts in, the molten Nutella flows out in a dark, glossy river. The contrast of warm brownie, cold ice cream, and crunchy nuts is the final, irresistible touch.
Common mistakes
One common mistake is overbaking the brownie, which dries out the center and ruins the lava effect. Pull it out when the edges are set but the middle still jiggles. Another mistake is not beating the eggs and sugar long enough, resulting in a flat top.
Beat for the full 2 minutes. Also, make sure the Nutella disk is frozen solid; if it is too soft, it will sink and melt into the batter. Finally, do not overmix the dry ingredients, as that develops gluten and makes the brownie tough.
How to tell it’s done
The brownie is done when the edges are set and pull away slightly from the skillet, and the top is crackly and shiny. The center should still look soft and slightly underdone, but not liquid.
A toothpick inserted near the edge should come out with a few moist crumbs, while the center will remain gooey. The internal temperature of the batter should reach 160°F (71°C) for food safety, but the center will be molten. Let it rest for 5 minutes before serving to allow the lava to set slightly.
- Egg dishes: 160°F (71°C) in the thickest part
Up next · Part 3 of 3
4 variations · storage & make-ahead · 5 answers · printable card
Tips, FAQ & printable recipe (Part 3)← Back to the ingredients (Part 1)