Dinner · Part 2 of 3: Instructions
Million Dollar Cheesy Beef Spaghetti (One-Pan Baked) Step-by-step instructions
- Prep
- Cook
- Total
- Serves
- 8
Before you start
Get everything in place before the burner goes on, because the assembly moves fast once the sauce is ready. Set out the cream cheese and sour cream first so they soften while the rest of the prep happens; cold cream cheese never spreads smoothly. Dice the onion, mince the garlic, and shred the mozzarella if using a block. Fill the large pot for the pasta and put the colander in the sink. Butter the 9x13-inch baking dish and set it near the stove.
Ingredients at a glance (14)
- 1 lb spaghetti
- 1 lb ground beef
- 1 yellow onion, finely diced
- 3 garlic cloves, minced
- 24 oz jarred marinara sauce
- 2 tbsp tomato paste
- 2 tsp Italian seasoning
- 1 tsp kosher salt, plus more for the pasta water
- 1/2 tsp black pepper
- 8 oz cream cheese, softened
- 1 cup sour cream
- 1/2 cup grated Parmesan
- 2 tbsp butter
- 3 cups shredded mozzarella
Instructions
Build the meat sauce
- Boil the spaghettiBring a large pot of well-salted water to a rolling boil and add the spaghetti. Cook one minute less than the package directions so the strands stay firm, then scoop out about a cup of pasta water before draining. Toss the drained spaghetti with the butter so the strands do not stick.Look for The pasta bends without breaking and still shows a chalk-white pinpoint at the center.Tip Salting the water like the sea seasons every strand from the inside out.
- Brown the ground beefHeat the skillet over medium-high and add the ground beef with the diced onion. Break the meat into small crumbles and cook until no pink remains, 6 to 8 minutes, until the beef reaches 160°F (71°C) internally. Tip in the garlic and cook one minute more.Look for The crumbles turn deep brown with no pink, and the onions turn translucent and soft.Safe temperature 160°F (71°C) internal temperature (ground meat)Tip Let the beef sit undisturbed a minute at a time so it browns instead of steaming.
- Simmer the meat sauceStir the tomato paste into the beef and let it darken for a minute, then pour in the marinara. Add the Italian seasoning, salt, pepper, and half a cup of the reserved pasta water. Simmer gently 8 to 10 minutes until slightly thickened, then taste and adjust the salt.Look for The sauce coats the spatula, and a spoon dragged through leaves a slow-filling trail.Tip The splash of pasta water loosens the sauce just enough to coat every strand later.
At the end of this phase, the spaghetti sits drained and buttered in the colander, glossy and separate, and the meat sauce is thick enough to mound on a spoon. The beef shows no pink anywhere and registered 160°F (71°C), the onions have melted into the sauce, and the marinara has darkened and tightened after its short simmer.
Taste the sauce now; it should taste slightly bold and salty, because the pasta and the creamy layer will mellow it. If it tastes flat, add salt a quarter teaspoon at a time. Before moving on, confirm the oven is heating and the creamy ingredients are soft.
Layer the dish
- Mix the creamy layerWhile the sauce simmers, stir the softened cream cheese, sour cream, and grated Parmesan together in a mixing bowl until completely smooth. Work the mixture until no streaks remain and it spreads like thick frosting. If the cream cheese resists, let it sit a few minutes longer at room temperature.Look for The mixture looks glossy and uniform, with no lumps of cream cheese left.Tip Truly soft cream cheese is the whole game here; cold spots turn into lumps in the bake.
- Layer the bottom pastaPreheat the oven to 375°F (190°C) and butter the baking dish. Spread half of the cooked spaghetti evenly across the bottom, then ladle about a third of the meat sauce over it. Keep the layer thin and even so the slices later hold their shape instead of sliding apart.Look for Every strand looks moistened, with no dry pale patches peeking through.Tip Use tongs to twirl the spaghetti into loose nests; they stack into cleaner slices.
- Spread the cream layerDrop spoonfuls of the creamy mixture over the first pasta layer and spread it gently to the edges with a spatula or the back of a spoon. Work from the center outward so the cream settles between the strands, keeping the layer even so every serving gets some.Look for No pasta shows through the white layer, and it reaches all four corners.Tip Dipping the spatula in warm water helps the sticky cream spread without dragging pasta.
- Top and finish assemblyAdd the remaining spaghetti in an even layer, then spoon the rest of the meat sauce over the top and spread it edge to edge. Shower the whole dish with the shredded mozzarella, covering the sauce completely. Give the dish a gentle shake to settle the layers before it goes into the oven.Look for The cheese covers the sauce in an unbroken blanket with a few saucy gaps at the edges.Tip Reserve a handful of mozzarella to add for the last ten minutes of baking for extra pull.
The assembled dish should look like a finished lasagna seen from above: an even white creamy band fully hidden between two pasta layers, sauce covering the top pasta edge to edge, and a complete blanket of mozzarella with no sauce peeking through.
Shake the dish gently; the layers should settle together without sloshing, which means the sauce is thick enough. Check that the cheese reaches all four corners, since uncovered corners dry and scorch. If any sauce shows through the cheese, scatter a little more over those spots. The dish is ready for the oven the moment it looks uniform.
Bake and serve
- Bake until golden and bubblingBake the dish uncovered on the center rack for 25 to 30 minutes, until the cheese is melted and golden in spots and the sauce bubbles visibly at the edges. If the top colors too fast, lay a sheet of foil loosely over the dish for the final minutes.Look for Steady bubbling at the edges and deep golden patches across the cheese top.Tip A glass dish shows the bubbling at the edges clearly, so watch the side walls for the cue.
- Rest, cut, and serveSet the dish on a rack and let it rest for 10 minutes so the layers set and slice cleanly. Cut into squares with a sharp knife or scoop generous portions with a metal spatula, letting the cheese stretch as you lift. Plate and serve while the cheese is still pulling.Look for A cut edge holds crisp layers with the creamy band running through the middle.Tip The rest is not optional; cutting early turns neat squares into a shapeless pile.
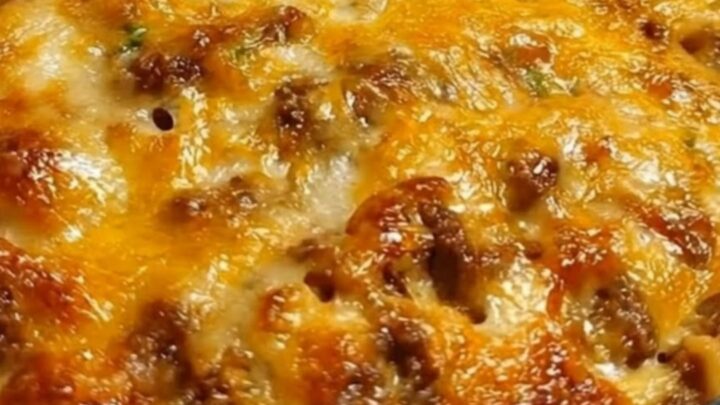
Straight from the oven, the top should be molten with golden-brown blisters and the sauce visibly bubbling at the edges of the glass dish. After the 10-minute rest, a cut with a sharp knife shows clean strata: pasta, sauce, the creamy middle band, pasta, sauce, cheese.
A spatula slid under a square lifts it in one piece, and the cheese stretches in long ribbons as it rises. Steam should rise steadily from the cut edge. If the squares hold their shape and the middle is piping hot, the dish is done; if the layers slide, rest another 5 minutes.
Common mistakes
The most common slip is overcooked pasta: spaghetti boiled to full softness keeps absorbing sauce in the oven and turns mushy, so pull it a minute early. Cold cream cheese is the second; it never spreads evenly and leaves lumpy streaks, so give it real time to soften. Skimping on the cheese coverage dries out the top, since exposed sauce steams away instead of staying sealed under the mozzarella. Cutting too soon is the final mistake. Without a 10-minute rest, the layers slump and the neat squares collapse into a saucy pile.
How to tell it’s done
The bake is done when the sauce bubbles steadily around the edges of the dish and the mozzarella shows golden, lightly blistered patches across the whole surface. Slide a thin knife into the center and hold it there a moment; it should feel hot to the touch when withdrawn.
The beef was already cooked through to 160°F (71°C) before the sauce went in, and the oven heat brings the entire dish piping hot, so the visual and thermal cues at the edges are the reliable signals. Rest the pan 10 minutes before cutting so the layers set.
- Ground meat: 160°F (71°C) in the thickest part
Up next · Part 3 of 3
4 variations · storage & make-ahead · 5 answers · printable card
Tips, FAQ & printable recipe (Part 3)← Back to the ingredients (Part 1)