Desserts · Part 1 of 3: Ingredients
Marble Swirl Loaf Cake with Hazelnuts
- Prep
- Cook
- Total
- Serves
- 10
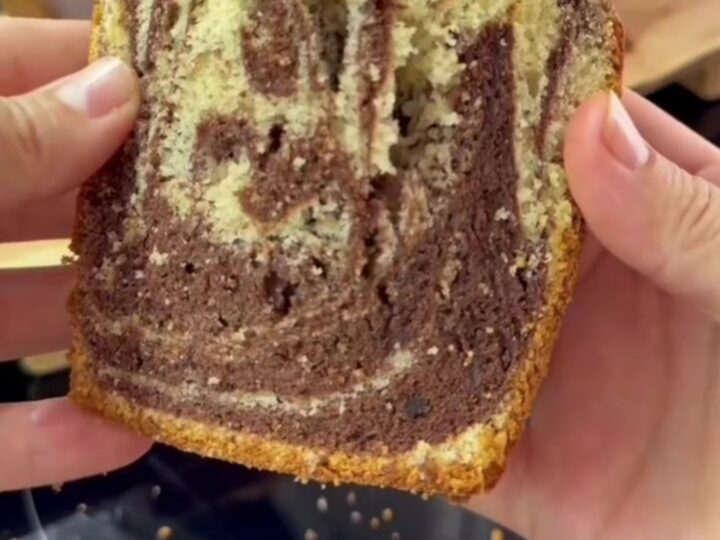
This marble swirl loaf cake is a showstopper: a tender vanilla crumb laced with rich cocoa ribbons, crowned with a crunchy roasted hazelnut topping. The contrast of colors and textures makes every slice as beautiful as it is delicious.
Perfect for a weekend bake, a tea-time treat, or a simple dessert that looks anything but simple. The method is straightforward—two batters, a quick swirl, and a generous sprinkle of nuts—and the result is a moist, flavorful loaf that everyone will love.
This marble swirl loaf cake combines the best of both worlds: a light, fluffy vanilla base and a deep, chocolatey swirl, all topped with roasted hazelnuts for a satisfying crunch. The batter comes together quickly with basic pantry staples, and the marbling technique is forgiving enough for bakers of any level.
Whether served warm with a cup of coffee or as a dessert centerpiece, this loaf is sure to impress with its beautiful interior and irresistible aroma. Follow the simple steps to create a bakery-worthy treat at home.
Ingredients
- 3 large eggs
- 1 1/2 cups granulated sugar
- 1 cup whole milk
- 1/2 cup vegetable oil
- 2 cups all-purpose flour
- 2 tsp baking powder
- 1/2 tsp salt
- 1/4 cup unsweetened cocoa powder
- 1/2 cup chopped roasted hazelnuts
Why this recipe works
The ribbon-stage beating of eggs and sugar creates a stable foam that gives the cake its light, airy texture. By aerating the eggs thoroughly, you build structure without relying on chemical leaveners alone, resulting in a tender crumb that stays moist for days. The addition of oil further ensures a soft, supple texture that butter alone cannot match, keeping the loaf moist even after cooling.
The marbling technique is designed to create distinct ribbons of vanilla and chocolate rather than a uniform blend. Folding the cocoa into only half the batter preserves the contrast, and the gentle swirling motion in the pan creates those iconic waves.
The hazelnuts on top toast during baking, adding a nutty aroma and a crunchy counterpoint to the soft cake, making every bite a study in texture.
Notes and substitutions
Use room-temperature eggs for better volume when beating; cold eggs don't whip as high. Whole milk adds richness, but any milk you have on hand will work.
The oil should be neutral-flavored—vegetable, canola, or sunflower—so it doesn't overpower the vanilla and chocolate. For the cocoa, either natural or Dutch-processed will work; Dutch-processed gives a deeper color and milder taste.
Roasted hazelnuts are preferred for their deep flavor; if you only have raw ones, toast them in a dry skillet over medium heat for a few minutes until fragrant before chopping. The loaf pan should be well-greased and lined with parchment for easy removal. If you don't have a loaf pan, this batter can be baked in a 9-inch round cake pan, but adjust the baking time accordingly.
- whole milk: Any milk (2%, almond, oat) can be used; whole milk gives the richest crumb.
- vegetable oil: Canola or melted coconut oil work well; avoid olive oil for a neutral flavor.
- chopped roasted hazelnuts: Chopped walnuts, pecans, or almonds can replace hazelnuts; skip for a nut-free version.
- unsweetened cocoa powder: Dutch-processed cocoa gives a deeper color and milder flavor; natural cocoa also works.
Equipment
- 9x5-inch loaf pan
- Electric mixer
- Mixing bowls
- Rubber spatula
- Wire rack
Up next · Part 2 of 3
7 steps · 55 min of cooking · what to look for at each stage
Step-by-step instructions (Part 2)