Dinner · Part 2 of 3: Instructions
Loaded Nashville Hot Fried Chicken Macaroni & Cheese Skillet Step-by-step instructions
- Prep
- Cook
- Total
- Serves
- 6
Before you start
Before you start, set up your ingredients and equipment. Cook the macaroni first and drain well—this prevents watery sauce. For the chicken, set up a breading station with flour, beaten egg, and panko in separate shallow bowls. Have your oil heating in a deep skillet while you bread the chicken.
For the cheese sauce, measure out the butter, flour, and milk, and have the shredded cheeses ready. Preheat the broiler before you assemble the skillet. Keep a kitchen thermometer handy to check the chicken's internal temperature. This recipe moves quickly once you start frying, so having everything in place is essential.
Ingredients at a glance (15)
- 300 g elbow macaroni
- 300 g boneless chicken thigh, cut into chunks
- 80 g all-purpose flour
- 1 large egg, beaten
- 80 g panko breadcrumbs
- 2 tbsp cayenne pepper
- 1 tbsp brown sugar
- 1 tsp paprika
- 4 tbsp hot frying oil
- 40 g butter
- 30 g all-purpose flour
- 400 ml milk
- 200 g sharp cheddar cheese, shredded
- 100 g Monterey Jack cheese, shredded
- Sliced dill pickles, for topping, to taste
Instructions
Phase 1: Pasta and Chicken Prep
- Cook the macaroniBring a large pot of salted water to a boil. Add the elbow macaroni and cook according to package directions until al dente, about 8 minutes. Drain and set aside.Look for The pasta is tender but still firm to the bite.Tip Reserve a cup of pasta water in case the sauce needs thinning later.
- Prepare the chickenSet up a breading station: place the flour in one shallow bowl, the beaten egg in another, and the panko in a third. Season the chicken chunks with salt and pepper, then dredge each piece in flour, dip in egg, and coat with panko, pressing to adhere.Look for Each piece is evenly coated with no bare spots.Tip Use one hand for wet ingredients and the other for dry to avoid clumping.
At the end of this phase, you have a pot of perfectly cooked elbow macaroni, drained and ready to go. Your chicken pieces are breaded and sitting on a tray, with a crisp coating that feels dry to the touch.
The oil is heating in the skillet, and your breading station is clean and organized. The kitchen smells of raw flour and egg, but the real magic is about to happen. You're ready to start frying.
Phase 2: Frying and Sauces
- Fry the chickenHeat about 2 inches of oil in a deep skillet to 350°F (175°C). Working in batches, fry the chicken pieces for 3-4 minutes until golden brown and cooked through, reaching an internal temperature of 165°F (74°C). Drain on paper towels.Look for The crust is deep golden and crispy.Safe temperature 165°F (74°C) internal temperature (poultry)Tip Do not overcrowd the pan; fry in small batches to keep the oil hot.
- Make the Nashville hot glazeIn a small bowl, whisk together the cayenne, brown sugar, paprika, and 4 tablespoons of the hot frying oil. Toss the fried chicken pieces in this glaze until evenly coated.Look for The chicken is glossy and coated with a fiery red glaze.Tip Taste a tiny bit of the glaze before adding all the chicken to adjust the heat.
- Make the cheese sauceIn a saucepan, melt the butter over medium heat. Whisk in the flour and cook for 1 minute. Gradually whisk in the milk and cook, stirring constantly, until the sauce thickens and bubbles. Remove from heat and stir in the cheddar and Monterey Jack until smooth.Look for The sauce is velvety and coats the back of a spoon.Tip Shred the cheese yourself for the smoothest sauce.
The chicken is fried to a golden brown and has reached 165°F (74°C). After tossing in the hot glaze, the pieces are glossy and fiery red, with a slight sheen of oil. The cheese sauce is smooth, creamy, and bubbling gently on the stove. The aroma of cayenne, brown sugar, and melted cheese fills the kitchen. This is the heart of the recipe—everything is coming together beautifully.
Phase 3: Assembly and Broiling
- Assemble the skilletPreheat the broiler. Fold the cooked macaroni into the cheese sauce, then transfer to a cast-iron skillet. Top with any extra cheese, if desired. Broil for 3 minutes until bubbly and golden on top.Look for The top is bubbly and lightly browned.Tip Place the skillet on a baking sheet to catch any drips during broiling.
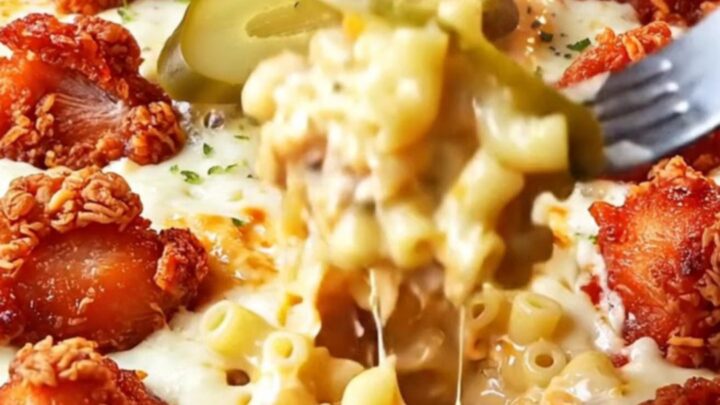
- Top and serveArrange the glazed chicken pieces over the bubbling mac and cheese. Scatter sliced dill pickles on top. Scoop out steaming portions and serve immediately.Look for The chicken sits proudly on the creamy pasta with pickles adding brightness.Tip Serve straight from the skillet for the full effect.
The macaroni is folded into the cheese sauce and transferred to the cast-iron skillet. After broiling, the top is bubbly and golden, with spots of browned cheese. The chicken pieces are arranged on top, each one glistening with the spicy glaze. Pickles are scattered over the surface, adding pops of green. The skillet is sizzling and fragrant. It's ready to be served.
Common mistakes
One common mistake is overcooking the pasta—make sure to cook it just to al dente because it will continue to cook in the sauce and under the broiler. Another is not heating the oil to the right temperature; if it's too cool, the coating will absorb oil and become greasy, and if it's too hot, the outside will burn before the inside cooks.
Use a thermometer to keep the oil at 350°F (175°C). Also, when making the cheese sauce, add the milk gradually and whisk constantly to avoid lumps. Finally, don't skip the broil—it creates that golden, bubbly topping that makes this skillet irresistible.
How to tell it’s done
The chicken is done when it reaches an internal temperature of 165°F (74°C) and the crust is deep golden brown. The cheese sauce is ready when it coats the back of a spoon and has a smooth, velvety consistency. After broiling, the mac and cheese should be bubbly around the edges and lightly browned on top.
The dish is finished when the chicken is glazed, the pickles are scattered on top, and the whole skillet smells irresistibly spicy and cheesy. Serve immediately while everything is hot and the cheese is at its most gooey.
- Poultry: 165°F (74°C) in the thickest part
- Egg dishes: 160°F (71°C) in the thickest part
Up next · Part 3 of 3
4 variations · storage & make-ahead · 5 answers · printable card
Tips, FAQ & printable recipe (Part 3)← Back to the ingredients (Part 1)