Dinner · Part 1 of 3: Ingredients
Loaded Nashville Hot Fried Chicken Macaroni & Cheese Skillet
- Prep
- Cook
- Total
- Serves
- 6
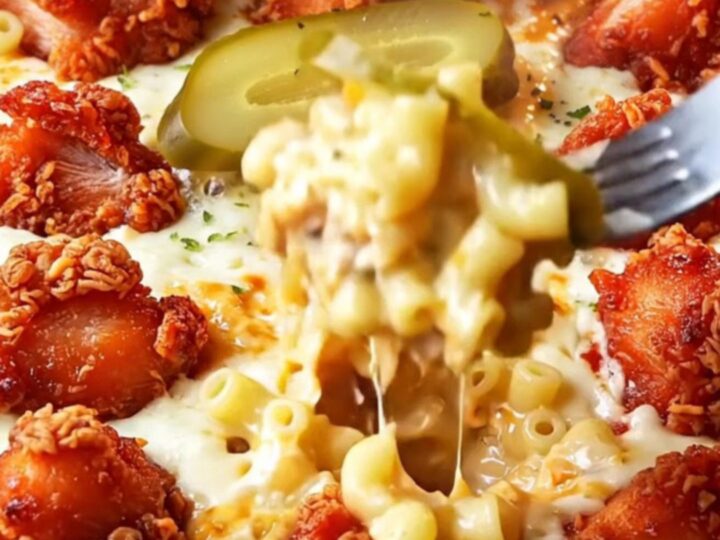
This loaded Nashville hot fried chicken macaroni and cheese skillet brings together two comfort-food icons in one glorious, bubbling cast-iron pan. Ultra-creamy four-cheese macaroni is topped with shatteringly crisp, fiery Nashville hot fried chicken and tangy dill pickles.
Every scoop delivers crunchy, spicy, creamy, and tangy in a single bite. It's a show-stopping dinner that feels indulgent and satisfying, perfect for a cozy night in or a crowd-pleasing weekend meal. The contrast of textures and heat is simply irresistible.
Imagine a cast-iron skillet filled with velvety mac and cheese, crowned with golden fried chicken chunks coated in a sticky, fiery Nashville hot glaze. That's this recipe. It starts with a classic stovetop cheese sauce made from sharp cheddar and Monterey Jack, then folds in tender elbow macaroni.
The chicken is double-coated in panko for extra crunch, fried until golden, then tossed in a cayenne-brown sugar glaze that brings the heat. A quick broil melts everything together, and pickles add a bright, acidic finish. This is comfort food turned up to eleven.
Ingredients
- 300 g elbow macaroni
- 300 g boneless chicken thigh, cut into chunks
For the chicken
- 80 g all-purpose flour
- 1 large egg, beaten
- 80 g panko breadcrumbs
For the glaze
- 2 tbsp cayenne pepper
- 1 tbsp brown sugar
- 1 tsp paprika
- 4 tbsp hot frying oil
For the cheese sauce
- 40 g butter
- 30 g all-purpose flour
- 400 ml milk
- 200 g sharp cheddar cheese, shredded
- 100 g Monterey Jack cheese, shredded
For topping
- Sliced dill pickles, for topping, to taste
Why this recipe works
The method here is all about building layers of texture and flavor. Frying the chicken in panko creates a shatteringly crisp crust that stays crunchy even after being tossed in the glaze.
The glaze, made with hot frying oil, cayenne, and brown sugar, clings to every nook and cranny, delivering that signature Nashville hot kick with a hint of sweetness. Meanwhile, the cheese sauce is made properly—starting with a roux and whisking in milk slowly—so it turns out silky and smooth, not grainy or greasy.
Assembling everything in a cast-iron skillet and broiling it briefly does two things: it melts the extra cheese into a bubbly, golden topping, and it keeps the whole dish piping hot from oven to table. The skillet also holds heat beautifully, so every serving stays warm and the cheese stays gooey.
The pickles are not just a garnish; their tangy vinegar cuts through the richness of the cheese and the heat of the chicken, balancing each bite. This is a recipe that rewards patience at the stove but comes together in under an hour.
Notes and substitutions
Use boneless chicken thighs for the juiciest results—they stay moist during frying and stand up to the bold glaze. If you prefer chicken breast, it will work but may be slightly drier. The panko breadcrumbs are key for that shatteringly crisp texture; regular breadcrumbs will give a finer, less crunchy coating. For the cheese sauce, always shred your own cheese from a block. Pre-shredded bags often contain anti-caking agents that can make the sauce grainy.
The glaze calls for hot frying oil—use the same oil you fried the chicken in for the most authentic flavor. If you want to control the heat, start with 1 tablespoon of cayenne and add more to taste. The brown sugar balances the spice, so don't skip it. You can also add a splash of pickle brine to the glaze for extra tang, though it's not in the video. Serve this skillet immediately after broiling, while the cheese is still bubbling and the chicken is at its crispiest.
- chicken thigh: Chicken breast can be used, but thigh stays juicier during frying.
- panko breadcrumbs: Crushed cornflakes or regular breadcrumbs work, but panko gives the crispiest texture.
- sharp cheddar: Use extra-sharp cheddar or a blend of cheddar and Colby for a milder flavor.
- cayenne pepper: Reduce to 1 tbsp for a milder heat, or add a pinch of smoked paprika for extra depth.
Equipment
- Large pot for pasta
- Deep skillet or Dutch oven for frying
- Saucepan
- Whisk
- Cast-iron skillet (10-inch)
- Tongs
- Mixing bowls
- Measuring cups and spoons
Up next · Part 2 of 3
7 steps · 30 min of cooking · what to look for at each stage
Step-by-step instructions (Part 2)